
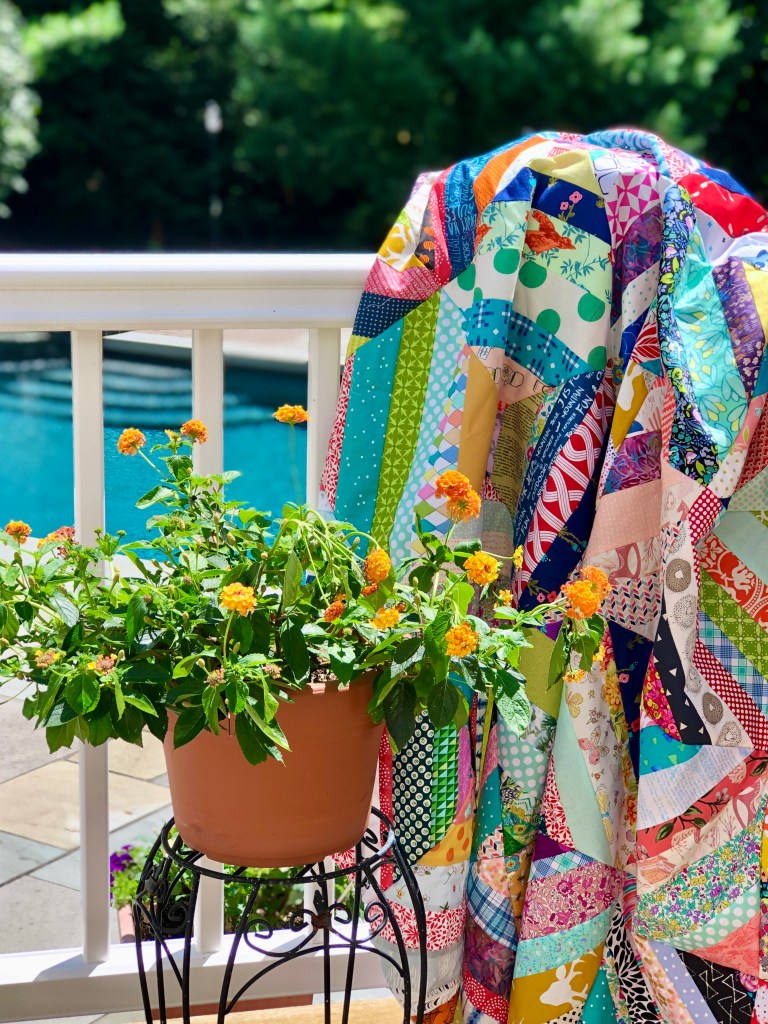
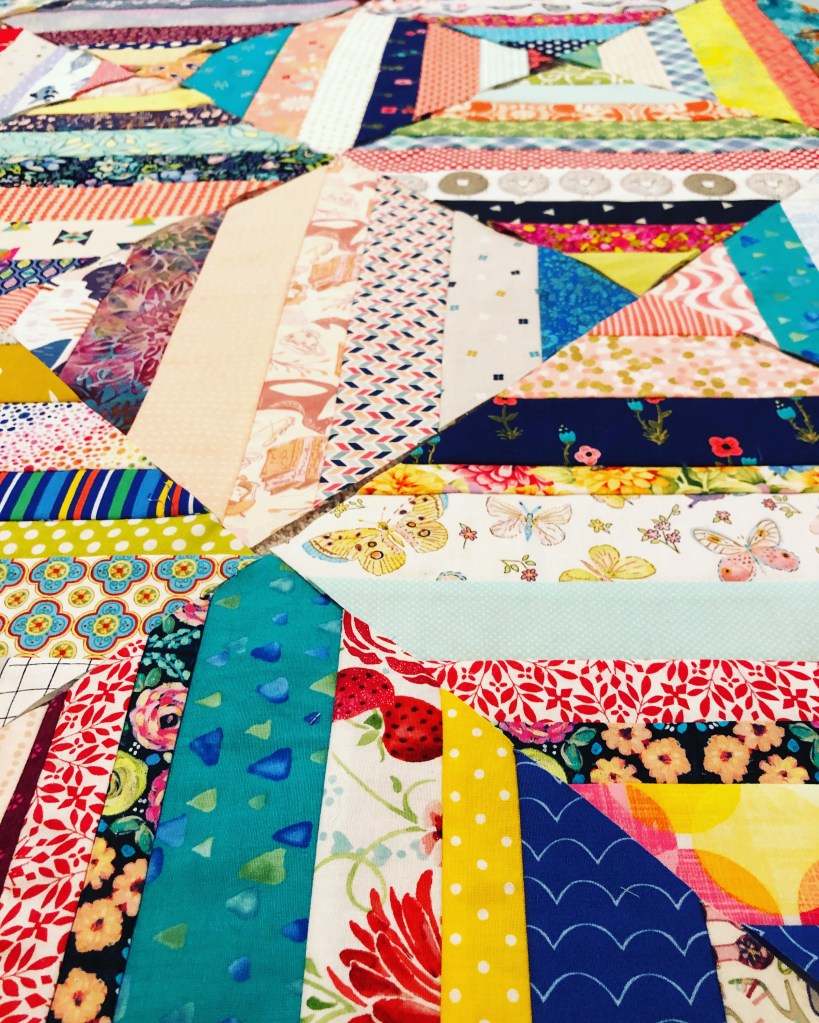
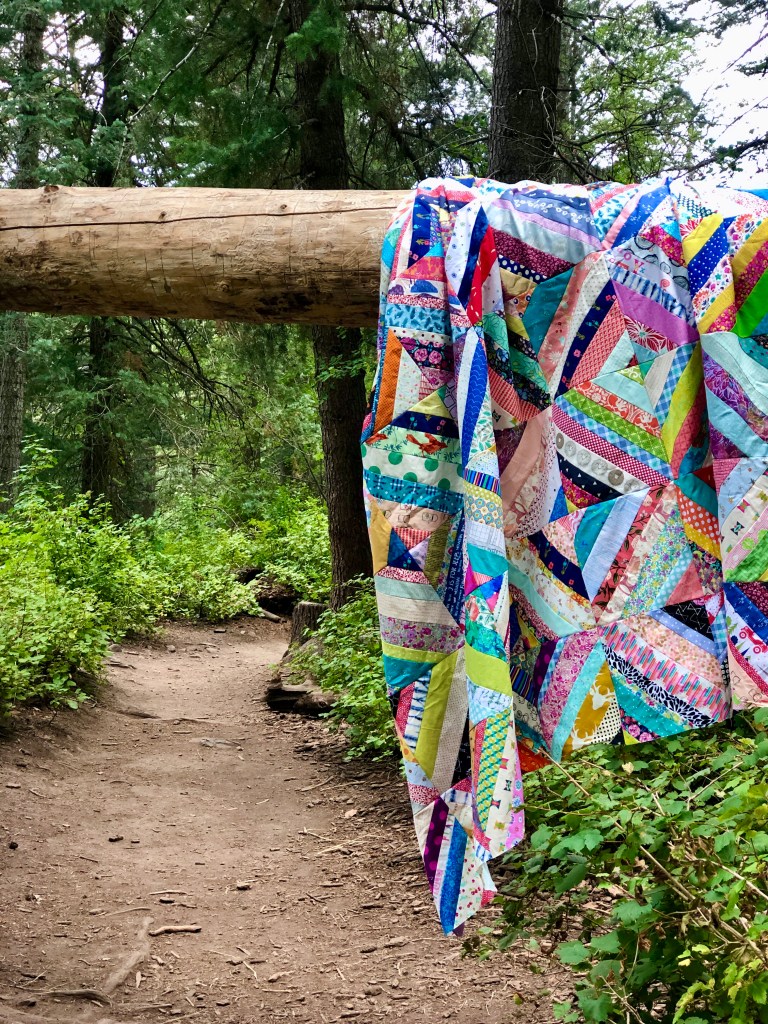
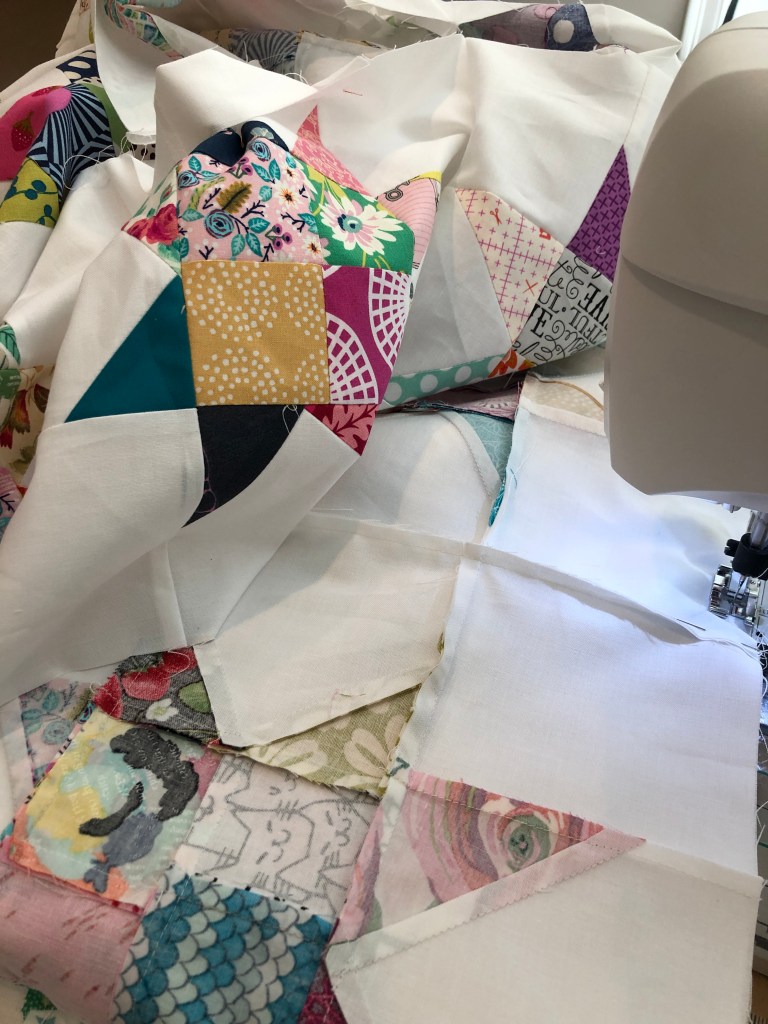
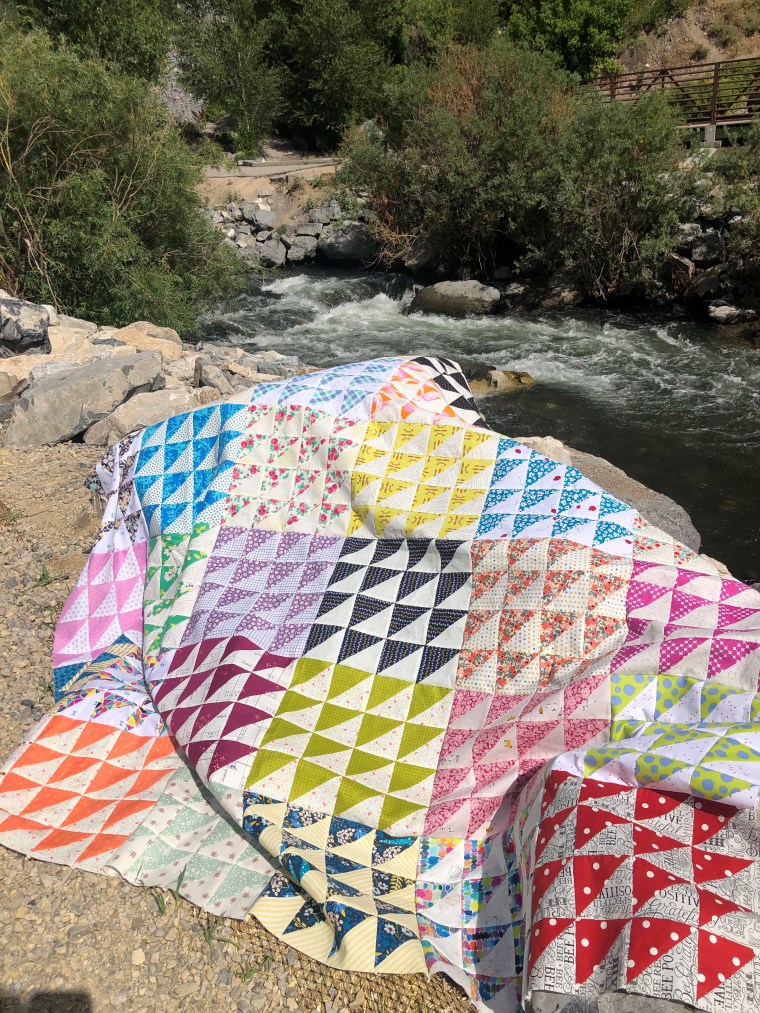
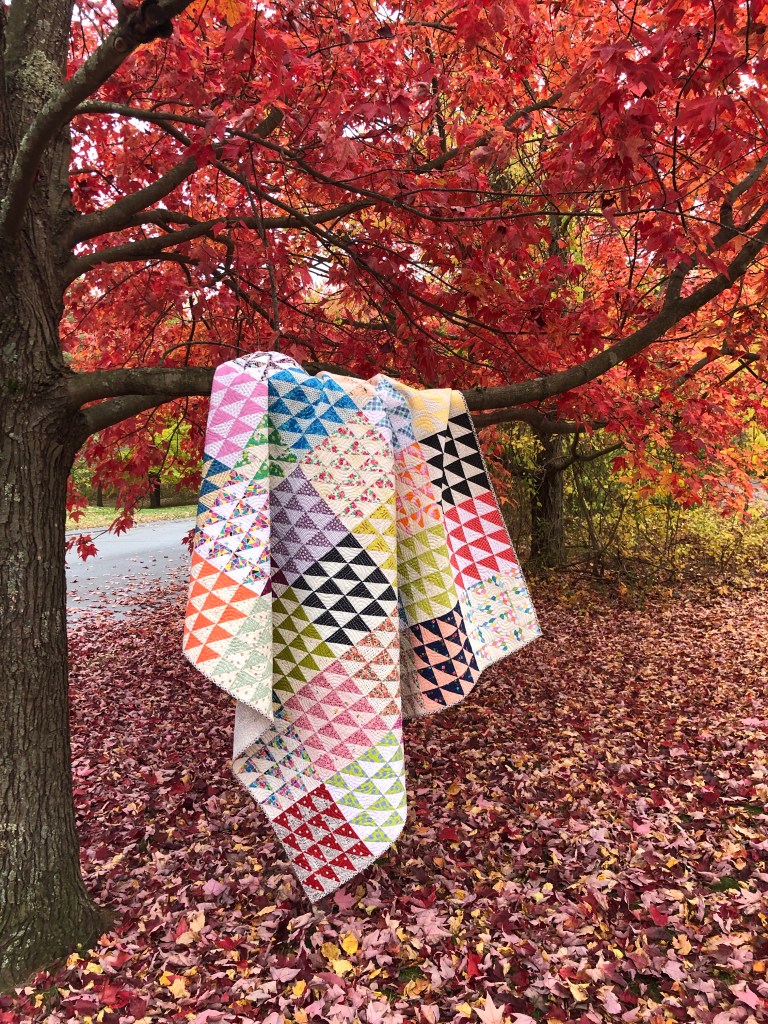
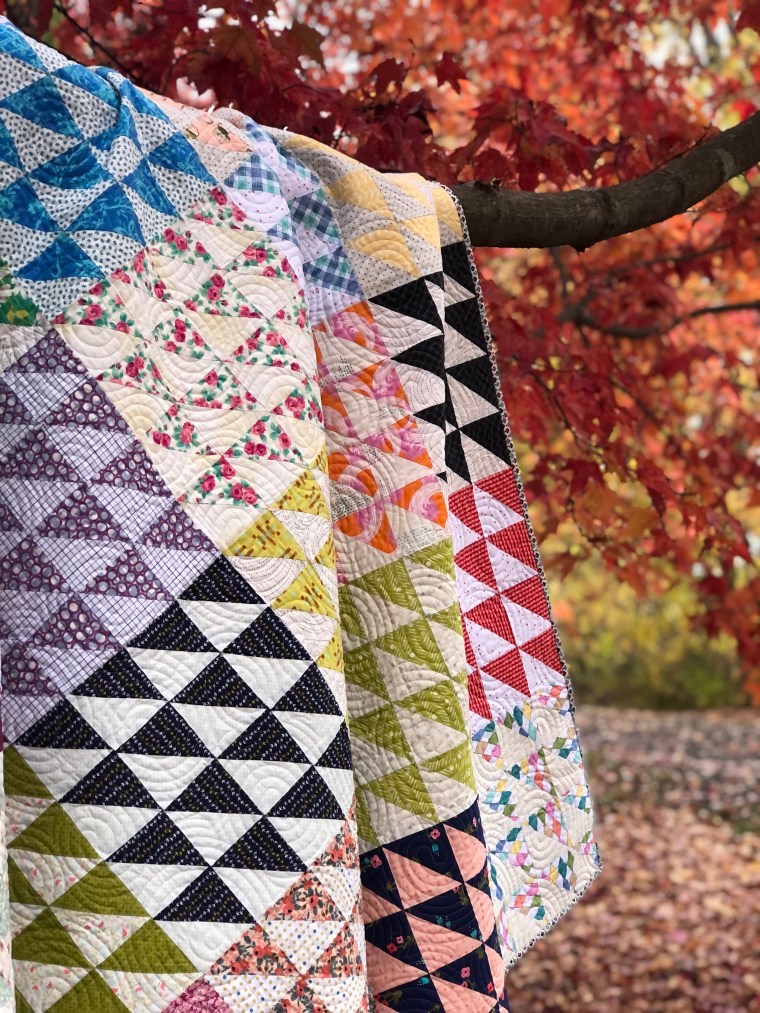
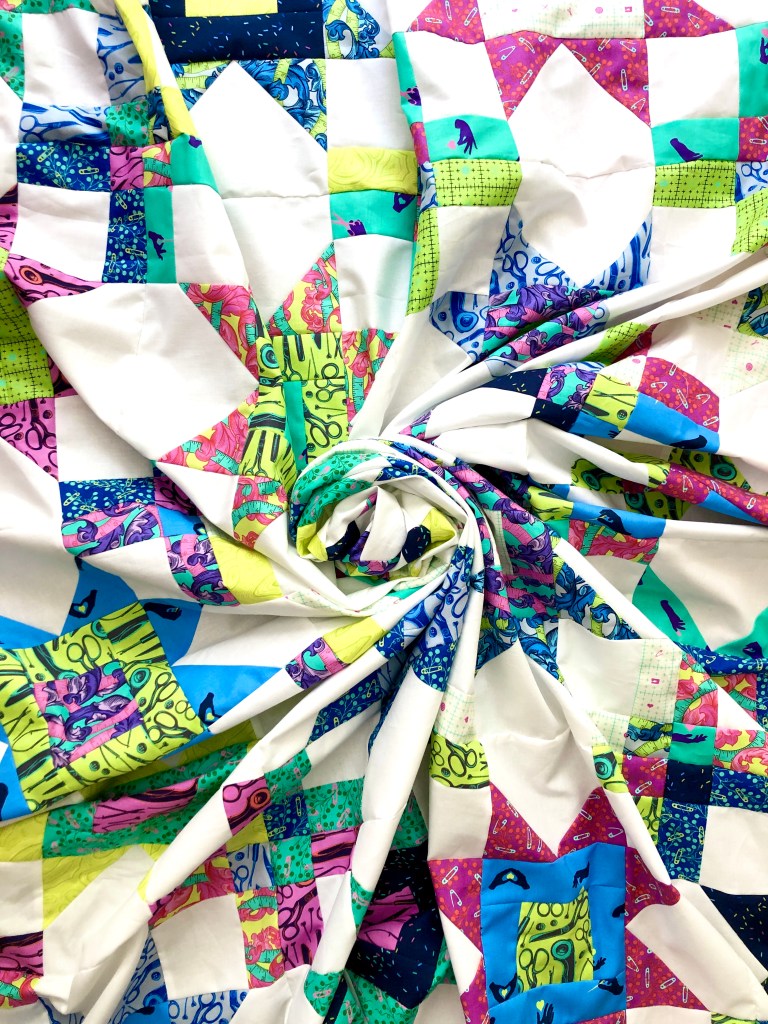
I made this quilt in May 2020 while testing a pattern for designer, Brittany Tunison, of White Plains Quilts. I was able to share some sneak peeks online, but not a full reveal until today,… More

I made this quilt in May 2020 while testing a pattern for designer, Brittany Tunison, of White Plains Quilts. I was able to share some sneak peeks online, but not a full reveal until today,… More
There’s a saying, “What a difference a day can make”, so one can presume how transformative two months might be. Two months. Are those measured the same during a pandemic? I know that there have… More
One of the first designers I worked with as a pattern tester is Natalie Santini, of Sew Hungry Hippie. She is a gem – creative, talented, spunky, no-nonsense and always coming up with new projects.… More


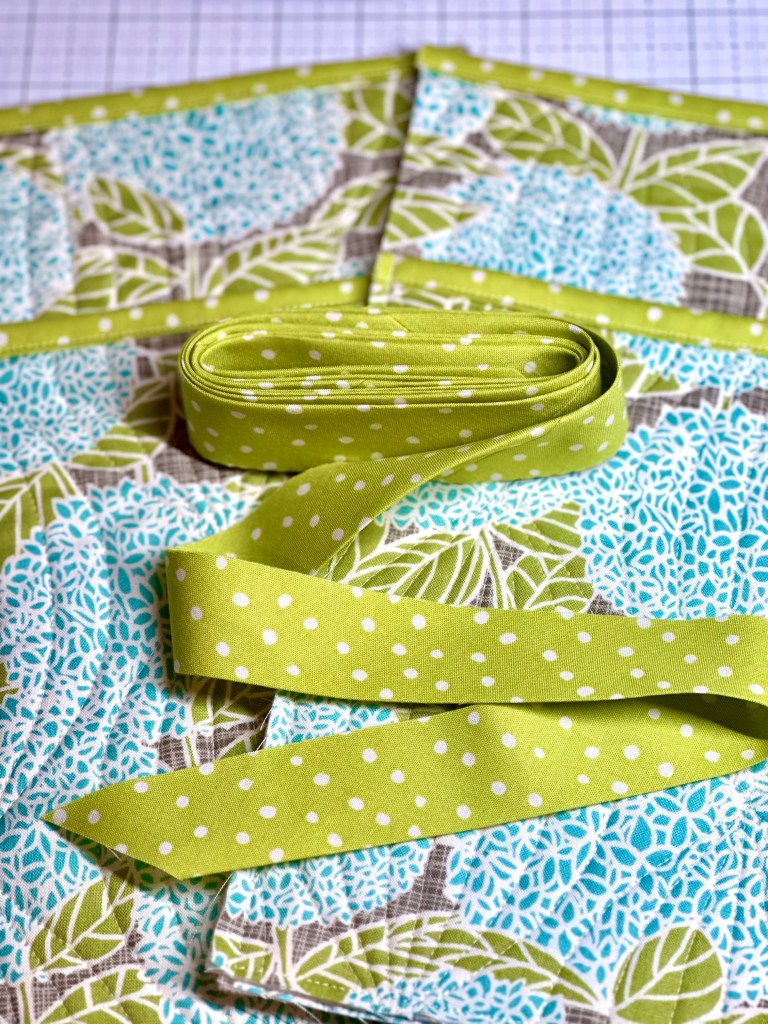
Have you ever found a pattern that you love so much, you want to make it over & over again? For me, a pattern that falls into this category is the All The Things Tote. It’s designed by Kait at http://www.knotandthreaddesign.com. This pattern comes in three different sizes and all are more generously proportioned than you might imagine. As soon as I made one, all I could do was grab yardage and get to work on more!

Early 2023, I knew without hesitation that I’d be making a LOT of these totes. I could easily straight-line or decorative stitch some quilt sandwiches to then cut into pieces for the bags, but I wanted a little more flair. My intention was to make these for gifts and I thought it would be fun to experiment with different pantographs and fabric combinations. I also wanted to be as efficient with fabric and cost effective as possible when it came to professional longarm quilting. Thankfully, I have made a lot of quilts and have had excellent experiences with two quilters, each of whom helped me in this tote making effort.
The best part, I started early enough to not feel panic at the holidays while creating handmade gifts. Just for reference, I highly recommend the early start! So much more enjoyable.
I turned to Jennifer, www.knottedthread.com who has quilted so many of my projects over the past several years. Every single finish ships back to me in a timely manner and I never doubt it will be perfectly done. These bag panels were no different – so well done. Kait, at Knot and Thread, also quilted panels for me. Some were done with quilt batting, others with Soft and Stable Foam Stabilizer. I generally prefer cotton batting, but one bag in particular needed a little more structure, which was made possible with the soft and stable.
I have two sewing machines and one, the Husqvarna Opal, is used entirely for piecing blocks and my Juki TL-2010Q is used for projects that require industrial strength and power to glide through thick layers. They are my studio babies and I can’t imagine sewing without either of them. They each perform so well for what I need and I’m thankful for the flexibility to move around a table to the machine which is best (for me) at different tasks.
The All the Things tote has a few areas/seams that are several layers thick. Think double sided fabric, stabilizer, binding, webbing straps…it’s a lot. My Juki earned its place in the “I can do this because of you” category this past year! While I didn’t attempt the thickest seams with my Husqvarna, I think a slow and steady pace might work with a variety of machines and heavy-duty needles.
With so much of this being “secret gift” sewing, I thought I would have taken more photos! As I started to write this post, I realized I didn’t have as many process photos as I usually take. It might also be that each bag was made from yardage panels and not pieced blocks. Some I finished with white webbing straps, others were webbing covered in coordinating fabric. The additional benefit is that each panel had a little bit of wiggle room and cut just right, I had some leftover yardage for zipper pouches. I mean, who doesn’t love a quilted zipper pouch?


With this one, I reversed the direction of the end panels so that the interior would face out with a pocket of yellow flowers. I like it!

This directional beach chair fabric, was constructed just a bit differently so that all the chairs were accurately placed. It also makes me think about lazy summer days, toes in the sand, enjoying the surf with family & friends.

My youngest now has two totes, a large & a medium. The first is one of my favorites, complete with shark fabric, but do I have a photo? Not that I’ve found yet! I’ll have to do that. Any time I’m asked to make something by my kids, it’s a prompt, “of course”.
Then there are the maker friends, who share fabric (you know it’s you, Joanne!) or tell me about totes they’d like to have, but likely won’t make. I’m looking at YOU, Alicia. I’m fortunate to have a circle of creative people in my life and the sharing of ideas and handmade gifts is truly a joy. I think often times as makers, we don’t receive handmade gifts because others think we would do it ourselves. I can’t speak for everyone, but even though I sew, quilt, bake, make bread, I’m always excited when I handmade “thing” comes my way. It’s fun & I appreciate the time & effort someone invested into gifting me something from their own creativity and hands.


Such a perfect name for a tote that can be designed in numerous fabric combinations, carrying widely different contents, stabilized with a favorite material, quilted with unlimited pantographs or straight lines, pieced block pockets…it is and can be All the Things.
With eleven already under my belt, it still doesn’t feel like I’ve made all the combinations in my mind, so there may be more in 2024!
Happy Sewing!
All photos and written content property of Two Terriers Studio & not to be copied or distributed without written consent of the owner. This is not a sponsored post (although I wish it were!). All comments and collaboration notes are my personal opinion & from my personal experiences.


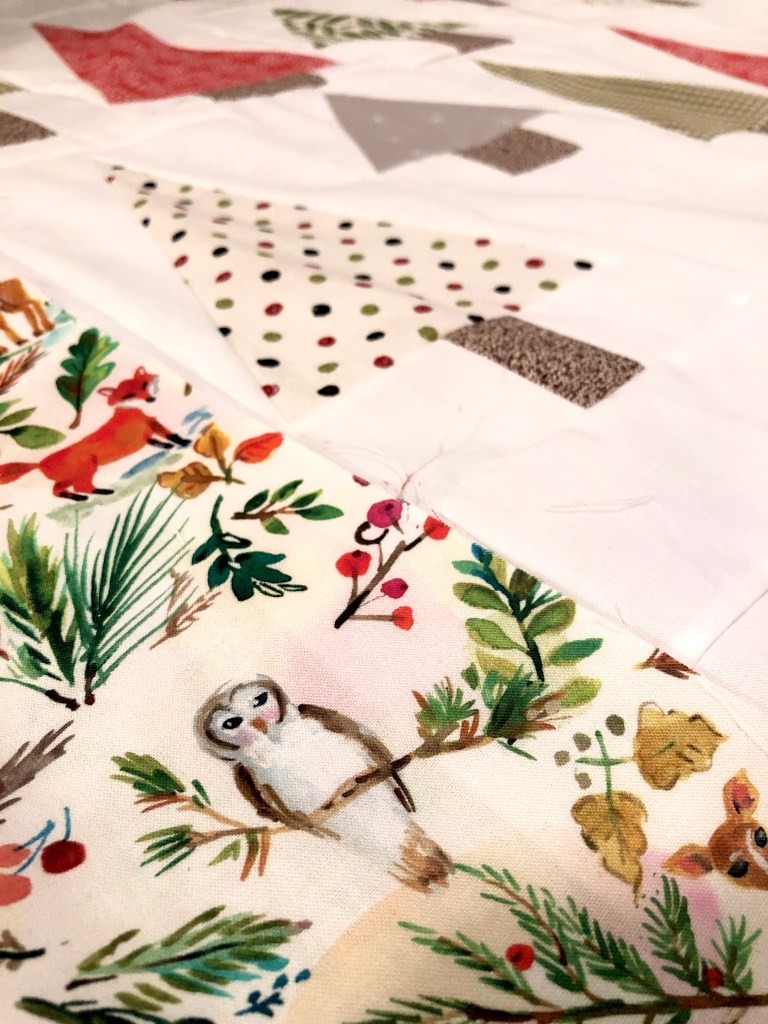
Let’s talk about a dramatic shift from loving low volume backgrounds to being enamored with blacks, navy and every shade of blue/gray to mimic a night sky. Add in the flowers of a garden and the creatures that visit under the cover of darkness and you’re here, the start of my first Night Garden Quilt.
I was cruising through summer and prepping my holiday gift lists and even getting some projects started, when my IG friend, Elizabeth (@lizzymakes) started sharing pictures of a night garden quilt. It caught my eye immediately, mostly because the dark fabrics were so out of the norm for me, but I really liked what she was doing. I’d zoom in….see more details, finding myself even more intrigued as I studied her quilts. Then she shared the idea of a loosely structured / no deadline sew-along and I jumped right in. Yes, 100%. I went about pulling all the bright colors for flowers and all the darks for backgrounds. I was intent on not buying more fabric, but as you might imagine, that was a short-lived idea. I have a lot of scraps, but this was going to require more dark prints than I had available for the size finish I wanted.
First up, flowers. I started with the zinnia blocks, a pattern by Lori Holt. I literally went straight to my scrap bins and pulled everything for the petals, and then built in the other elements of the flowers. I wasn’t really sure how many flowers I’d make or what the formation of the sky might entail or how closely I could replicate all the creatures I’ve seen walk through my yard. But it was ALL swirling in my thoughts. I started to remember other floral block patterns I had purchased and only used once. Could I add those? Yes. It was back to my digital files and scouring the archives to make use of the things I had purchased with other intentions. So much of it came into play for this quilt. Revisiting patterns is a good thing!
I could easily overthink the animals & whether they are night or day visitors, but in the end, I just wanted representation of what I like – stars, crescent moon, bright/lively flowers, flying friends and the all time favorite, the bear. Everything else would be a cherry on top.


Here’s another flower variety, this one a pattern by On Williams Street. More chances for tiny scraps to come to life!
It’s all in the details. While the scrappy-ness of the bigger blocks is typical of my wild-color, improv loving heart, I also like to sneak in little details. At first glance you may not see them. If you’re sitting snuggled under the quilt with time to spare, you might notice. If you know me well, you know why it’s there. That kind of stuff. I like it in my work. The storytelling through images makes me happy.

This little segment has old & new fabric, pieces from pattern testing and even fabric my husband brought home from a business trip in the UK. Nobody else would know, but I do and I like how it all continues to find a way into my quilting.


Foundation Paper Piecing. For me, it’s the love / hate piecing method. I love the accuracy and precision. I loathe the removal of the foundation. I love the tiny bits; it means every scrap has potential. But those papers, there has to be a better, less messy way. It’s a test of patience for me, for sure. However, as much as I take deep breaths and sigh about the mess, I go back for more. Ha!

In all seriousness, I could NOT make this hummingbird without foundation paper piecing. So, tiny pieces of foundation to tear away, it’s ok. I’ll keep doing it to have results like this.
For the past few summers, I’ve planted gardens that are welcoming to butterflies and hummingbirds. They are frequent visitors to our home every single day, so they had to be included in this quilt. As the weather chills and some of the flowers die off, my flying friends aren’t as frequent to the patio. I look forward to seeing them next summer.
There’s a tiny note in this block too. I’m sure you see it; wink. 🙂


Be still my heart; owl….I think you are stunning. This is a pattern by Griffin and the Bear, which made my piecing work so easy. I hear the hooting from the woods…this one needed to be included too. There is such a thrill and a gift to living in a forest.
Speaking of forests….wouldn’t you gnome it? There has to be a gnome.

I worked on this daily and from start to finish; add in long distance quilting and photos. It took less than 8 weeks?! I think that’s right. To say I was slightly obsessed would be accurate. I *may” have left my fabric out and purchased more backing for another one. Once I got in a rhythm with these blocks, it just flew by.

This was professionally quilted by Kaitlyn, http://www.knotandthreaddesign.com. It’s fantastic. She’s finished several of my quilts and I’m always pleased with the results. I finally had a chance to meet her this summer; so thankful for my quilt community. I bound it with the same fabric I used for the backing.


That’s a wrap. I’m a convert. Give me all the dark backgrounds now! Thanks to Elizabeth for the sew-along, Kaitlyn for the quilting, and Cass for indulging me in awesome fabric from Nova Quilts. There were moments along the way I wasn’t sure how my intentions were going to be puzzled together, but it worked. It’s another “I love it” finish for me! Night Garden 2 – I’m coming for you.
-Happy Quilting…enjoy!
All photos and content property of Two Terriers Studio and not to be copied or distributed without written consent of the owner. This is not a sponsored post.

Home. Homespun. Yes, count me in. I love being home; I’m probably too much of a homebody at times. But it is the space I enjoy with the people I love best, so HOME, yes. Always.

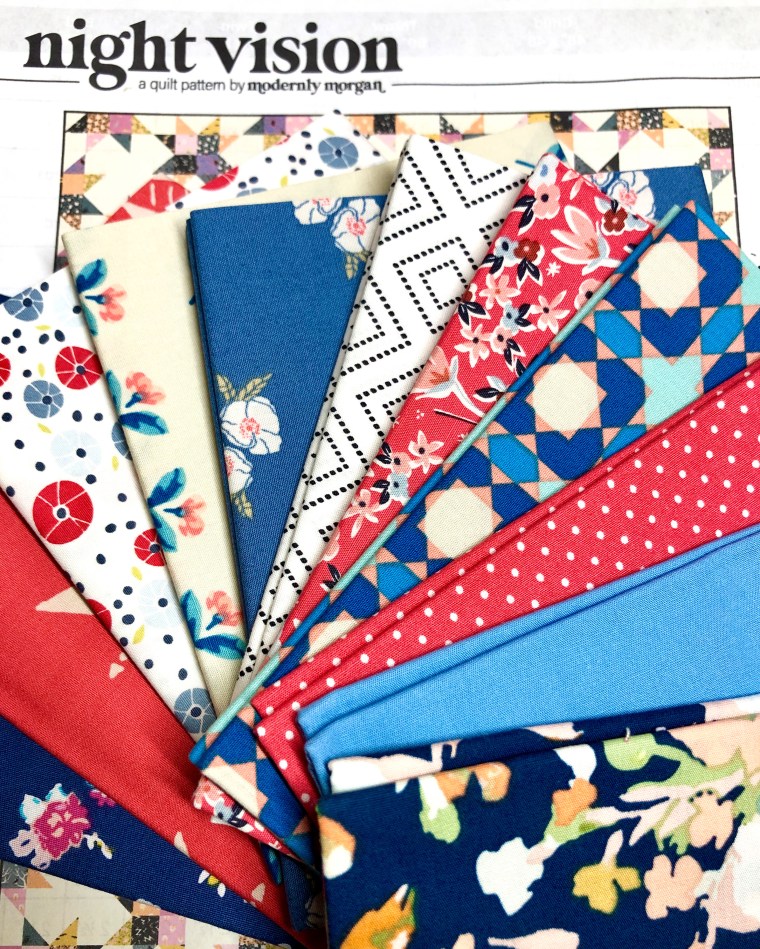
When this pattern, Homespun, was published by Morgan at http://www.modernlymorgan.com, I knew exactly which fat quarter bundle I would use from my collection. I also knew that a bit of fussy cutting would be thrown in, so I got to work. This pattern comes in three sizes: baby, small throw, and large throw. I made the large throw, which measures at 64″ x 80″.
I used my stash of Alison Glass Fabric, the Trinket collection. It’s bright on bright, which I believed would be a fun spiral of color in this particular pattern. I also switched from my favorite bleached white background to a denim blue by Art Gallery Fabrics and that was a good decision. I rarely do it, but I’ve not been disappointed when I shift to dark backgrounds. There is so much color in the piecing, the denim blue anchors it all.

At the time I started this quilt, I was testing patterns for three other designers, so my personal projects were last on the list. I always meet my deadlines and knew I had to finish the quilts that were pending my written edits and sewing; this one had to wait. I had set out the Homespun pieces on a large foam-core board so that I could eventually lay-out each individual block and ensure the direction of the fussy-cut centers. I almost feel that “meticulous” cut is a better description; maybe we should start calling it that instead of “fussy”. But there it sat, in various stages of completion while I worked on the testing deadlines. It was never far from sight, but it was also 4th on the list of studio work to be done. And you know what happened? Two years passed. TWO years. I worked on other things, this one never far from my machine. Embarrassing? Yes, a little. However, in that time my skills had improved and this went together so quickly once I restarted.

The bees. How stinking cute are the bees? I had used this Art Gallery Fabric in another quilt and could not get enough of the bees. I bought more & more and then sort of hoarded it. I HAD to have these as the centers of these Homespun blocks. While I didn’t spend an exorbitant amount of time thinking about the layout of the other colors, I did spend a lot of time ensuring all the bees were in the right places, directionally correct. Then it was a matter of chain-piecing until it was done.

It’s now 2023, 28 months since the first cut was made. I had a trip to Utah on my calendar and was intent on bringing this along. I got it finished and packed up. I bring quilt tops in my carry-on bag; never trusting all that work to cargo, that’s for sure. This was day three of our trip and elevation sickness found its way into my life the night before this photo was taken. Goodness. Wow. Ugh! It didn’t occur to me right away what the culprit might be. I underestimated the toll on my body from a day of travel, a day of hiking and then adjusting to 7K+ feet shift in elevation. I recommend giving yourself some time to acclimate. Lesson learned! I’d already had a sneak peak of Bryce Canyon the night before and there was NO WAY I was skipping this adventure. No way I was quitting; I was hiking that canyon, nauseous or not and if it took me all day, I was going to do it. My husband’s patience was a godsend. It was hot and so steep; we stopped often for me to collect myself, but we got it done. It was absolutely awe-inspiring and I’m so glad we pushed through. Just as I imagined, these colors in that canyon – magic.

I say this with almost every single “Quilt in the Wild” photo, but the pictures never do the real thing any justice. I thank God for this beautiful world and for the capacity to see just a smidge of it in my lifetime. Travel and exploration is worth every penny and every minute. It certainly puts life into perspective when you see how small we are in comparison. As “homebody” as I can be, travel, sightseeing, meeting other people and experiencing different cultures (even within our own country) is a blessing. To see my quilts in the places I’ve traveled with my husband or our family, it means a lot to me. It’s a documentation of work & fun; a combo scrapbook of sorts.
This might be one of the funniest memories and photos from the quilt photo vault.

As we traversed the canyon, I saw this crevice where I thought my husband could stand and be SAFE from the edge with a steep drop, but also have a pretty dramatic photo. Of course, we gave right of way to all the other hikers and patiently waited for an opening in the path. I was standing uphill, around another bend, thinking I would politely call, “now, do it now”, when no one else was around. I think this gentleman totally missed what we were doing and as soon as hubs unveiled the quilt, this man STOPPED in his tracks. Of course, only I could see him. I waited, he didn’t move. I waited more, he kept looking. I’m sure my husband was thinking, “Take the darn photo! Can I put my arms down now?” Our fellow hiker continued to look. I was both amused and curious what he was thinking. We are usually alone when documenting quilts, so to see a complete stranger take a hard stop in his own journey to watch this, made me smile. I have wondered many times how he told the story, or if he ever did, once his hike was done. This photo is one of my favorites.

One last shot of my Homespun quilt, among the Hoodoos of Bryce Canyon National Park. This may have taken me years to sew, but I always say that things happen for a reason. Maybe it was meant to be photographed here. Finish too soon, miss the shot.

It was long arm quilted by Jenn, http://www.knottedthread.com with a honeycomb pantograph. The binding is a navy and white stripe; the backing is Alison Glass’ Art Theory. So much color!

It’s now 2.5 years since this began and it’s done. It holds a lot of memories and a lot of miles and for that, I think it finished right on time.
-Happy Quilting!
All photos and content property of Two Terriers Studio and not to be copied or distributed without written permission of the owner.


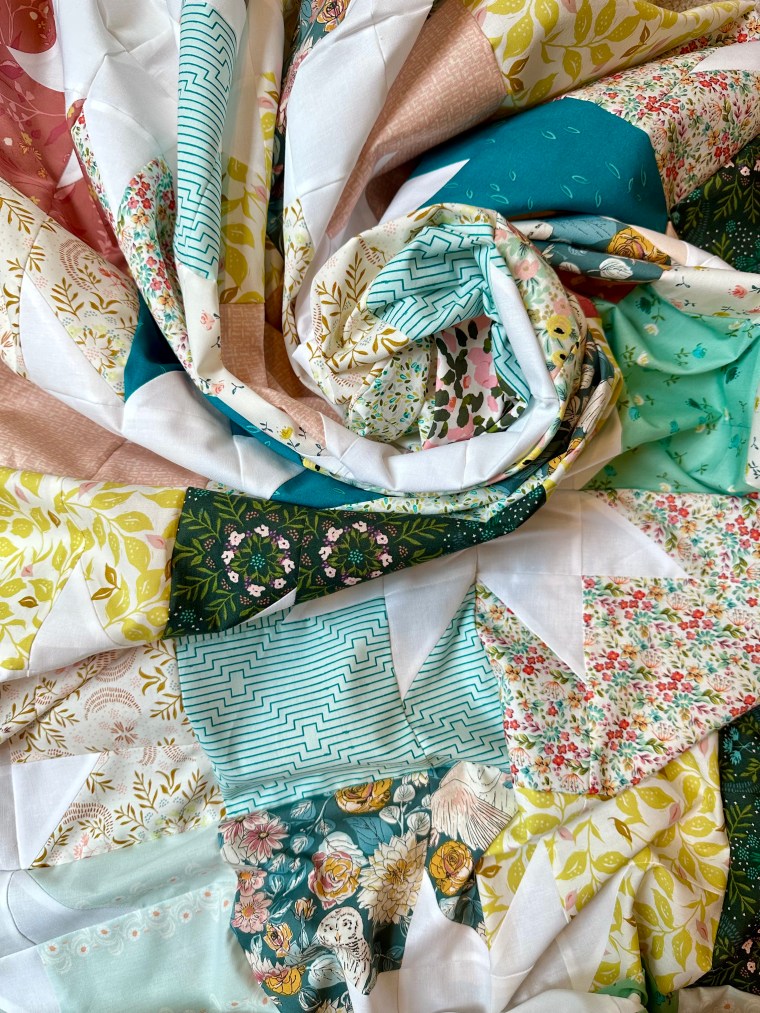
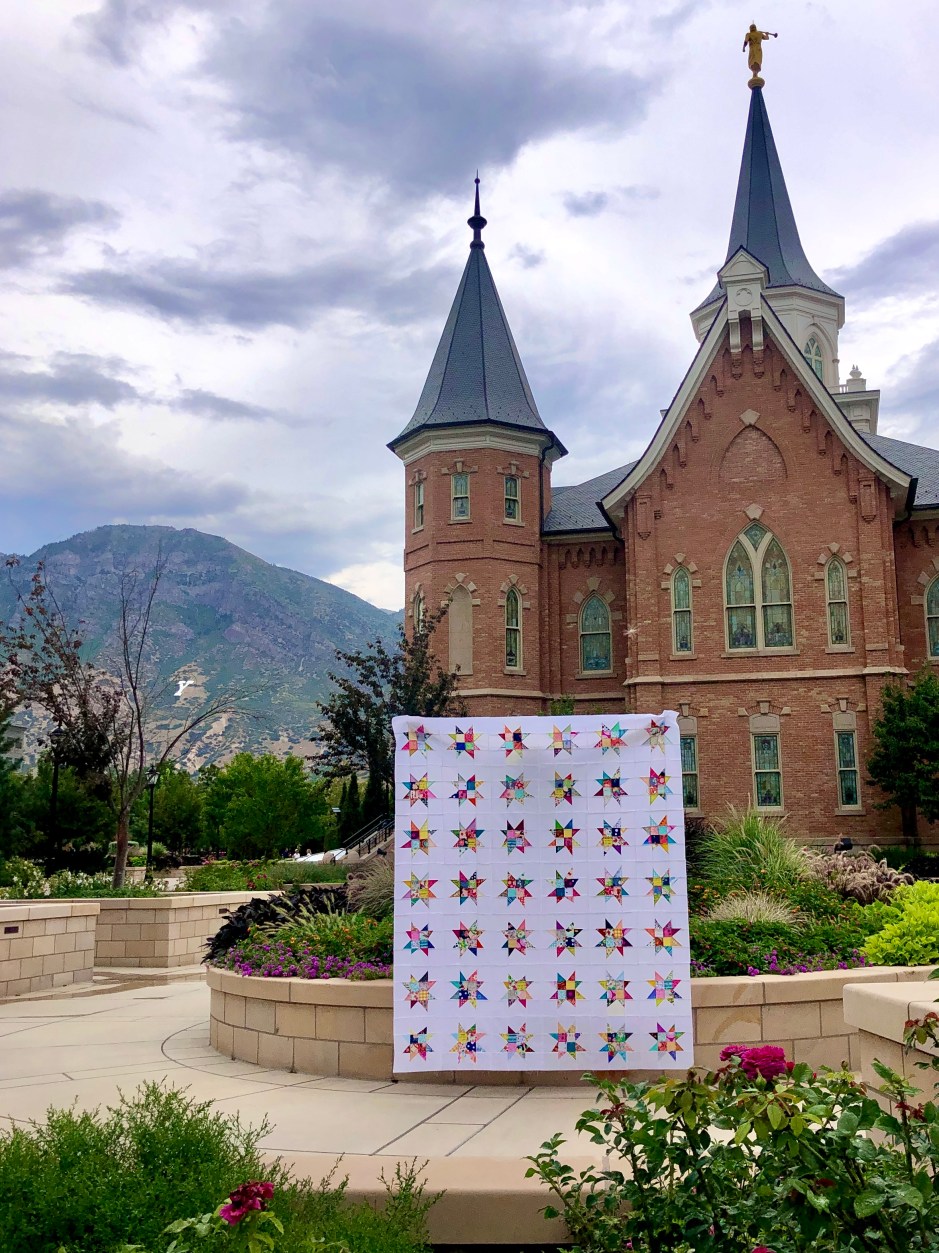
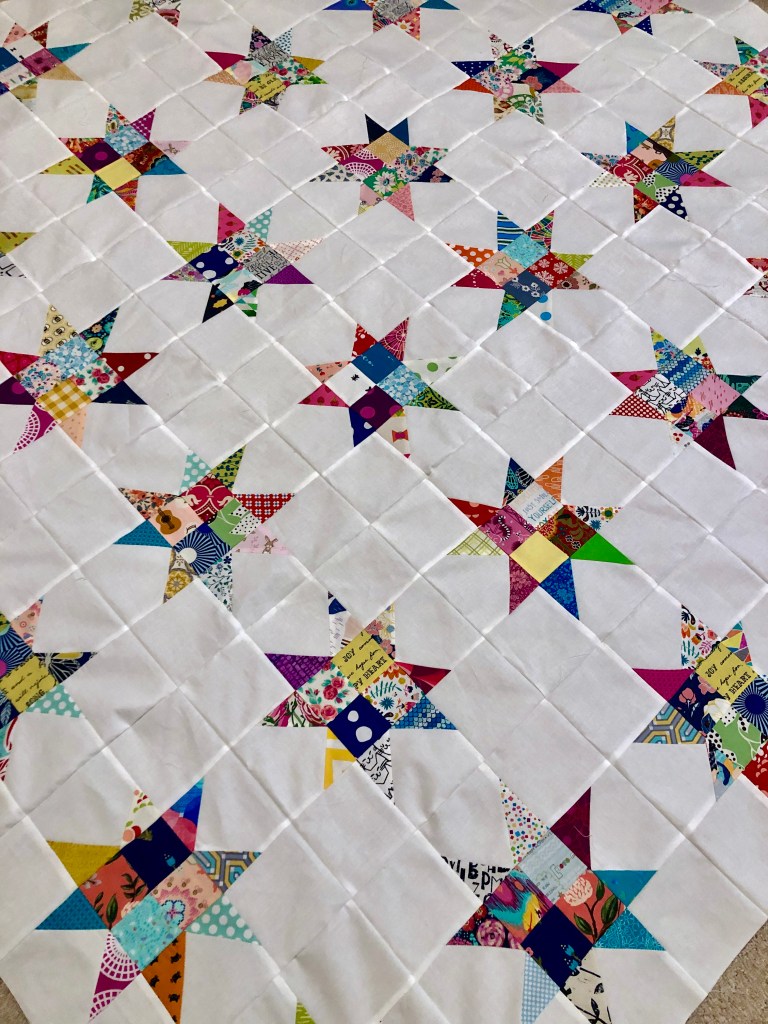
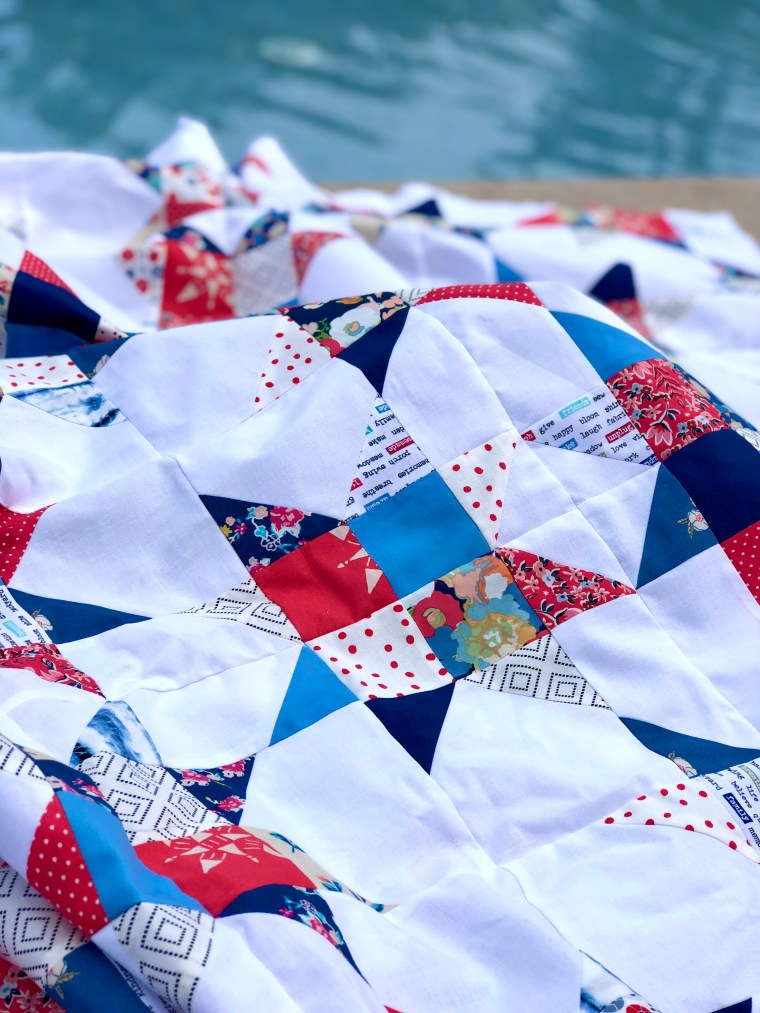
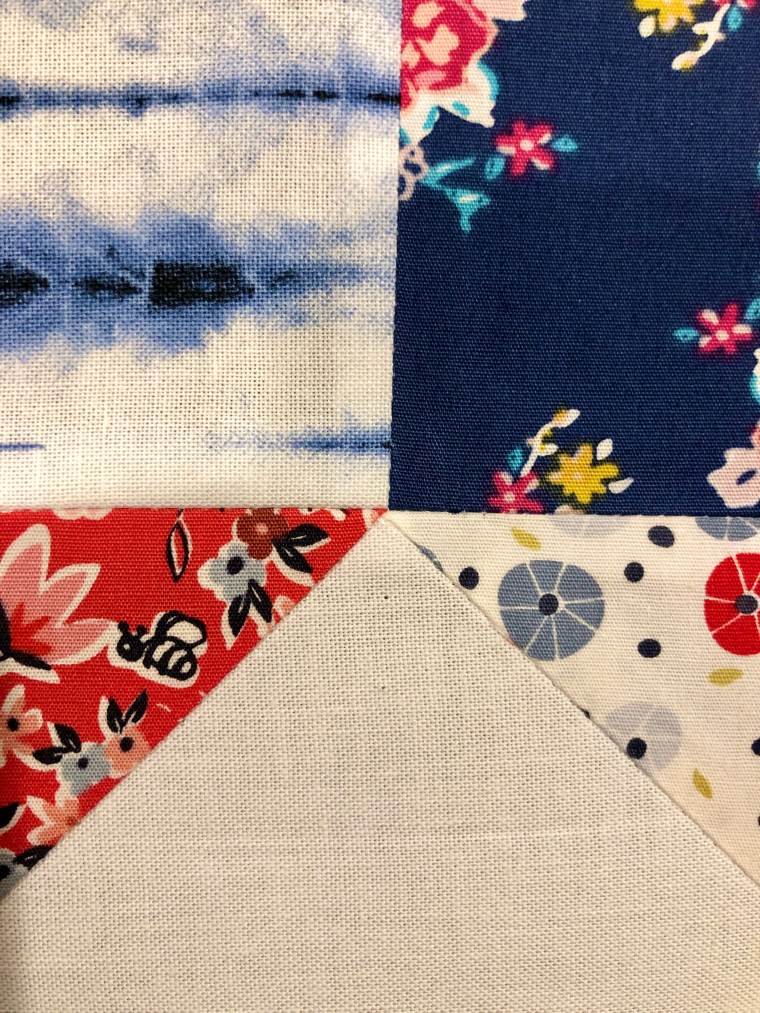
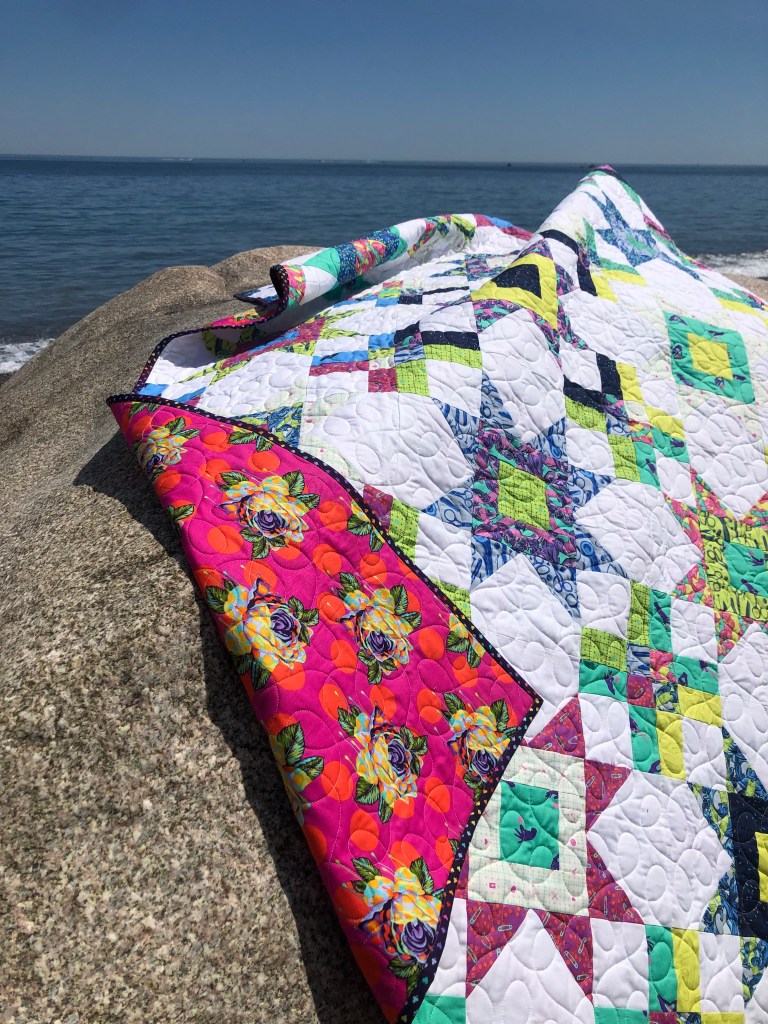
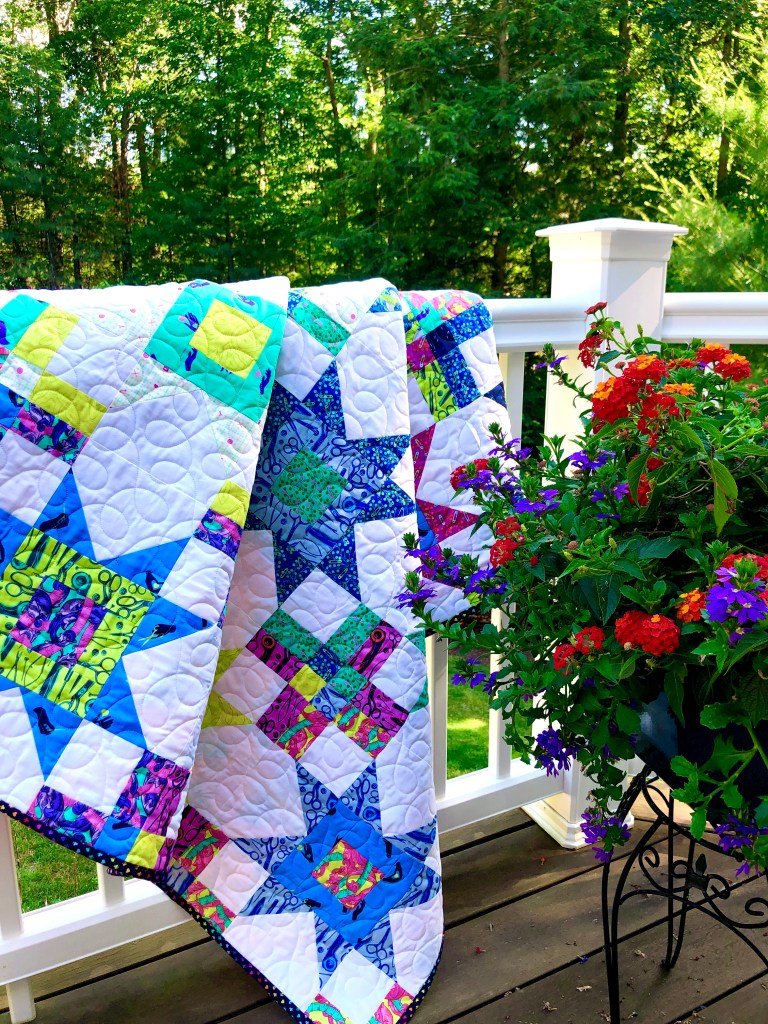
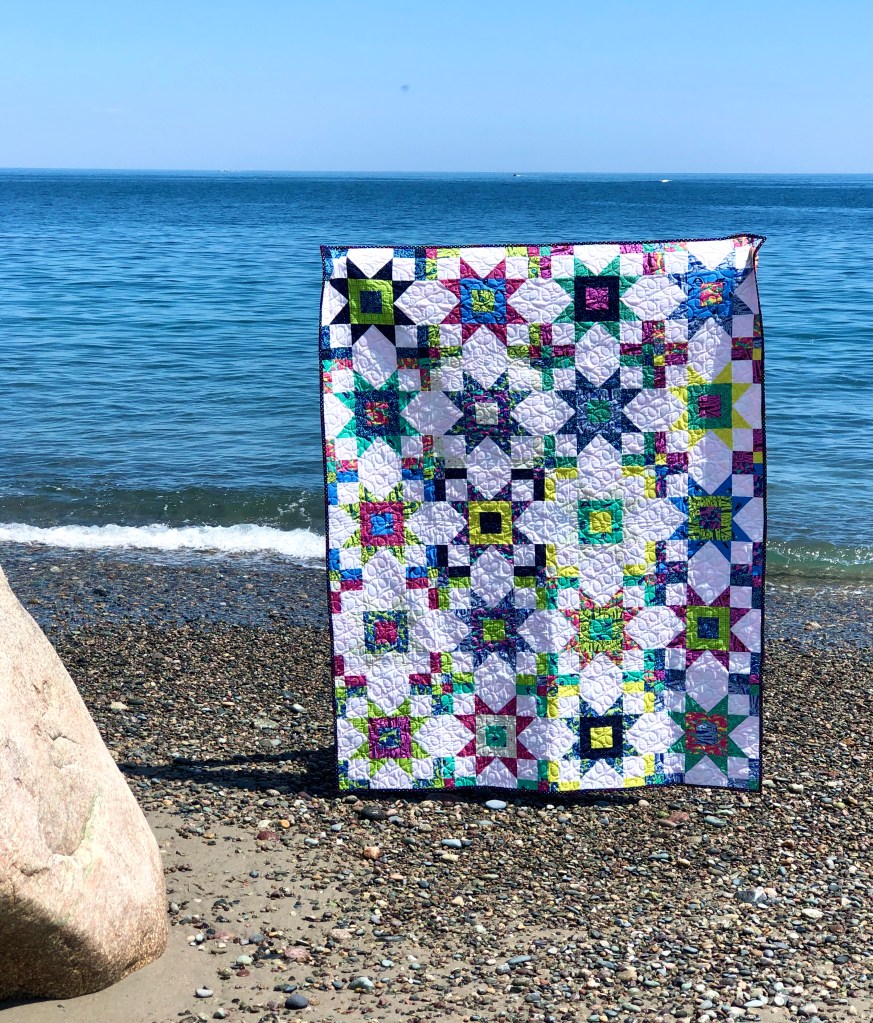
Lately, I’ve been documenting things out of the chronological order in which they were created, so here’s one more to keep it going! Star Pop 2, the second one I’ve made. I made the first Star Pop 2 quilt in the spring, as a baby gift for my American Sign Language teacher, but I kept it under wraps to keep the surprise. My youngest fell in love with that first version and asked me to make another. Of course, the answer was YES. Now, many months have passed and I’ve made a second of this same pattern. It goes together quickly and the structure of the blocks allows favorite prints to shine, as they aren’t cut too small. Also, who doesn’t love stars in a quilt?
Star Pop 2 is a modern sawtooth star pattern. It’s beginner friendly, too. The pattern comes with six size options: baby, square throw, large throw, twin, queen, and king. The first one I made in baby size, this one is the large throw which measures 60″ x 75″.
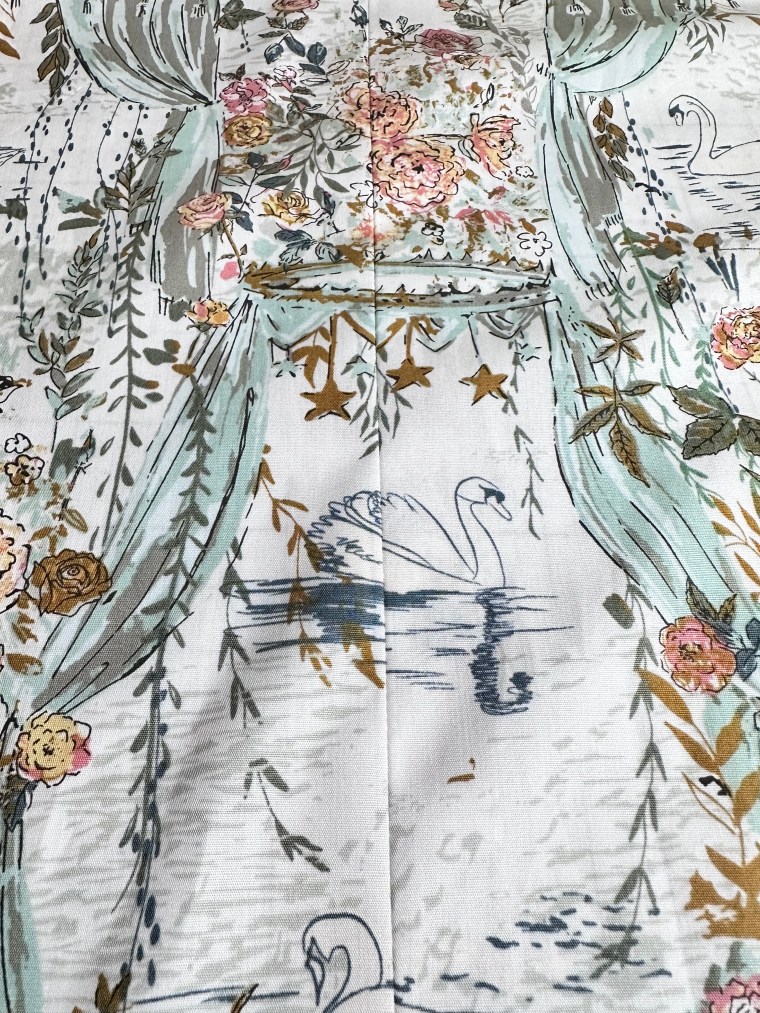
This quilt is made with some favorite Art Gallery Fabrics I purchased from my friend, Brittany at http://www.whiteplainsquilts.com when she had an online fabric shop. She still designs and sells beautiful quilt patterns, so go give her website a look. She phased out the fabric portion of her business, but when she was in the thick of it, the curated bundles were exceptional. Several of these prints are from my own AGF stash, but they all came together beautifully, in my opinion. I was drawn to the “Willow” fabric collection by Sharon Holland, and most especially, Rosewater Ballet. It truly reminds me of ballet, the days watching my child at the conservatory; the swans also remind me of the Swan Boats in Boston…it was the spark for this particular quilt.

This beautiful Rosewater Ballet print and the stack of white blocks, that will become the stars, makes me smile. I think there’s something really cool about seeing the elements stacked and ready, knowing the end goal.

Seriously? How sweet is this? The owl, the flowers, the colors. Let’s all just acknowledge the simplicity of the block too. If you’re one who likes chain piecing and efficiency, this pattern by Emily Dennis, http://www.quiltylove.com , is a good choice.
If you’ve seen many of my quilts, you know I often finish them with a pieced back. I use up all the bits from the front or make duplicate blocks for a section across the center. I am still learning to piece backs with a single fabric, but I knew this one needed no interruptions or other fabrics. It’s not perfect pattern matching, but with only a couple of these under my belt, I’m OK with it. I also know the recipient won’t be judging it harshly. I’ll tell you, it boosted my respect for people who hang wallpaper! Geez. That’s a skill.
Here she is, pieced and swirled and ready to be quilted. When the colors and the prints are all tossed into one shot and there’s that exhale of relief that what was in my mind, worked out in the process. Even better, a thumbs up from the one who requested it. That’s all I need.
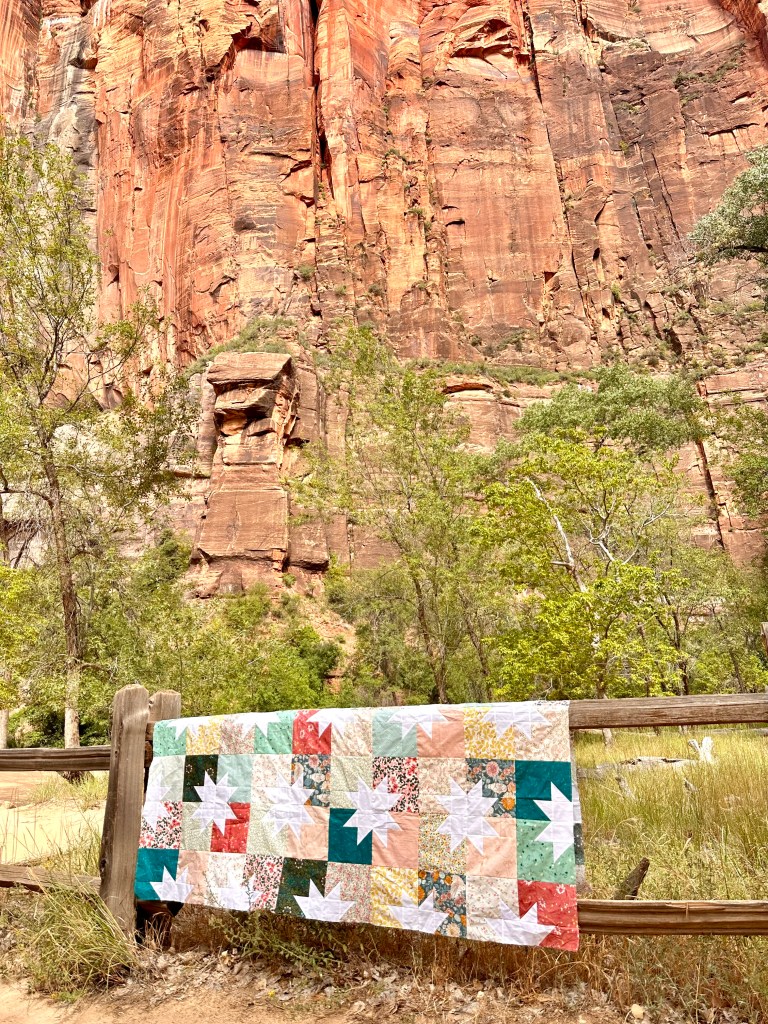
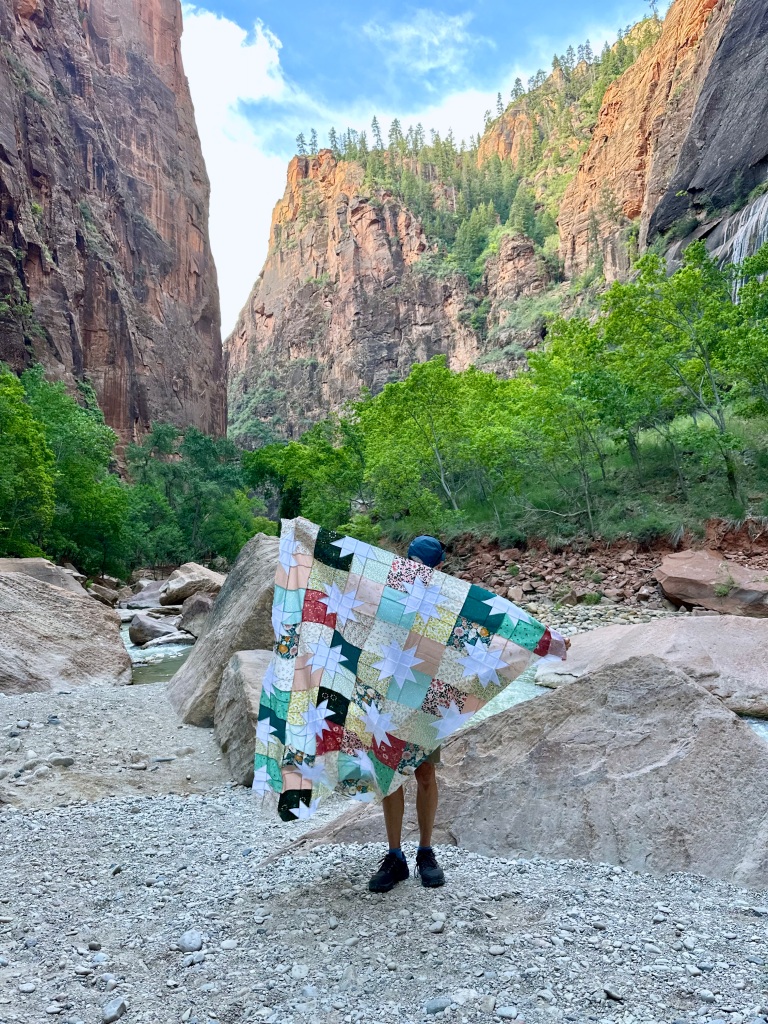
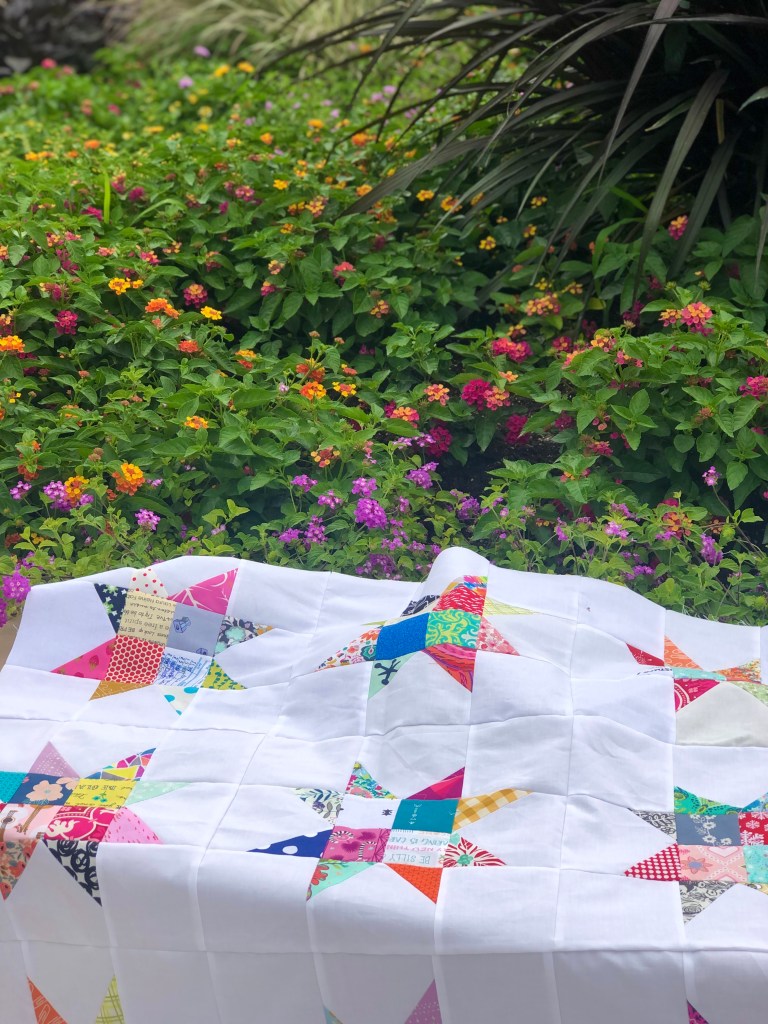
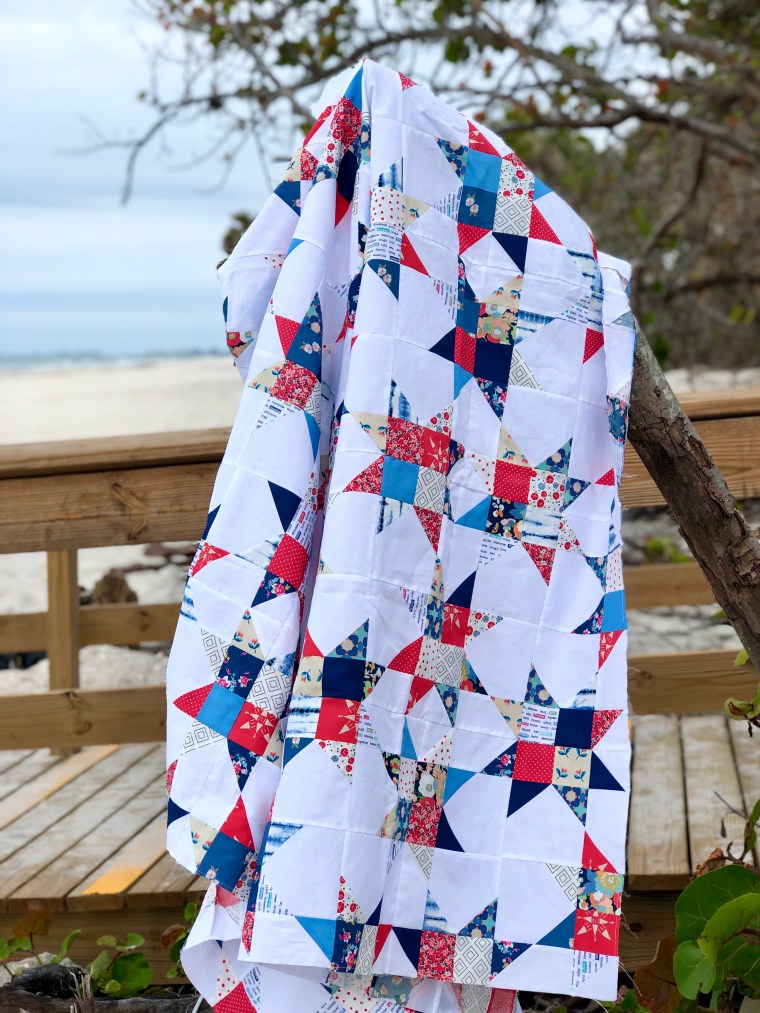
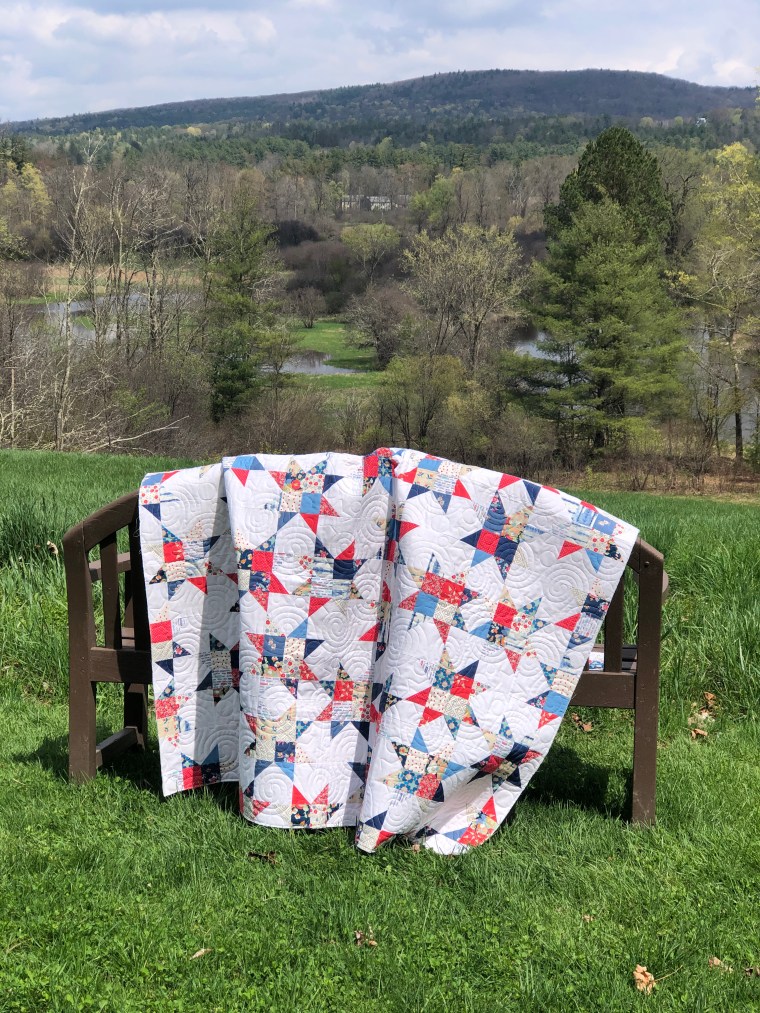
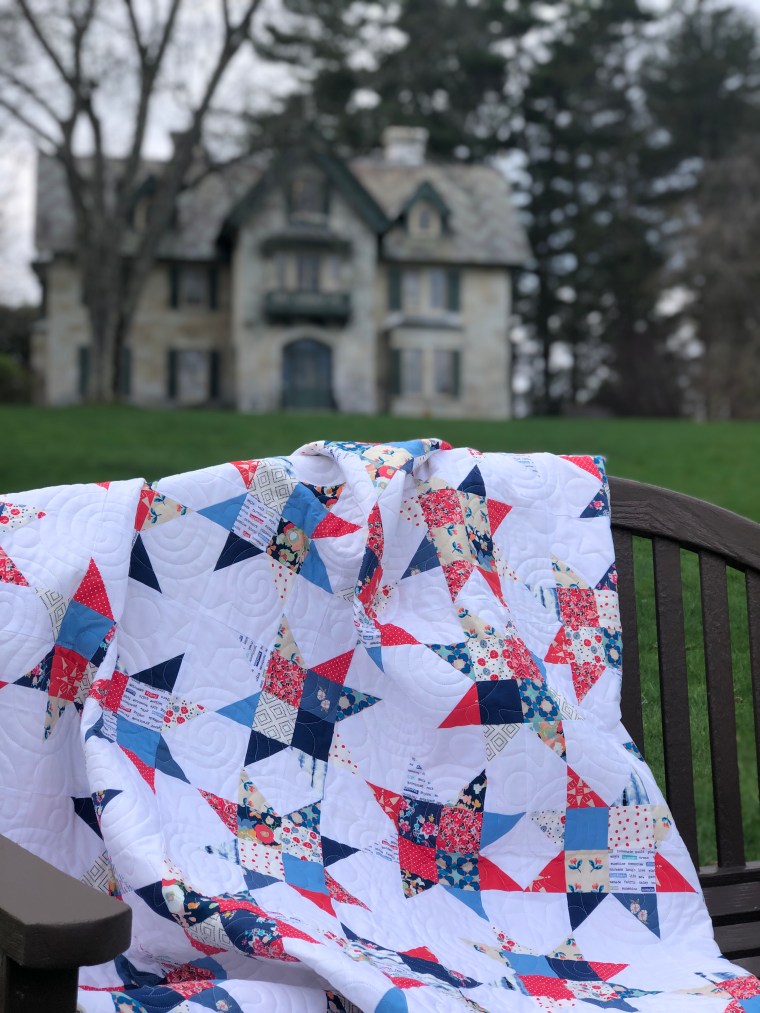
This summer, my husband and I were in Utah and visited two national parks. Not having been to Zion National Park before, I didn’t really know what all we would see, but I thought this quilt would photograph well in that environment. The rugged terrain and the delicate prints, a perfect balance. If you’ve never been to Zion, ( http://www.nps.gov ), I recommend giving it consideration. The trails were not as crowded as I anticipated and the views were unbelievable. I found myself stopping every few feet because the view was even better and then realized none of the photos were as breathtaking as the real thing. So, it became “take photos, but take it in”.

Is that not jaw-dropping, beautiful nature? I thought my quilt was pretty cool, but the landscape dwarfs it by comparison. I mean, seriously. How is a quilter supposed to compete with the Master Artist and thousands of years of time? Impossible. Just be ok with being second, here.

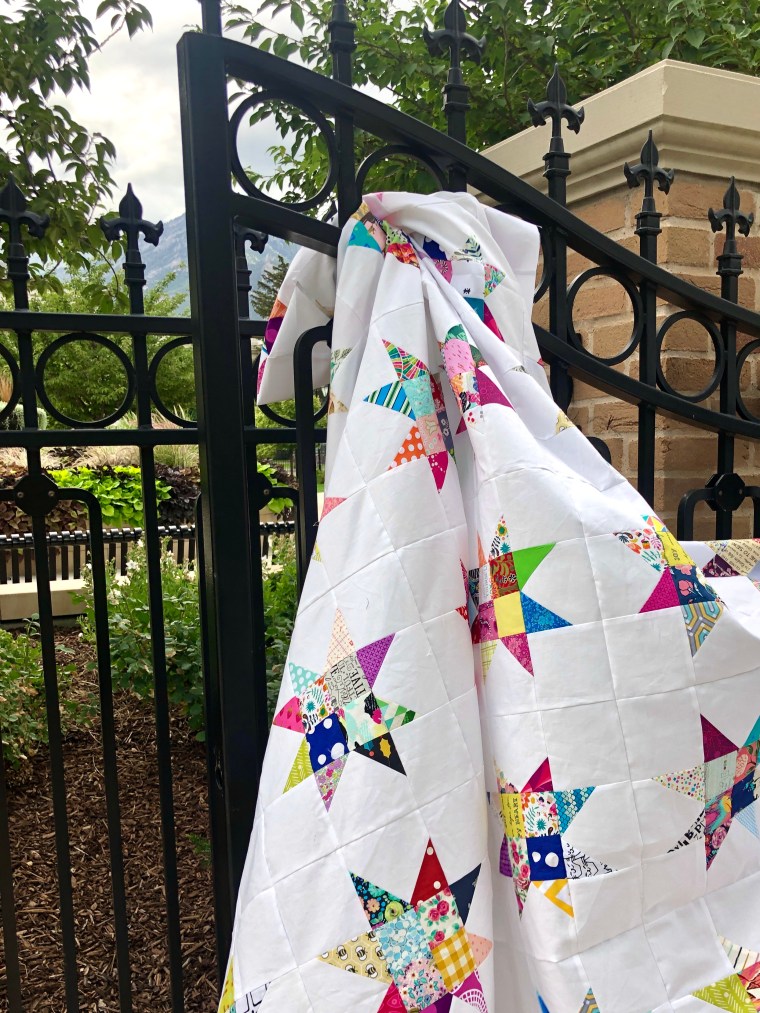
The sun shifted just a bit as we were walking out of the canyon, across this riverbed. We paused to take a few more minutes to soak it all in, not knowing if we’d be back. The air is so clean; there was hardly a sound even though we weren’t alone, and the scent of the vegetation is unlike anything in New England. I wish I could add sound/scent to these pictures. The quilt draped across this branch, a little airing out, but looking like stained glass windows. I’m always a sucker for quilts in the wind.

I had this professionally long-arm quilted by Jenn, http://www.knottedthread.com. This is the Macintosh Rose pantograph in white thread. I chose this because it’s sweet and the swirl of the roses is a nice contrast to the larger square blocks and star points. It’s a feminine finish…I love it.
It just needs a quick wash, another hug and then off to live with my youngest. May she feel the love wrapped up in this project.
-Happy Quilting
All photos and content property of Two Terriers Studio and not to be copied or distributed without permission of the owner.
Well, this post was a long time coming to press! Goodness gracious. The second post in this 3-part series was written five months ago, but this particular quilt has been finished for a year. I’ve clearly not kept up with the blog or the chronology of my projects this year.
Time. It’s fleeting.
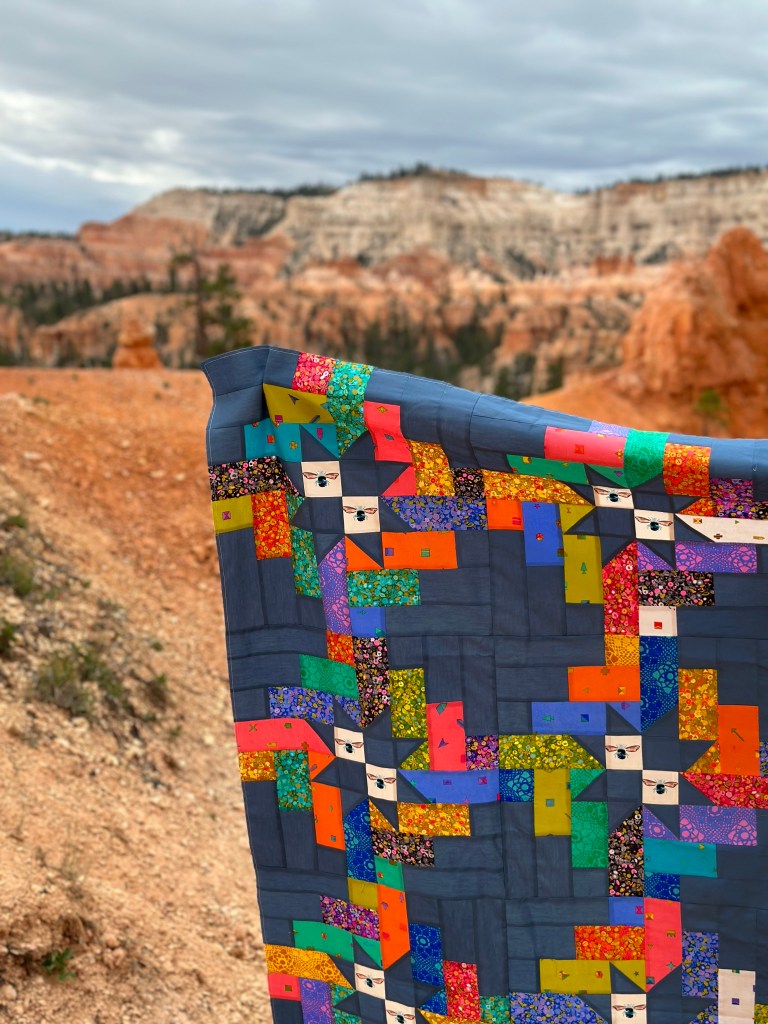
Let’s just get to it…meet the quilt lovingly called “The Beast”. The third in a 3 part series.
Why “The Beast”? First and probably singularly named because it’s huge. Huge by the standards I’d set for some of my quilts when this was finished in the summer of 2022. With this being an improv style, there wasn’t a pattern or an end size in mind when I started. It was finished when I was finished and that took months (years?). It’s perfectly suited to keep my tall husband cozy on movie nights, so all’s well that ends well.
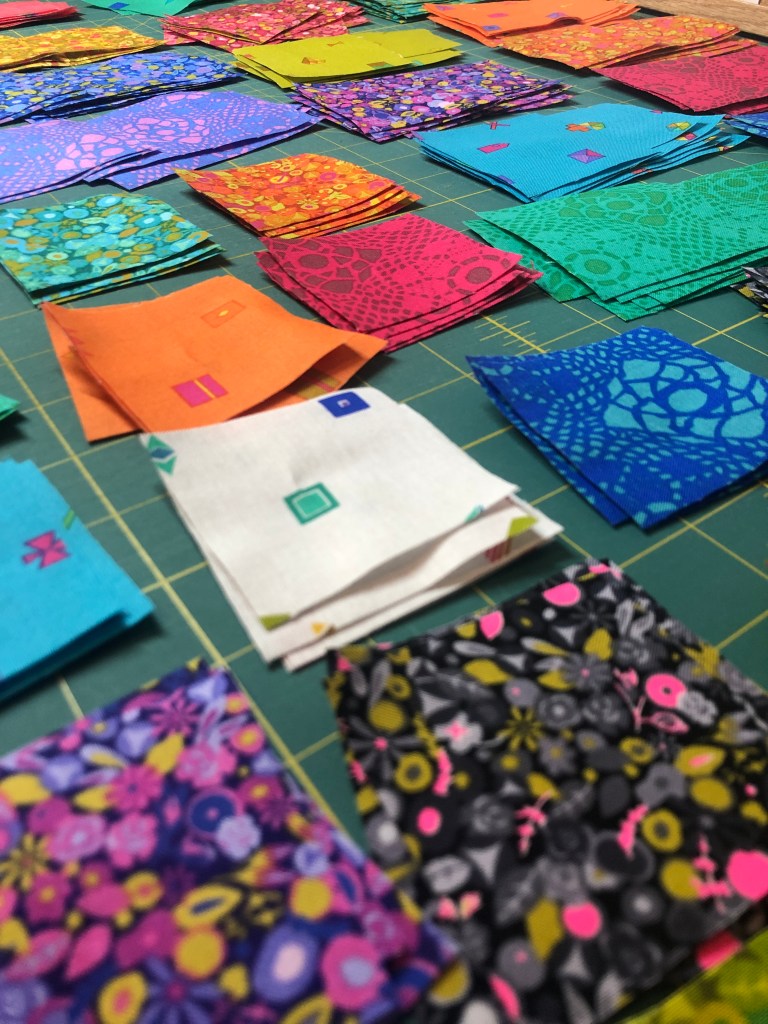
There’s no surprise this is another scrappy quilt. I never tire of seeing a decade of fabric bits thrown together into something useful. Thrown together may be a stretch, but I can say without hesitation that I don’t spend much time thinking about which fabrics are pulled from my overflowing bin. I’ve purchased all these pieces because I like them individually, so my thought is that collectively, it will work out. This quilt represents years of previous projects. I love it.
Like most quilters, I have a multiple scrap bins. Some sorted by color, some by designer, some by size. The pieces of this quilt came from the “strings & strips” bin. With the completion of each project, I sort scraps into the appropriate bin and anything more than an inch wide, but in a long strip, goes into this one space. When it hits overflowing, it’s time to piece them together.
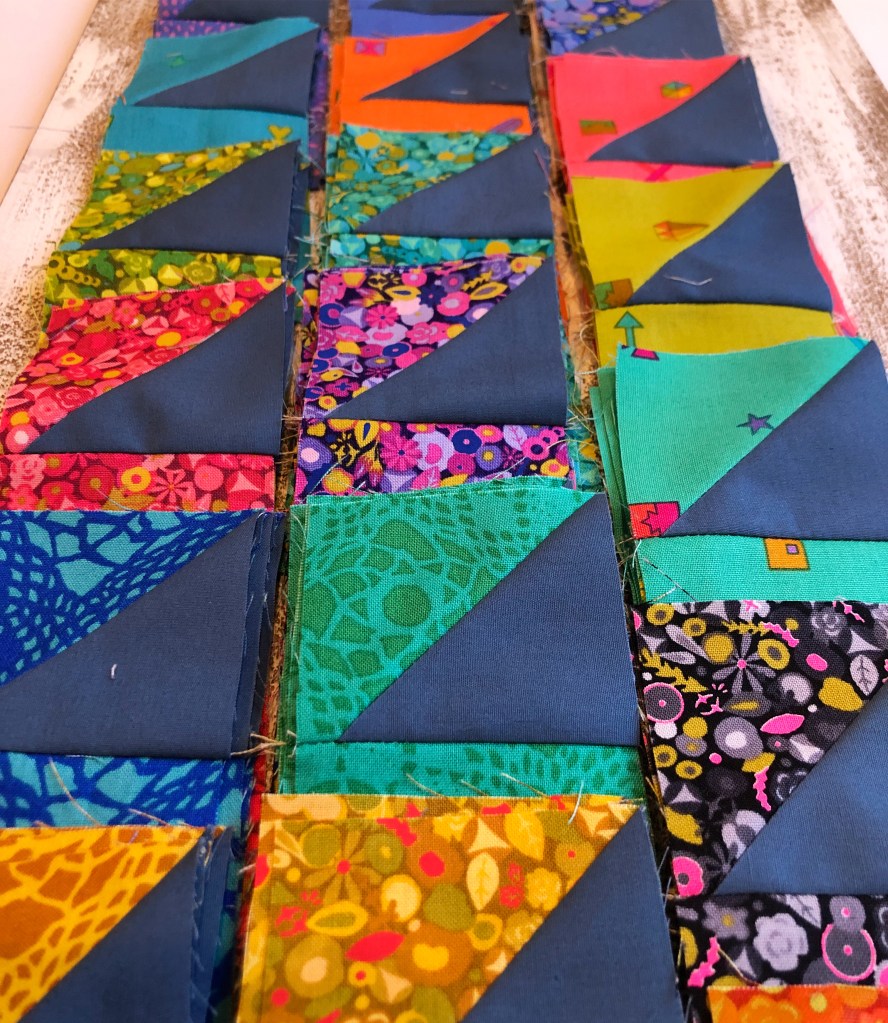
I started these blocks with ten inch foundation paper piecing squares from http://www.missouriquiltco.com. The lightweight and easily torn-away foundation papers made these blocks a breeze. I constructed this like a “string quilt”, with a fabric strip placed face-up, diagonally across the center and then worked in each consecutive strip to one side until the foundation was covered. I flipped the square around and repeated on the other half of the square. Everything was given a good press, trimmed and set aside. Over and over and over!
As you can see, there isn’t a theme. The strips vary in color, width, designer and style. It seems to me that in scrappy quilts, the more fabrics, the more it makes sense. It’s not like trying to stay in a zone and missing it…the more the better. At least to my eye.

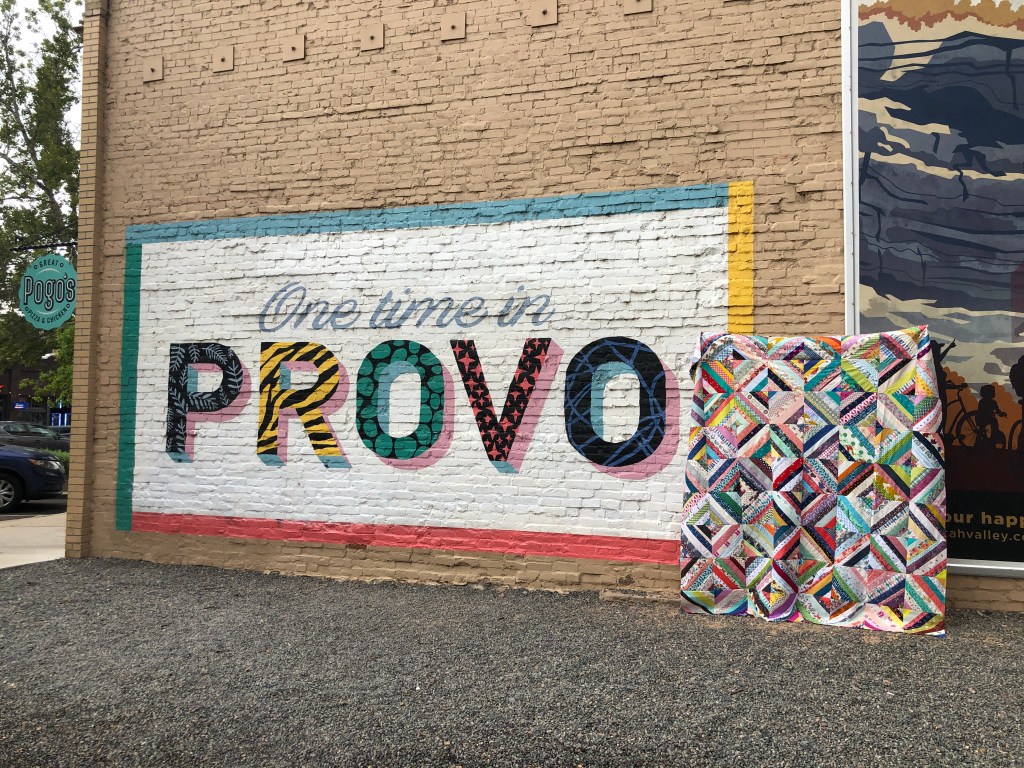
From New England to Utah, this quilt saw some mileage. In the summer of 2022, my husband & I were in Provo, Utah as well as Sundance. The scenery is incredible; perfect for quilt photos. We hopped around town, a bag of quilt tops in tow, and then headed into the mountains. I’m so lucky to have a husband who will carry quilts up steep terrain and then also hold them off the ground while I try to capture good angles. He’s the best. We’ve learned that photos of large quilts in the wild are easier when they are just pieced tops. These babies get heavy!
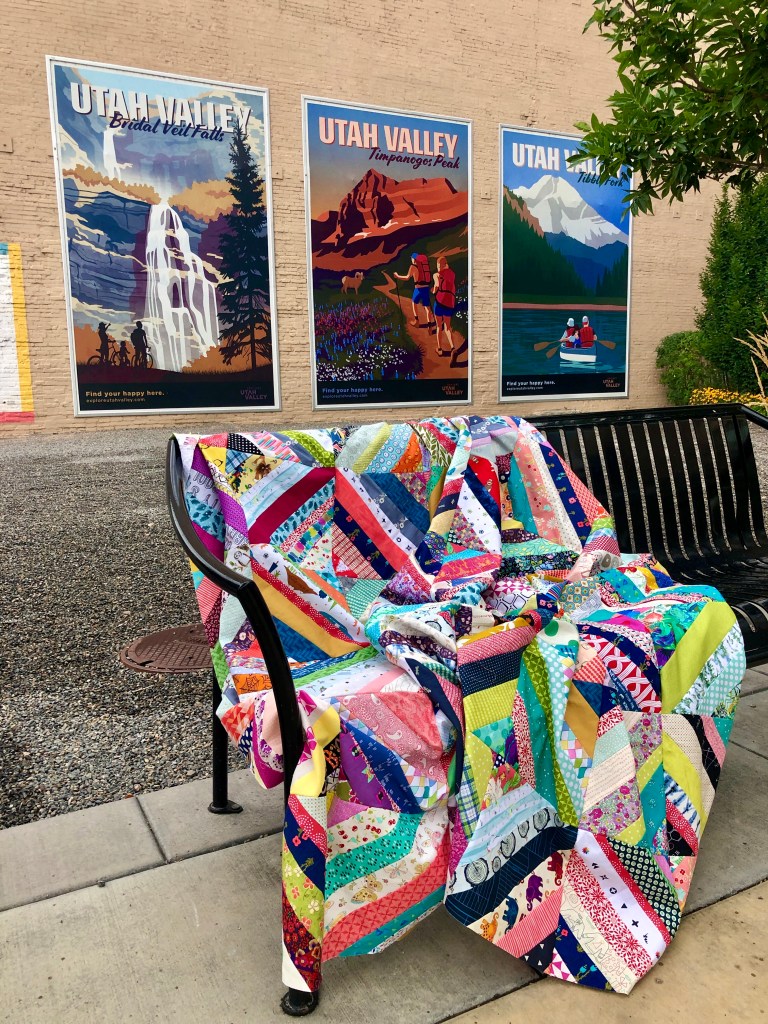
Into the mountains we go. These photos were taken along Stewart’s Cascade Trail, a 1.9 mile hike from the south side of Mount Timpanogos. The trail traverses through thick fir trees, oak, maple, aspens, and an avalanche path. It is stunning. The aspens were spectacular and when the sun shines just right, everything is more beautiful. The elevation is significantly higher than what we are used to at home, but it was manageable. The snakes, not my thing. I kept a good watch after the first one crossed my path.
Anyone else love to see quilts in the wild or in the wind? I love the burst of color among nature’s glory.
The goal was to get to the waterfall and take the photos there. A few people stopped to ask what we were carrying, so the trek took more time as we stopped to explain the quilts. I never know if other hikers think it’s cool or wacky that this is what we are doing, but I’m guessing it leads to a story of “you’re not going to believe what I saw on the trail today!” Just as we got to the clearing and the waterfall was within sight, a young couple moved passed us and perched on a rocky ledge and made themselves comfortable. We debated waiting them out, but also made note of the time and impending sunset. Hiking back down a trail we didn’t know, in the dark, wasn’t top priority. The waterfall shot was over. So here we are…imagine a waterfall just behind the quilt. It’s there, I promise.

I had this longarm quilted by Jenn, http://www.knottedthread.com using the Time Warp pantograph. The movement of the panto across these angular cuts is exactly what I wanted.

With so much going on in the front of the quilt, I opted for a simple black & white striped binding. The back of the quilt is mainly black and white with a pieced section, too. I like how the striped binding frames everything.
I had two bolts of the terrier fabric & it has come in handy for quilt backs. I really like this print and have used it on quilts I know I intend to keep in our family.
The Beast finished at 75″ x 87″; a decade of fabric, many months of sewing, a bit more than two thousand miles of travel and a day’s hike in Utah. Worth every minute of effort.
-Happy Quilting!
This is not a sponsored post. All content and photos property of Two Terriers Studio and not to be duplicated or shared without written consent of the owner.


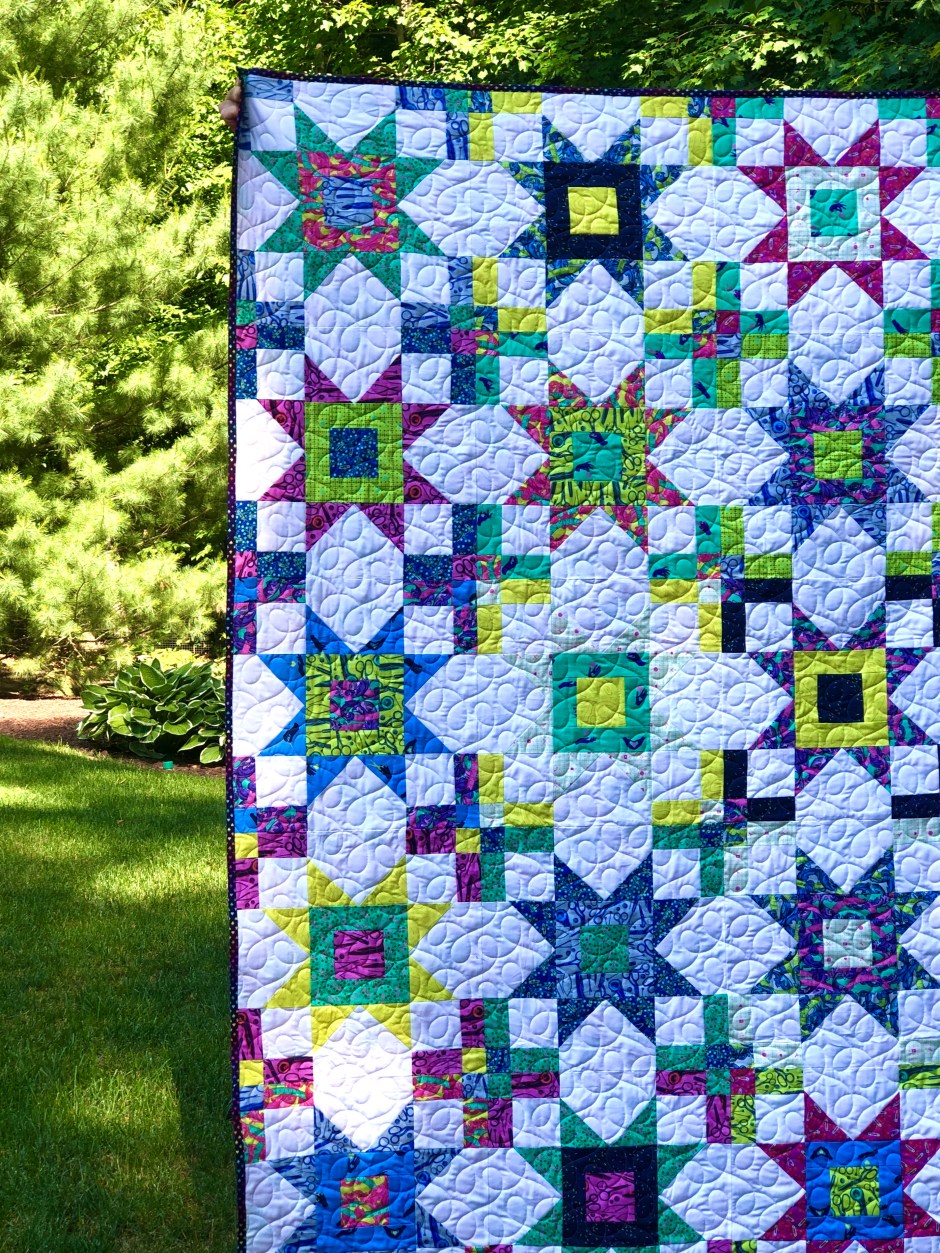
Continuing on with my Eastern to Mountain, 3-part series, let’s talk about the Wonky Stars Quilt. This series is about three different quilts that are all scrap busting by nature; colorful and well-traveled. This particular one was 100% inspired by the Missouri Star Quilt Co. “Block” magazine that I received from a fellow quilter. As I’ve mentioned before, I learned so much about quilting from Jenny Doan, Founder of Missouri Star Quilt Company http://www.missouriquiltco.com. I watched her online tutorials, almost daily in the beginning, and her ‘anyone can do this’ style drew me in. She made quilting approachable and fun, so of course, I was happy to have this new book in my collection.
Wonky Stars is just that – WONKY. There’s no fussing with matching triangle points. The four patch center is about as precise as the piecing needed to be. The rest is a wash of colors and prints, free form triangle shapes and wonky goodness throughout. Making this was a relaxing experience and I immediately thought that it would be a quilt I could make over & over and never tire of the process. While Jenny’s version on the cover of her book is scrappy, as is mine, this would be fantastic in a curated palette or from a single collection. I omitted the sashing and setting squares in my quilt, but aren’t Jenny’s just an extra pop?

As you can see, there’s a little bit of everything in these blocks! My go-to background is a bleached white cotton from Moda Fabrics. A bright, crisp white is one of my favorites when paired with all these vibrant colors. Keeping the same white in my quilts allows my solid white scraps to match. Pulling from smaller pieces generally ensures they are all the same. Note, I said “generally”. It’s not an exact practice, as there have been a few stragglers left behind from earlier quilting days. One of those stragglers found its way into this quilt, as a matter of fact. I actually didn’t even notice the slight variation until the quilt was completely pieced and I saw it in the daylight!

Progress! I totally understand that scrappy patchwork isn’t everyone’s favorite, but I love it. It’s good to be frugal, using every last little bit of precious fabric. I like reliving the memories of so many other projects as I cut new blocks for what will be a one-of-a-kind new quilt. As usual, I didn’t have a final size in mind when I started these blocks. I kind of let the evolution happen and felt that I’d know when I’d made enough. There were moments I thought this could be a really fun & funky baby quilt, but the more stars I made, the more I wanted the quilt to be very big. So, I kept going.
Once my blocks were finished, I cut them all to the same size which seems like a process out of order. With the focus and precision in the four-patch and the “legs” of the stars all being different, the squaring came last. Squaring up these nine patch blocks was quick & the sewing even more so.
You can really see my alternating pressing of seams here. That’s another technique I know many quilters will debate. Press to alternating sides or open? I tend to press alternately; open if the pattern calls for it. With the Wonky Stars, my alternate row pressing was just fine. I always give my quilt tops a final starch and press before they are quilted, but this one shows the first pass.
This is where the Eastern to Mountain comes in. My husband and I took two quilts into the mountains of Utah and photographed them in a place that was totally new to us. We like to hike and explore, but the difference in altitude and width of trails compared to home made for a challenge. Thankfully, my husband agreed to carry the quilts and I’m certain the other hikers were wondering what he had in that big plastic bag! After crossing paths with a snake, I was busy watching my steps. Stopping among the Aspens for photos was the perfect respite. The photos do not do justice to this beautiful place. And yes, the top is a bit wrinkly.

I’m thankful we took these photos in Provo, before hiking near Sundance. We learned that extra large quilts are more difficult to keep off the ground when taking photos and dirt hiking trails aren’t forgiving. I had to do a little hand washing of this one and left it to drip dry over the hotel shower curtain rod. That was when I found the one, white square straggler. Yes, I left it and it’s quilted in. I sort of figured if it took all this piecing, hiking, and hand washing for me to see it, then let it be.

The backing fabric by Sarah Golden for Andover Fabrics features terriers, of course! The beautiful edge to edge quilting is the work of Jenn at Knotted Thread http://www.knottedthread.com. Now quilted & bound, it had one more trip to our friends’ in New Hampshire. Equally bright in the mountains of Utah as it is here, over the picket fence of a 200 year old home. Quilts – memories stitched together and at home everywhere.
All content and photos property of Two Terriers Studio and not to be copied or distributed without written consent of the owner.

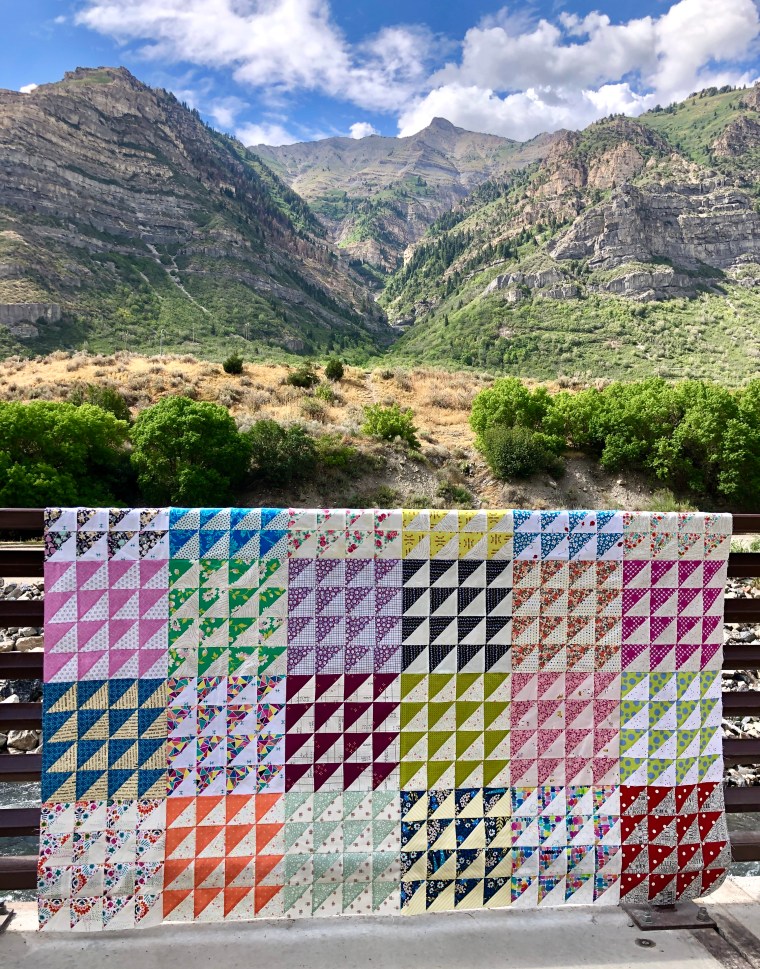
In three seasons of 2022, I made three quilts that traveled with me between the Eastern and Mountain time zones of the USA. I love “Quilts in the Wild” and capturing these in different cities and seasons, in various stages of completion was a treat. So, with that in mind (and because I’m about a year delayed in writing these stories), I’m going to do a 3 part series. One more thing they all have in common is that they were all three made from my scrap stash. It’s hard to say now, but I’m guessing some element of it was an Earth Day focus, using what I have without buying new. There truly is a blessing in using what you have; I could not be more pleased with these quilts.
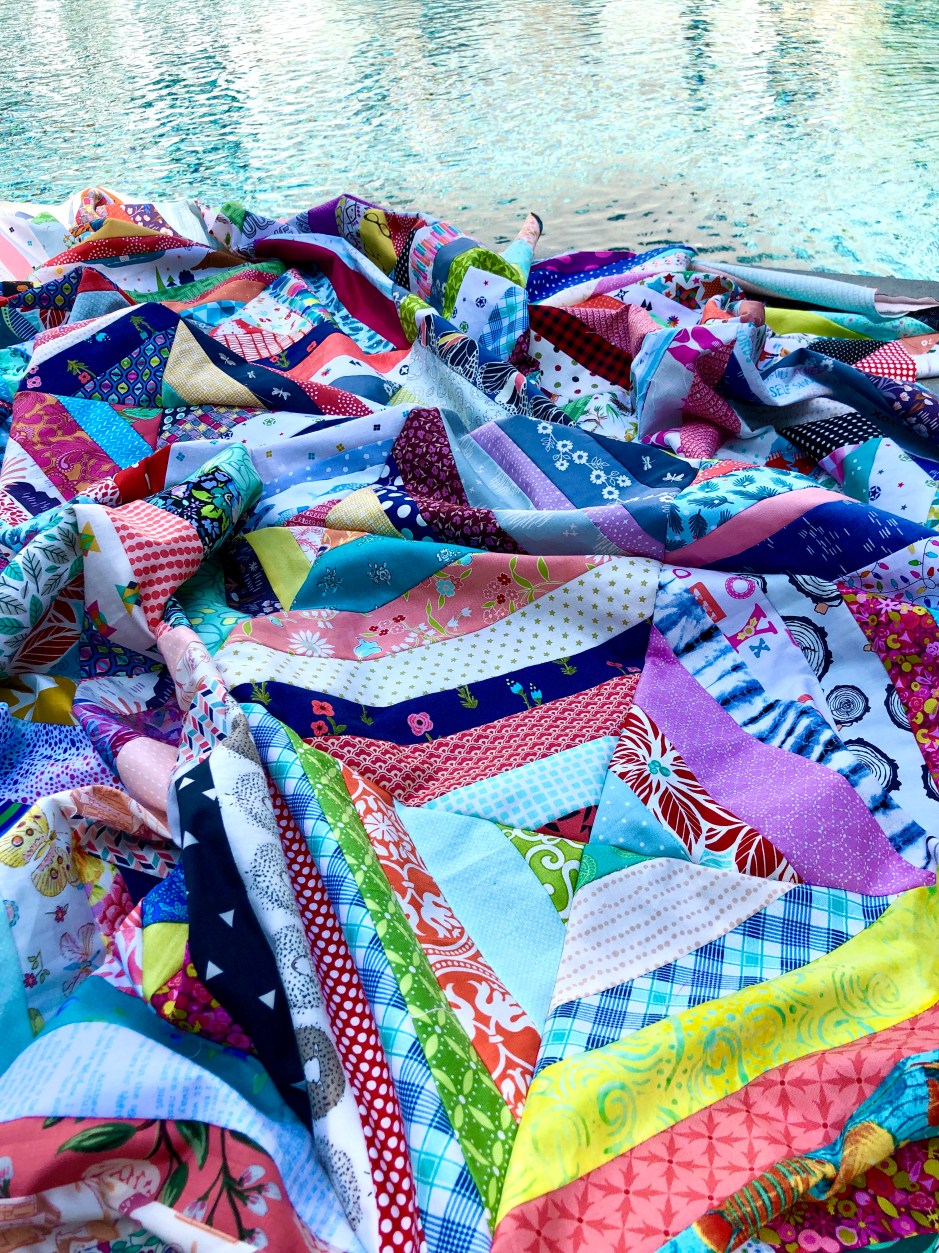
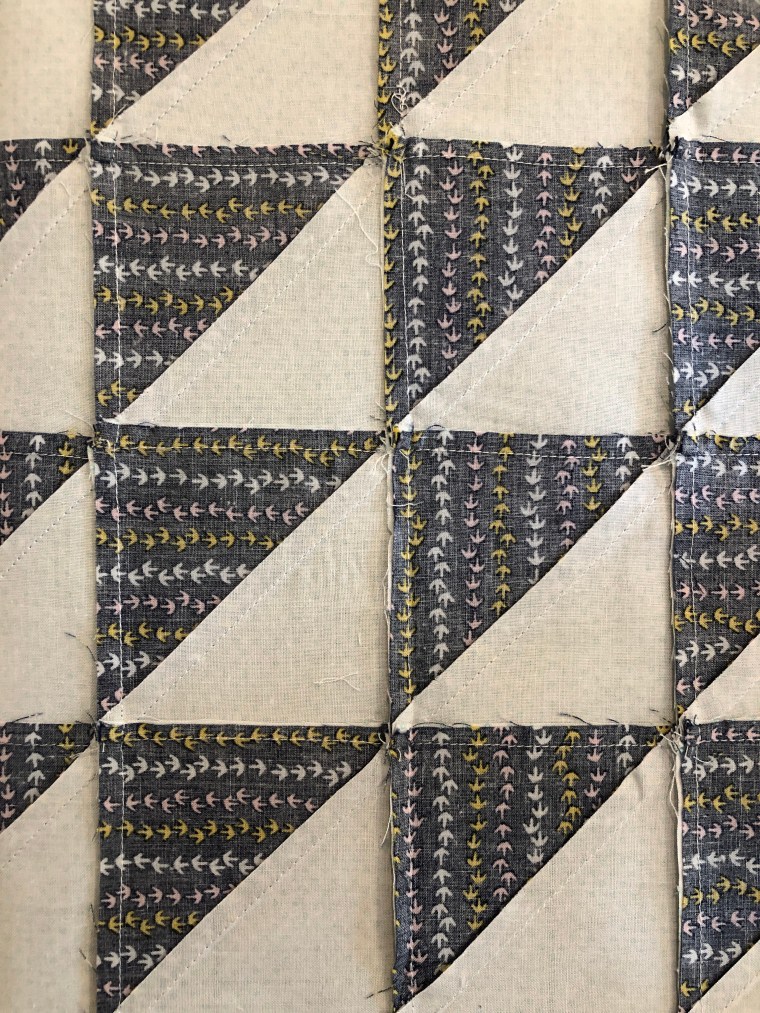
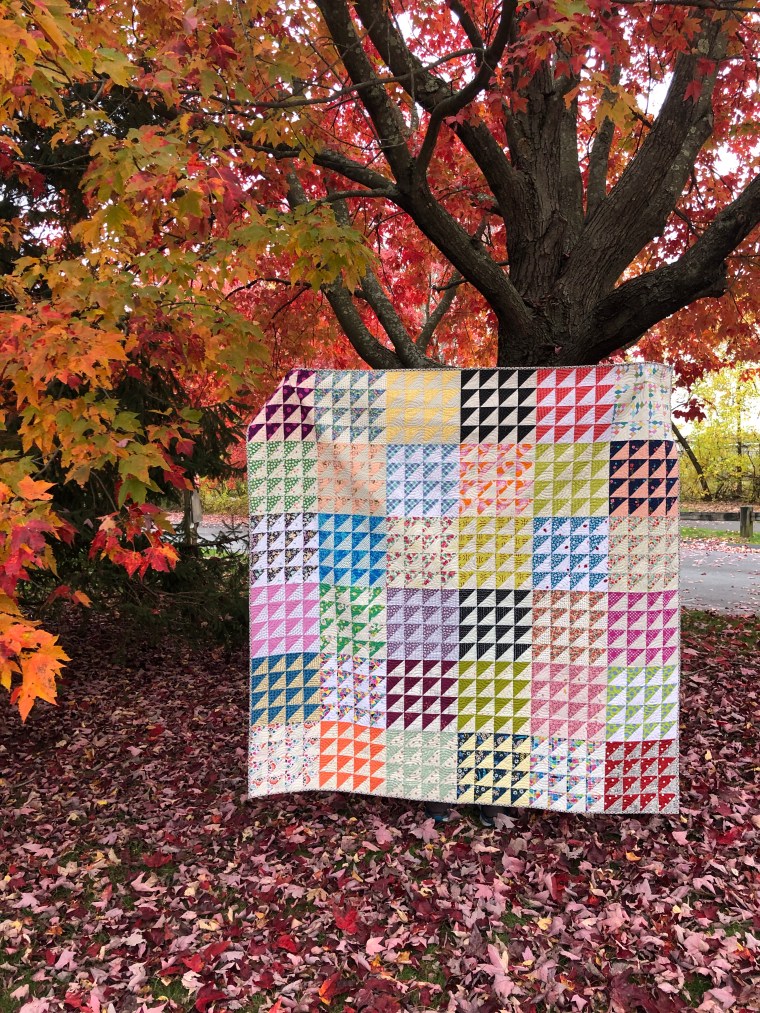
One of the great things about the Instagram quilting community are the friendships that can develop between quilters who may have never even met in person. A shared passion for fabric & design, is something we can talk about for days. Fine tuning skills with tips & tricks, as well as collaborating on patterns or even sew-alongs, is actually fun. This Retro HST (half-square triangle) Quilt was born out of an IG sew-along.
Quilty friends, @lizzymakes, @knotted_thread & @graccieone were the spark behind this sew-along in the spring of 2022. It was inspired by a half-square quilt created by Red Pepper Quilts (the original is a 9-patch HST block) and had been made by Elizabeth. Jen & Amanda hosted a “create at your own pace” sew-along and I liked the idea of a giant quilt, but at my own pace, and not on a group deadline. I started pulling fabric and pairing up squares.
Keeping the momentum going with more fabric pairings and trimming. In true to me form, once I started, I was pretty singularly focused!
A few tools to help with accuracy and flat blocks are always right by my sewing machine. The wool pressing mat, my LDH snips, a hot iron and a tailor’s clapper are all used in a day’s work.
Accuracy in the first cut is important, but it’s also important how we press (not iron) and trim our blocks to size. This particular quilt of mine has 576 half-square triangles. A little bit “off” x 576 will result in a wonky, not square or flat quilt top. I knew that if I was going to cut this many pieces, they had to be spot-on!
What’s on the inside matters too. I love how quilt blocks look from the side you’ll never see once it’s quilted.

Little by little, I pulled fabric and paired the darker pieces with some low-volume prints. I tried to stick to a schedule of making a few each day because I could tell right away I was going to like this and wanted to see it through to the end. That isn’t always the case. Some “starts” are not the favorite “finishes”.
I finished this before our trip to Provo and lovingly packed a suitcase with three quilts to take for photos. It’s been a long time since I was in the mountains west of home, so I was excited about the potential for great scenery. Provo did not disappoint!
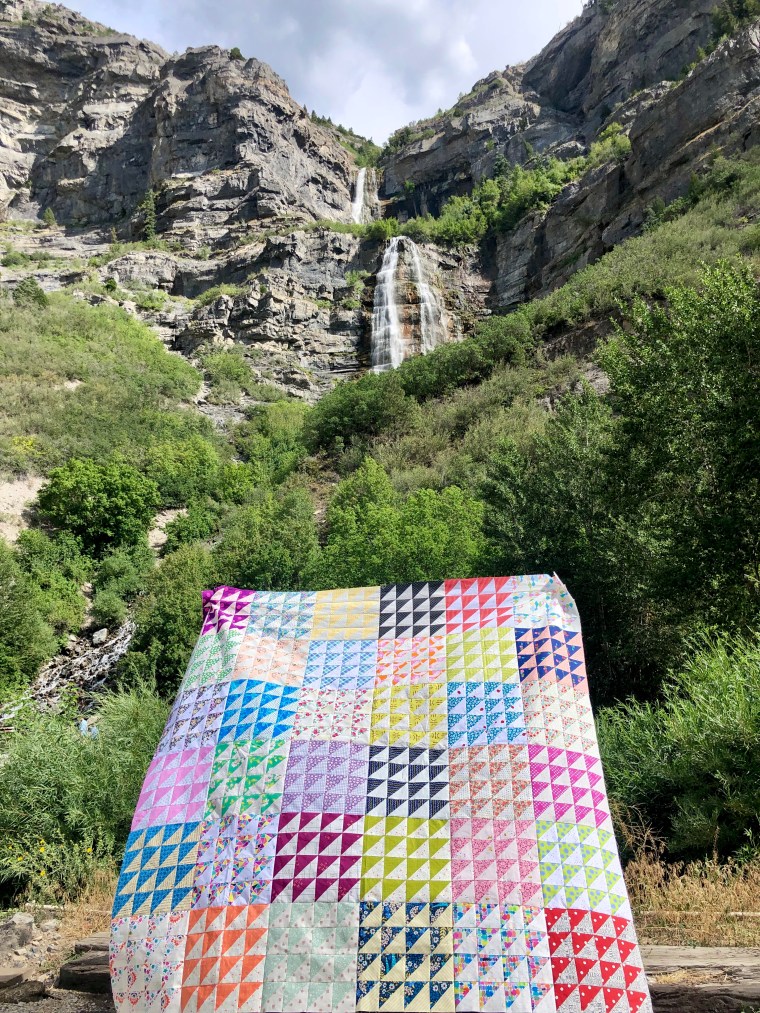
Two perspectives along the same sidewalk at Bridal Veil Falls. I wish there was sound…the waterfall and the gentle breeze cannot be captured here; it was a spectacular spot.
I like the contrast of the color and softness of all this fabric against river rocks and the roar of nature. Of course, I was on alert for gusts of wind so that my quilt top didn’t get blown into the stream. That would likely not be pretty!
Once I returned home, this was sent to be long-arm quilted. I’m so thankful to have the option to send big quilts out for the magic of edge to edge quilting. I don’t think I could do it justice, for a quilt this size, on my domestic machine.
I chose a swirl pantograph to give movement to all the angles and squares. The backing is a text print (my editing / writing days shine through in fabric prints, sometimes); the binding is a Liberty print. It pulls colors from the front, coordinates with the print on the back; subtle, but interesting, in my opinion.
I’ve shifted to machine binding my larger, personally owned quilts. Yes, it’s special to have them hand-bound. But, we use our quilts and they are washed often, so I like the added assurance of a solid, machine seam.
The good thing about an “at your own pace” sew-along is that I wasn’t behind schedule when I finally had it pieced, quilted, traveled and bound for photos in a New England Autumn! As much as I loved the Utah mountain shots, the backdrop of red trees is pretty cool too.
This one is well traveled and well loved, season to season. I look forward to making another!
All photos and content property of Two Terriers Studio, not to be copied or distributed without written consent of the owner.
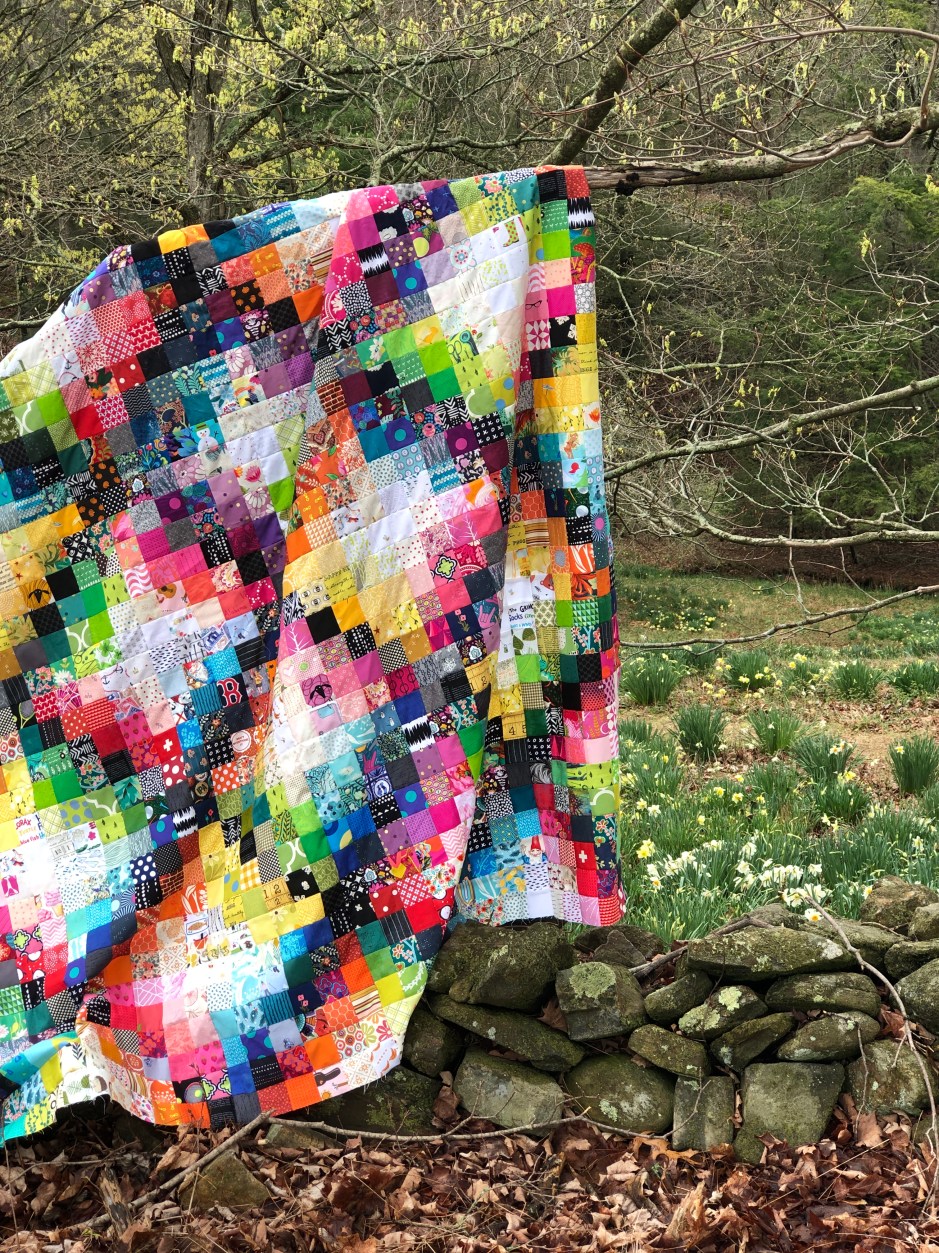

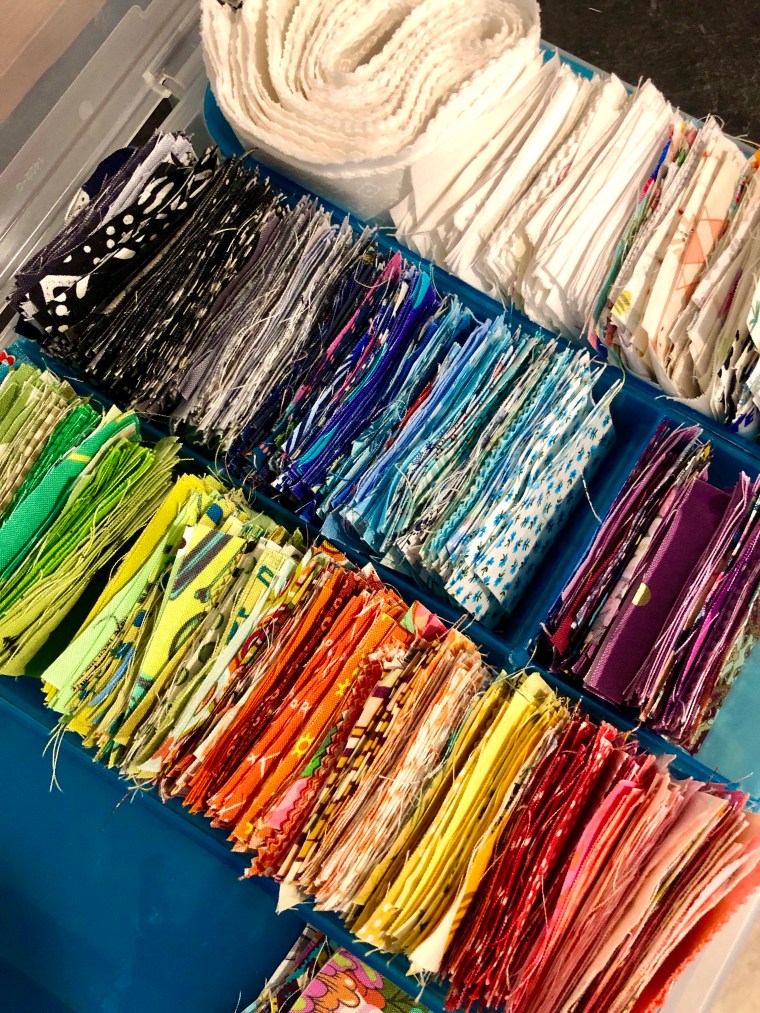
This is the latest scrap busting quilt I’ve made and I love it. Every quilt comes with a story; how it began, who it is for, the process, the fabric, the quilting and boy, does this one have a story. It’s one that I’m glad I trusted the process and continued sewing, even amidst the doubt and layout fatigue. What started as a project to use scraps and have some “mindless” patchwork sewing, quickly became anything but mindless. It’s more of a study of value and every block is placed with intention. Such intention isn’t usually found in scrappy or improvisation quilts I’ve made in the past. This one took time.
I tend to be frugal with my scraps; almost to a fault. I’ve now been quilting for just over a decade and while I buy a lot of fabric, I use and keep almost every little bit until it’s a size that I can no longer find a use for. After each project, I’ve cut leftover fabric into 5″, 3.5″, and 2.5″ squares and store them together for future patchwork. The bigger pieces are sorted and stored by color and become zipper pouches or something like that. I’ve made so many “scrap busting” quilts and will be sharing them here soon. I’m a couple days late for Earth Day celebrations, but I always feel that using every little bit and not dumping it into a landfill is a responsible way to move through this process. My goal here was to not purchase a single piece of fabric to make this giant quilt and in that, I succeeded.
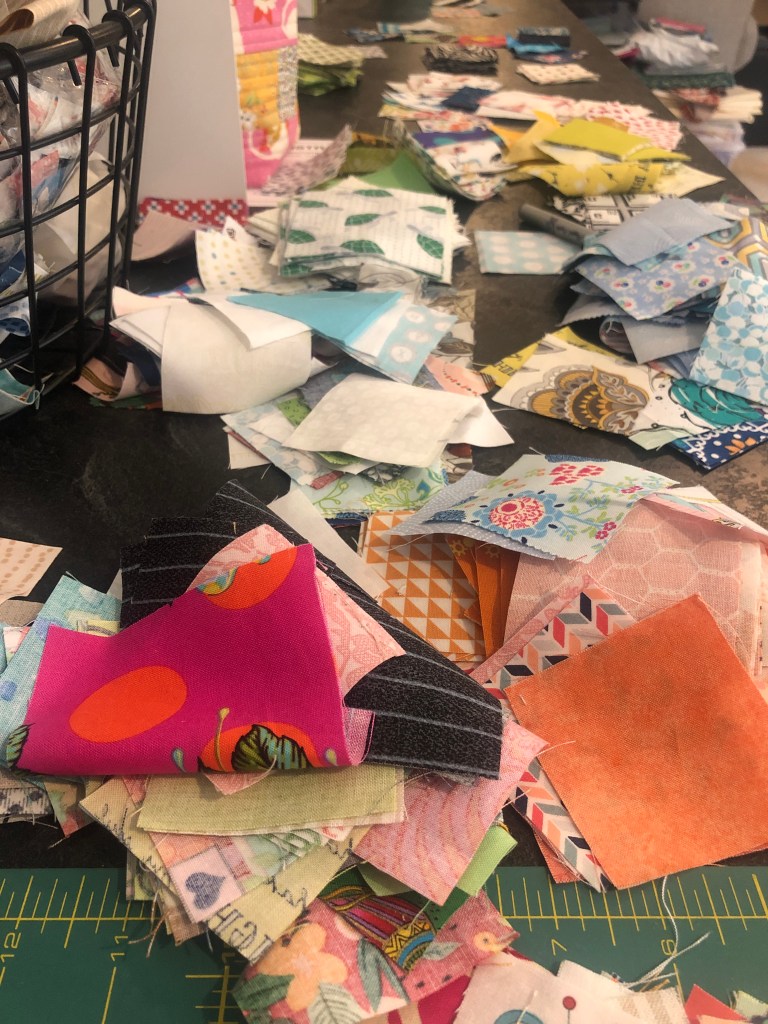
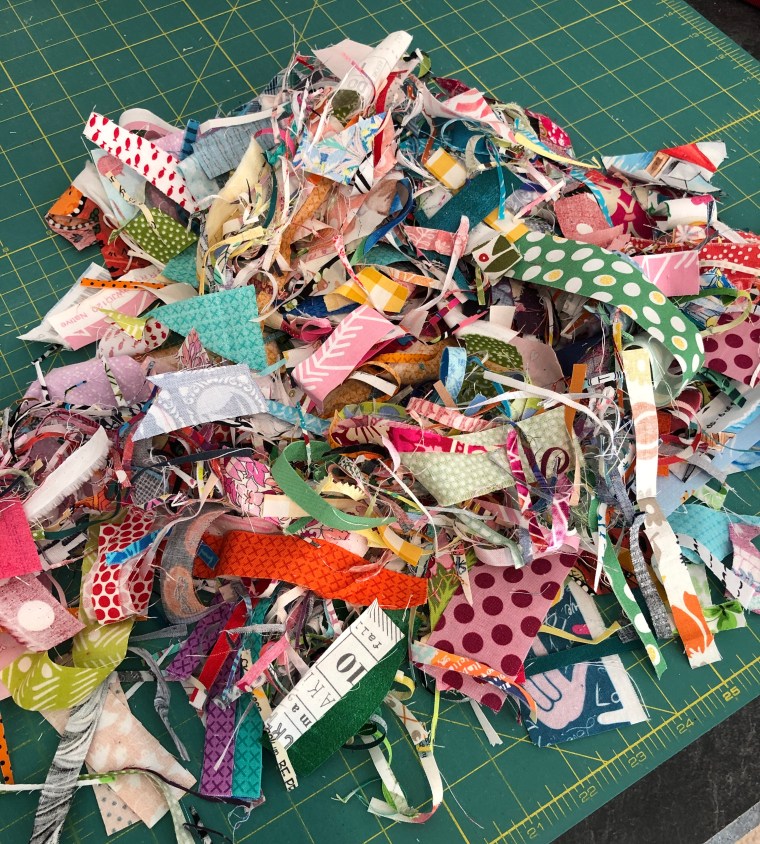
When I decided to make this Pixelated Quilt, I pulled all my 2.5″ squares and just dropped them on my cutting table. That’s the mess above. I don’t sort my squares by color, but by size. It seemed to make sense until this quilt assembly.
After a few days of sorting through all those little random pieces, I spent time sorting by color into a storage box. I don’t work well in chaos, so while I like all the fabric, the lack of order was making it a challenge to get things done. I was reminded that I have very little orange, yellow, or purple fabric in my collection. I needed to cut into some other larger pieces to develop the right amount of color gradient.
It was at about this time that I wasn’t sure I wanted to make this a large quilt. I started questioning what minimum size would still show the pattern, but allow for a quick finish. It was taking more time than I had anticipated (or wanted to spend) and rather than using the 2.5″ squares I’d already cut, I was having to cut into more fabric I already owned. I said to my husband, “I thought this was a good idea, now I’m not sure. Maybe it can be a baby quilt? I’m actually not loving it; is the value gradient actually showing yet?” He will say that the story went something like, “I have an idea; I love it; I think I’m OVER IT; insert mild curse words; I’m SO OVER it; a few more curse words; Ok, I really do love it!” Ha.
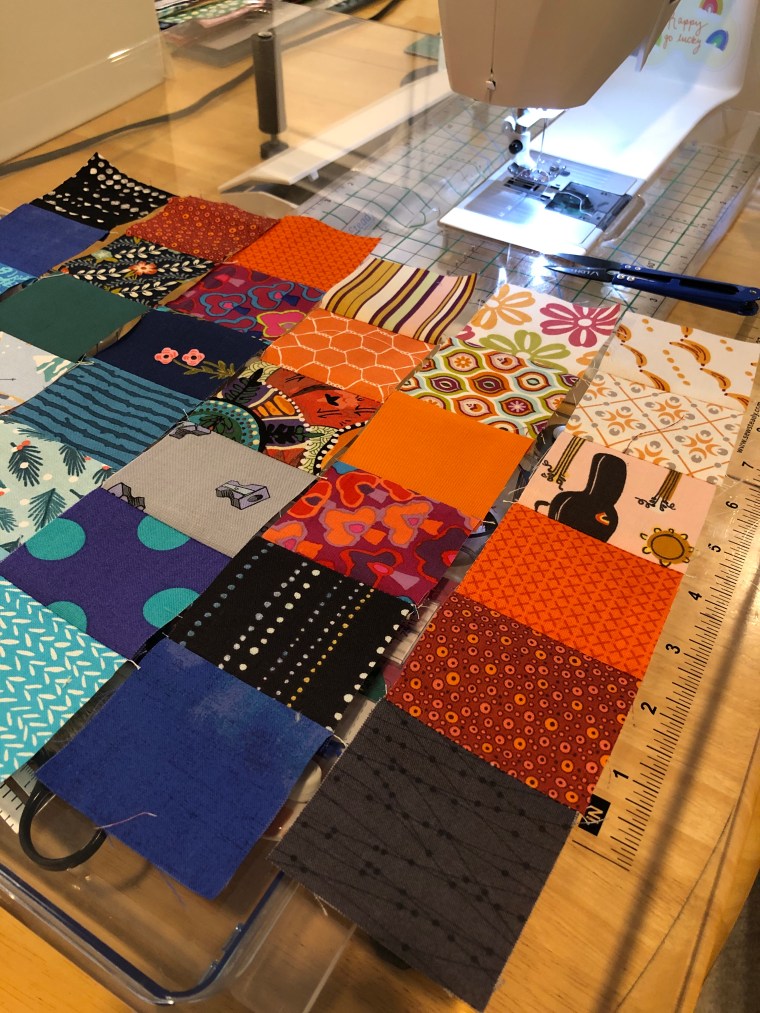
My block layout is a 6×6 pattern with the darkest line on the center diagonal. I also wanted the graphic images to be oriented top to bottom; the quilt front would have an obvious “top”. This was one more place where the intentional layout became time consuming. In addition to the gradient, I wanted the orientation to be consistent. Sometimes, I don’t worry about that. This time, I was trying to get each piece correct. With a quilt measuring 68″ x 80″, that meant 1,512 pieces…all measuring 2.5″ unfinished, 2″ finished.

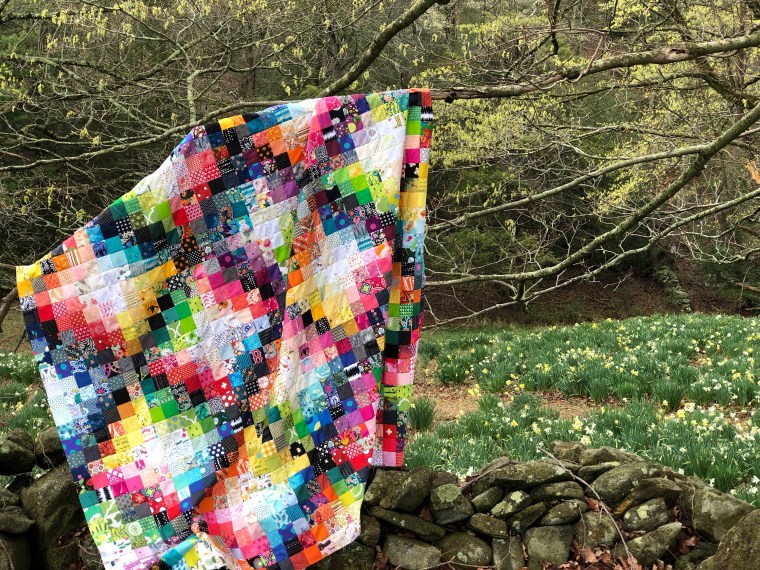
I like to photograph my quilt tops before they are quilted and bound for a few reasons. When I finally get the top finished, the first photos feel like a bit of a celebration. It’s also easier to travel with quilts of this size before they are quilted and bound, because the weight of something 68×80″ is heavy. My husband always helps me with the full size photos, so it’s also good that he’s not standing there, arms completely outstretched, trying not to let a heavy quilt hit the ground. I think it’s fun to see my work out of the studio, so “Quilts in the Wild” is top of my photo list.

These photos were taken at the Northfield Daffodil Farm in Litchfield, CT. It’s a magical place with rolling hills and so many beautiful flowers. This is was the second time (and second quilt of mine) photographed here.


I sent this to be professionally longarm quilted by Jen, http://www.knottedthread.com. I chose a continuous Baptist Fan pantograph and I think she did a wonderful job.

The backing is of sea turtles and the binding is a Moda Fabrics grunge. I like how the binding matched the sea turtles, but also framed this span of so many colors.


Quilted and bound, I took it to Massachusetts for one more photo. It was just the burst of color needed by the sidewalk on this cloudy, spring day. If you look closely, you can see those turtles peaking out at the upper right corner.
While there is truth to the way my husband would relay the story of this quilt’s making, I look at it finished and I’m thankful I continued on. Isn’t that the way with most things in life? It’s the mentality to keep going that will get us where we need to be. Within these one thousand five hundred and twelve squares are fabrics from my very first quilt, made over a decade ago, as well as pieces from almost every one in between. I’m definitely seeing repeats and I notice the gaps in my own stash. This one will be staying at home with us. I made a considerable dent in my scrap squares and celebrated using every little bit.
It’s just a fun, cozy, colorful quilt, made with love.
All photos and content property of Two Terriers Studio and not to be copied or distributed without written consent.

It’s been a LONG time since I’ve shared stories of quilts here. I didn’t realize how long until I started this post, but hello again, I’m glad you’ve joined me. I’ll be catching up with stories and photos of many quilts (some from 2022!) and travels very soon. I hope you’ll come back and visit.
This project was a pattern test for my quilt designer friend, Morgan, of www.modernlymorgan.com. She and I have worked together several times and when she asked me to test / review this pattern, I was happy to do it. Pattern testing gives me a path to keep my editing skills fresh and to work with talented makers, as well as having a sneak peek into yet to be released designs. It’s all good.
There’s a joke around the internet that buying fabric and quilting are two different hobbies. As a quilter, and fabric enthusiast, I tend to agree. I often buy fabric I love, without a clear-cut plan for it, but I know it will be used one day. Nothing goes to waste in my studio. For this quilt, I pulled a fat quarter bundle from my stash. This particular bundle is called Americana, by Art Gallery Fabrics. While it’s not specifically Stars and Stripes, the color variation is definitely one that evokes patriotic feelings. In a decade of quilting, I’ve not made a patriotic or Independence Day summer quilt, so this seemed the perfect time. I purchased this bundle from another friend, Jen at www.knottedthread.com.
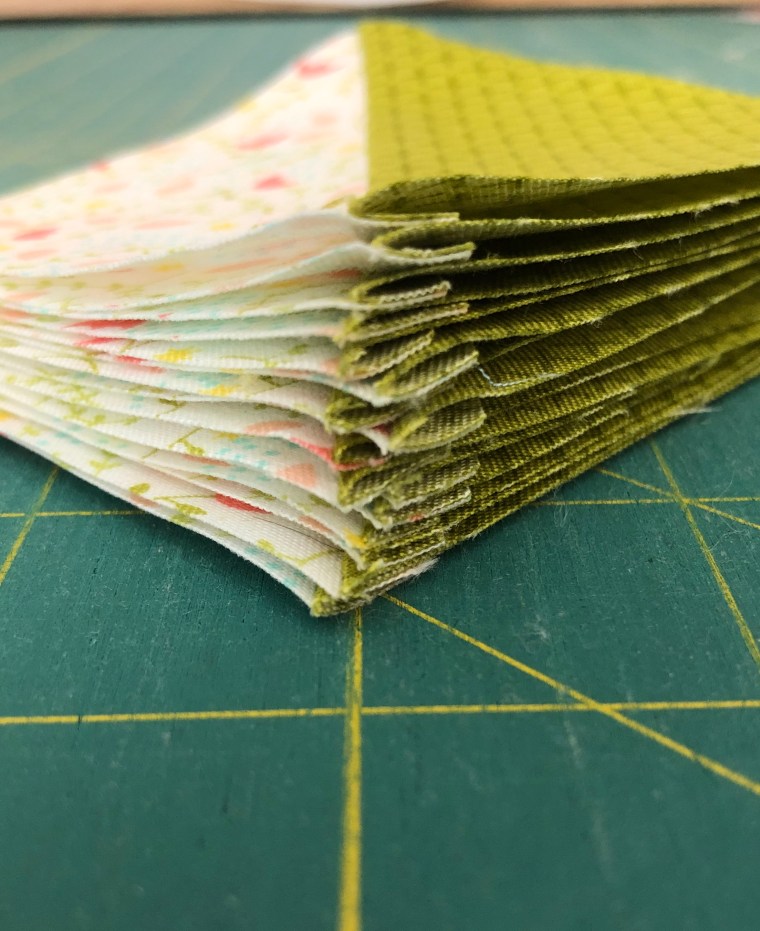
There’s something so beautiful about freshly cut fibers, stacked neatly together. To take yardage, cut it apart and reassemble into something new is a wonderful thing.
Half-square triangles in the making. I’ve only recently started using Seam Tape when piecing HSTs. It certainly cuts down prep time and results in accurate measurements too.

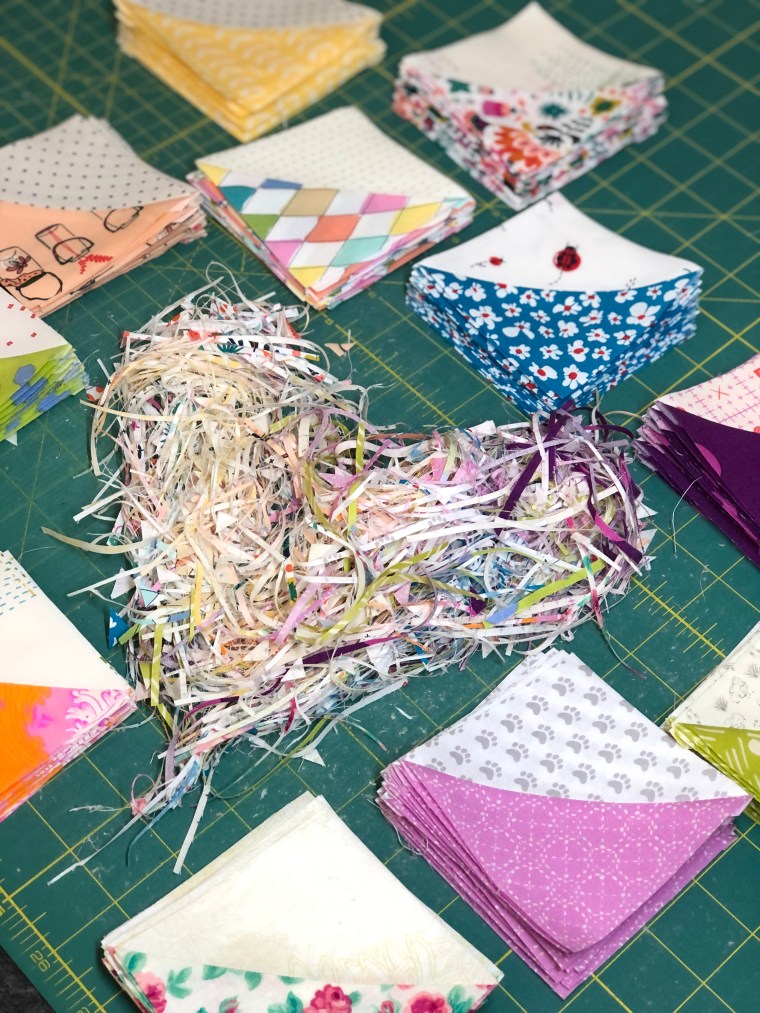
Fabric confetti is an unavoidable “work hazard”! Even these tiny pieces have a purpose. I donate these to a friend who uses them as “stuffing” for bedding for local animal shelters. It makes my heart happy to know that nothing goes to waste and that these trimmings give comfort to an animal in need.
The instructions for this quilt are very straight forward and allow for a lot of chain piecing. I like the repetitive nature of matching blocks and being able to sew several sections all at once and then work on the layout by color value / design. Morgan’s patterns are precise and easy to follow. I never question the math or accuracy, even in the “testing & editing” phase.
I rely on a few tools in my studio to enhance my quilt blocks. A wool pressing mat, tailors’ clapper, a HOT iron (no steam) and Faultless “magic” spray. This is not a sponsored post (although, I wish it were!), but here’s a glimpse of some of my favorite tools. The combination of these really helps to create flat seams and we all know that flat seams build flat quilts.

Seeing these photos reminds me, again, how long it’s been since I’ve blogged! I started this quilt while there was still snow on the ground. The colors brightened those winter days and made me look forward to summer picnics and celebrations. This quilt has traveled all around the eastern USA; see the sights below.
The pieced top, not yet quilted, traveled to Florida. For my family, the beach is among our favorite places to be, so of course, I needed to photograph this here. I do travel with quilt tops; I like the varying scenery for backdrops, but it also blends my hobby/work with family adventures. My husband is my trusted quilt holder & photo assistant, and thank goodness he’s tall and willing to hold these for all the photos! I literally couldn’t do this without him. He’s my biggest cheer squad too.

I sent this quilt top to NJ to be longarm quilted by Jen, at Knotted Thread. Her work is the exact finishing needed to bring these to life. I went with a swirl and star motif to balance the squares and to add a flair of celebration, as would be appropriate for Independence Day!
When it was returned to me, I brought it along on a trip to the Norman Rockwell Museum in Stockbridge, MA. Norman Rockwell’s paintings and illustrations tell the story of American life and it was not only a treat to see all his work, but the property is gorgeous too. I thought it was an ideal location to photograph my Americana themed quilt; at the home/studio of a renowned American illustrator. If you ever find yourself in western Massachusetts, stop in and see his work. It’s even better up close. I was in awe of the details – you don’t want to miss it.
This pattern comes with instructions for four sizes: child, throw (as I’ve made), twin & bed. It is fat quarter friendly and would also be great in a scrap-busting finish. You can purchase this & other designs at Morgan’s website as linked above. Check out all the other testers’ versions on Instagram too; so much creativity and inspiration to be found there!
Thanks again to Morgan for including me in the tester group. I end up with so many beautiful projects by doing this work.
All photos and stories property of Two Terriers Studio & not to be duplicated or shared without written consent.
In 2021, I joined Kitty Wilkin, @nightquilter, for her Quilt Your Life Community program. I had taken a virtual class with her prior to that & found her teaching style and skill to be very inviting and inspiring. Being a member of the QYL Crew was an obvious next step for me. Kitty has designed so many beautiful blocks and patterns; I was anxious to incorporate them into personal projects.
Thinking about the concept of “Quilt Your Life”, was both exciting and overwhelming. If you think about life, there are so many facets and measurable events. My head was spinning. It was a struggle narrowing it to something manageable. Kitty kept saying, “keep it simple, keep it simple.” I began a quilt that would track a 10-week program I was participating in, but in brainstorming what else this could be, I thought of loved ones and what I could make for them. We each have unique lives. How could I document something about each of them into a quilt-like piece of art?

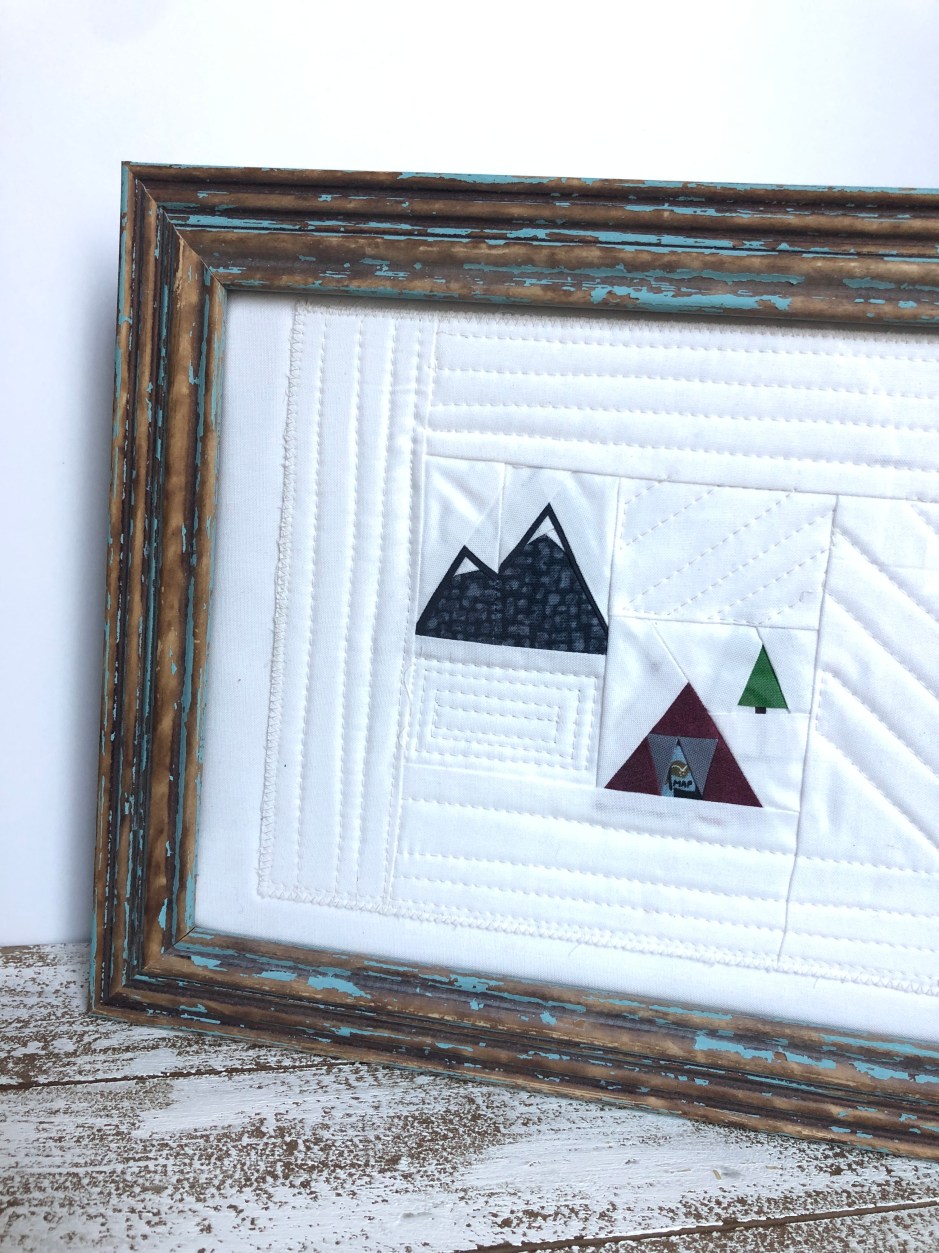
I have a niece who loves the outdoors; camping, hiking, skiing and more. I’ve not sewn a lot of things for her recently, so she came to mind for this first pass at sewing tiny “life” quilts. One of the patterns Kitty has designed is called Sew Tiny Adventures. The camping tent, pine trees and mountain ranges are perfect for this niece. Knowing I wanted to frame this piece, I upscaled the pattern about 56%; it’s still tiny.
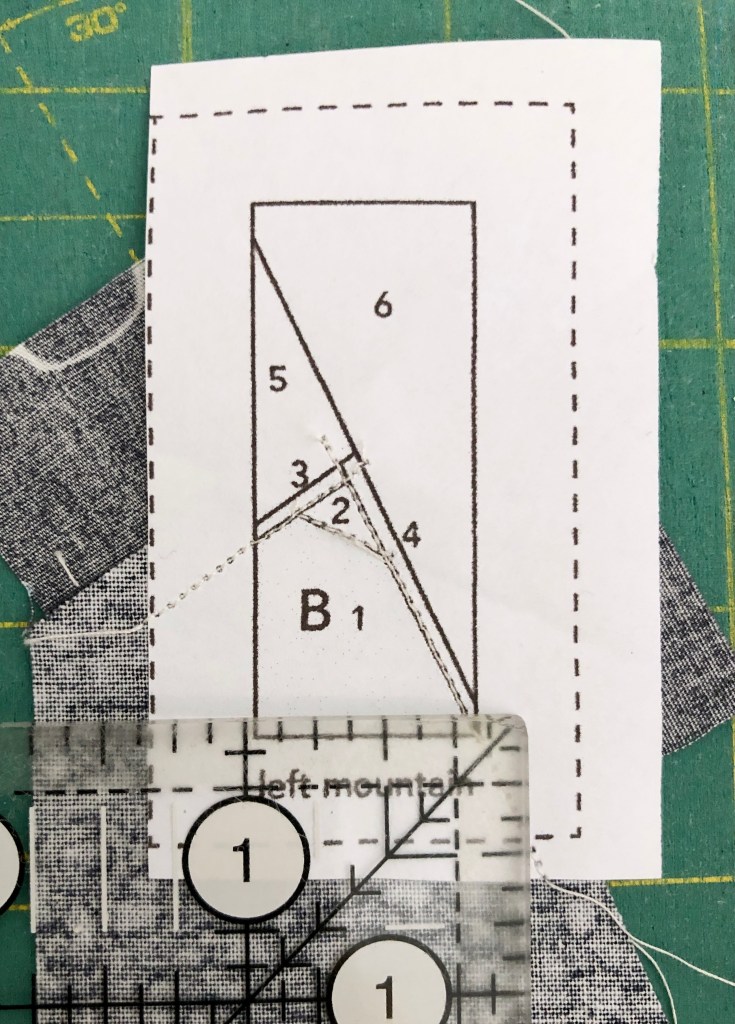
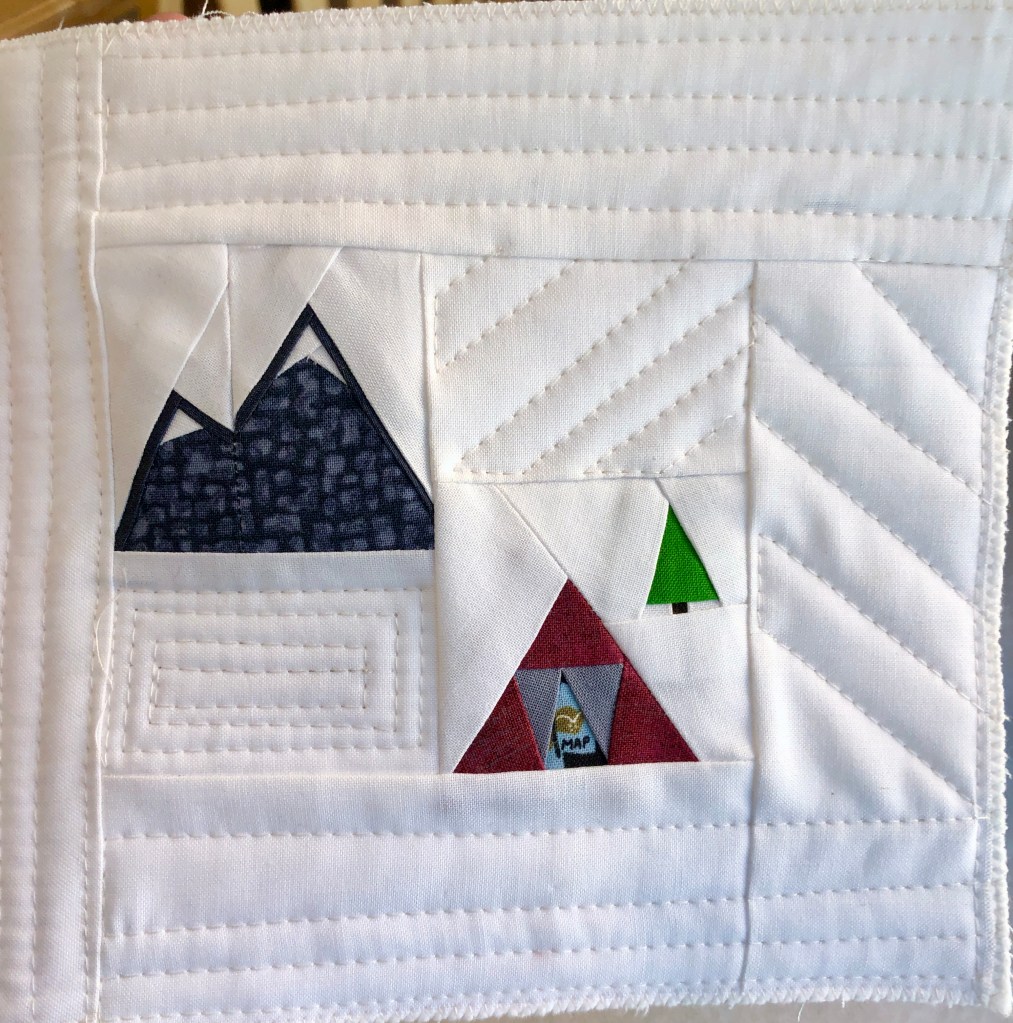
These blocks finish under 1.5″, so I needed to join them & then border with more fabric to fit the frame. This is finished like a quilt with wool batting and quilt cotton backing. It’s signed & my logo is attached, in the event the piece is ever separated from the frame. The informal tent, tree & mountains called for simple straight line quilting. Just enough texture, but leaving the images to stand on their own.

Now that this is finished & gifted, I’m able to share here. My wheels are in motion once again about what might come next. I have my own 10-week milestone quilt to design & finish. To be able to share a mini-quilt, personalized to a loved one, was FUN. It’s one of a kind and that’s always a good thing, right?
Get outdoors; live and document life!
Enjoy…
All photos and text property of Two Terriers Studio; not to be copied or distributed without written consent of the author.


Awhile back, as in 2019, I purchased fabric called “Dorothy’s Journey” featuring the story of the Wizard of Oz. I have so many personal connections to Dorothy, Kansas, friends along one’s journey and last but not least, it’s a favorite movie of my children when they were very little.
Like I do, I saved the fabric. I saved it for two years. I didn’t cut into it because I didn’t have a plan, so Dorothy & her friends sat patiently in my studio until the end of 2021. I’ve committed to sewing my stash & taking those “must have” bundles from the shelves and turning them into something handmade. What I didn’t realize is that posting my fabric was going to lead to a friend also proclaiming, “I have to have that…what can you make?”

I had already been cutting blocks for a quilt I wanted to make & keep, so I sorted through what I had left & I didn’t have enough to make something for her too. I scoured online shops & the options were slim or the prices were high. I gave my friend, Rachael, some guidance on where to find the fabric, with the caveat, “the price has gone up quite a bit; are you sure you want to do this?” Her answer was a confident, “Yes, I’d love a mini-quilt for the retreat center”. I’ve sewn for Rachael on several occasions and she gave me an open path on what the end product would be. Some time later, a package arrived with a note and yardage. The plan was set in motion.
My sewing machine was in for service, and this appointment kept me from getting started right away. When it came back with yellow thread in the bobbin, I took that as a pretty entertaining coincidence. I piece all my projects with neutral Aurifil thread, so this golden string was a surprise, but the perfect start to this mini-quilt.
The feature fabric highlights the cast of characters from The Wizard of Oz. I decided to fussy-cut, or meticulously cut, as the case may be, these images into the equal squares. Dorothy would be the center and surrounded by the others. I used a block pattern called Tell Me a Story, from the book, Intentional Piecing, authored by Amy Friend. In addition to the fabric sent to me, I added the yellow print to tie-in the concept of the yellow brick road.

I like how the names of the characters is included; it tells the story a bit, for those who may not be familiar with it.

With the blocks being foundation paper pieced, they are easy to assemble. I use a mini iron and wool pressing mat to prepare my seams.
I never realized how challenging it is to photograph metallic fabric until I worked on this project! These silver clouds look so different in real life, but wow, the photos don’t do them justice.

This mini quilt is backed with the pink floral print. It is approximately 18.5″ square. Dorothy is the central figure, her best friends – the Lion, Scarecrow, Tin Man and little dog, Toto, surround her. The peripheral characters, Glinda, the Wicked Witch, the Wizard, and the Winged Monkeys are there too. For those who know the story, so much is captured here.
Now that this has arrived at Rachael’s home, I can share here. I have set aside my own “Dorothy’s Journey” fabric, so stay tuned for what my 2019 purchase becomes. I sure hope it’s not another year before my personal project is complete!
Enjoy & remember, there’s no place like home.
All photos and text property of Two Terriers Studio; not to be duplicated or distributed without written consent.
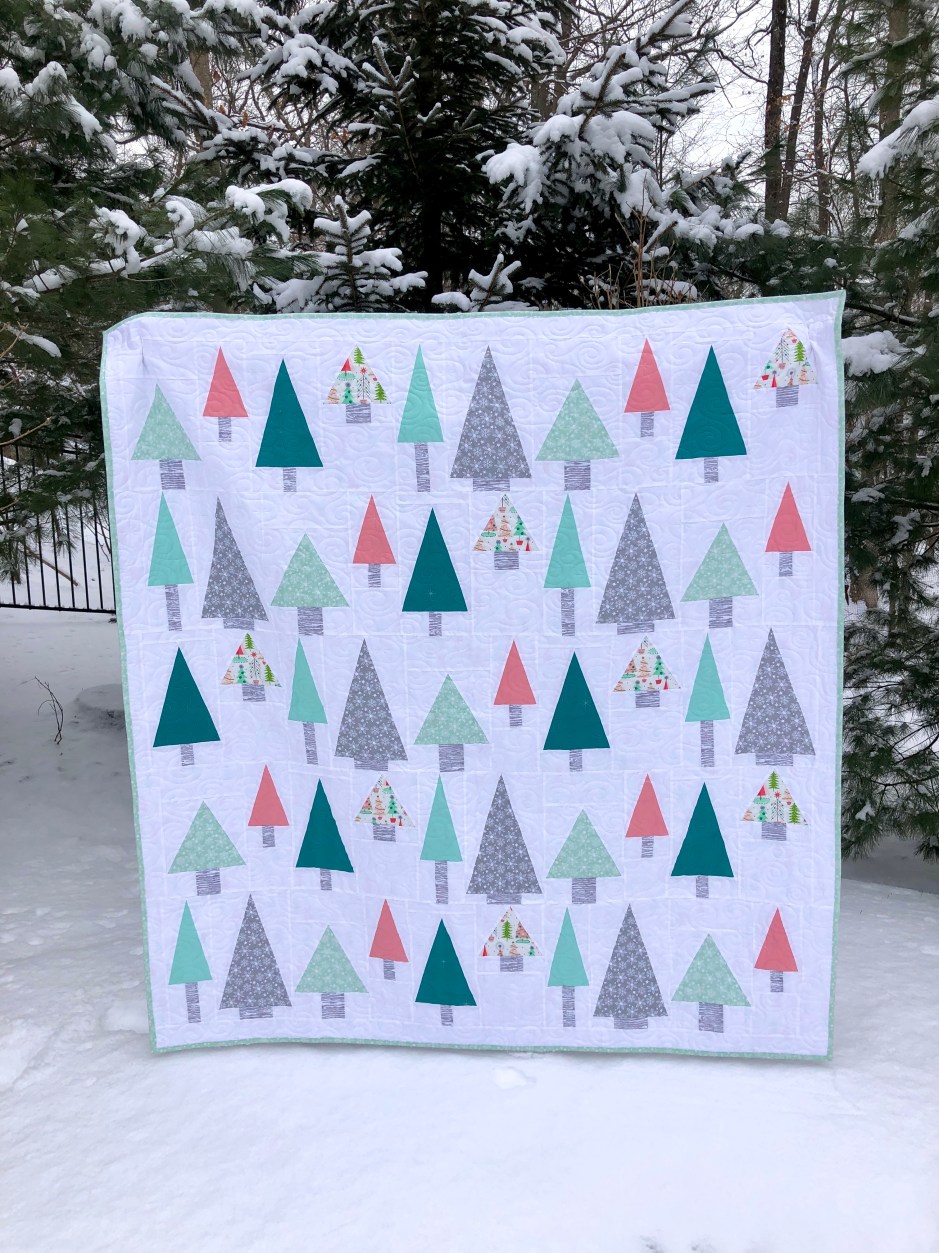

Looks familiar, right? It’s February 2022 and this has been in the works for a couple of months. Other quilts have been started & finished, but I fell out of habit getting blog posts written during the holidays, so let’s catch up.
If you’ve been a reader for awhile, you know I sew or quilt almost daily. I test patterns for several designers and I write about those quilts & my experiences here. Often, when I test a pattern, it happens to align with a holiday, a seasonal shift, coincidentally with milestones or the birth of new babies. When that happens, I head into the test with a particular person in mind and I choose fabrics that will work well with the quilt, but suited to a gift I also want to make. It’s a win-win. There are also times I make a quilt, knowing it’s a gift, but I want to have one for myself too! This second version of the Holiday Hills Quilt is kind of like that. I made the first version for my family, knowing full well that my sentimental, holiday loving, decor enthusiast friend needed one too.
I’m blessed with a multitude of creative family & friends. I’m inspired by their work and frequently, we share work or “barter”, for lack of a better word. We encourage one another, while also learning from each other. It’s really cool. I was speaking with my friend, Tammy, in late 2021 and she said, “I’d love for you to make me something; maybe a quilt?” Not only is she a friend, she’s been a solid customer too. She has supported my business from the beginning and owns multiple Two Terriers Studio creations. This particular discussion came on the heels of taking inventory of all the quilts I’ve made & gifted and even stacked in closets in my studio. Quilts I’ve tested, ideas that were started & left unfinished. Quilts on my “to make someday” list. Her comment got my wheels churning. I was watching her decorate her new home for the holidays. She has such an attention to detail that I knew her quilt would be best suited with the holidays in mind, in the color scheme I saw in her home. I wanted it to be a surprise, but I have learned that with the amount of hours it takes to complete a project like this, keeping the fabric a secret was not a great idea. I needed her input or approval first.
Tammy’s favorite color is teal / aqua. Little pops of it show up all around her world! As I started looking into fabric, I found this collection by Maude Asbury for Free Spirit Fabrics called Fa La La. I felt that it was perfect for her & she gave the “thumbs up”. It was all she knew about what was in the works; the rest I kept to myself. I’ll tell you, not sharing the other fabric choices was a challenge. I wanted to include her, but also surprise her. The trust she placed in me to just do as I wished, was a treat. I ordered the fabric and the project began.
I realize now that I didn’t actually take that many progress photos! This was a pattern I’d already made once, so the piecing and technical issues have been documented before. It was so tempting, with every new tree, to share progress, but I stayed on task.

This quilt is 60×64″ and bigger than I felt comfortable quilting, edge to edge, on my domestic machine. Tammy agreed with having it professionally quilted & she covered that cost, as well as the feature fabrics. I sent this to Jenn, www.knottedthread.com, for the quilting. As always, amazing results. After hours and hours of cutting and piecing, it’s nice to have this kind of finish, texture, and creative art added. It’s a team effort, a collaboration, for sure.
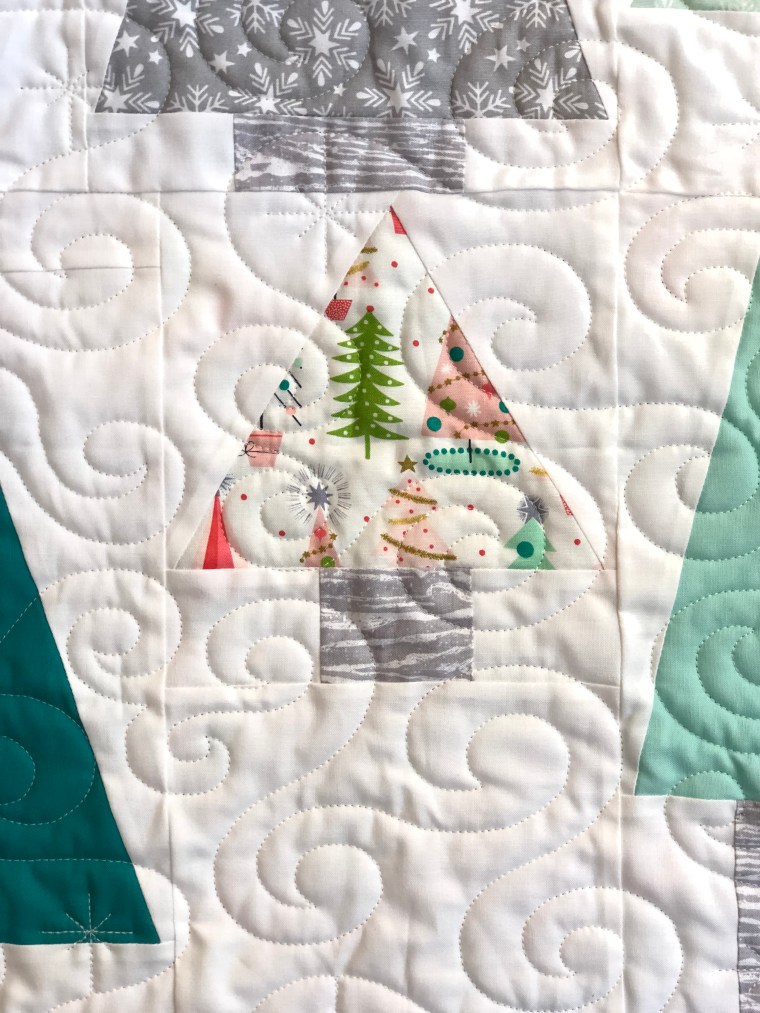
I’m certainly NOT a perfect piecing, all the time, kind of sewist, but this pattern by Raye, www.thehomebodyco.com, is written in such a way that points are not lost in the piecing of these trees. So satisfying to see it up close. Well, at least for me!
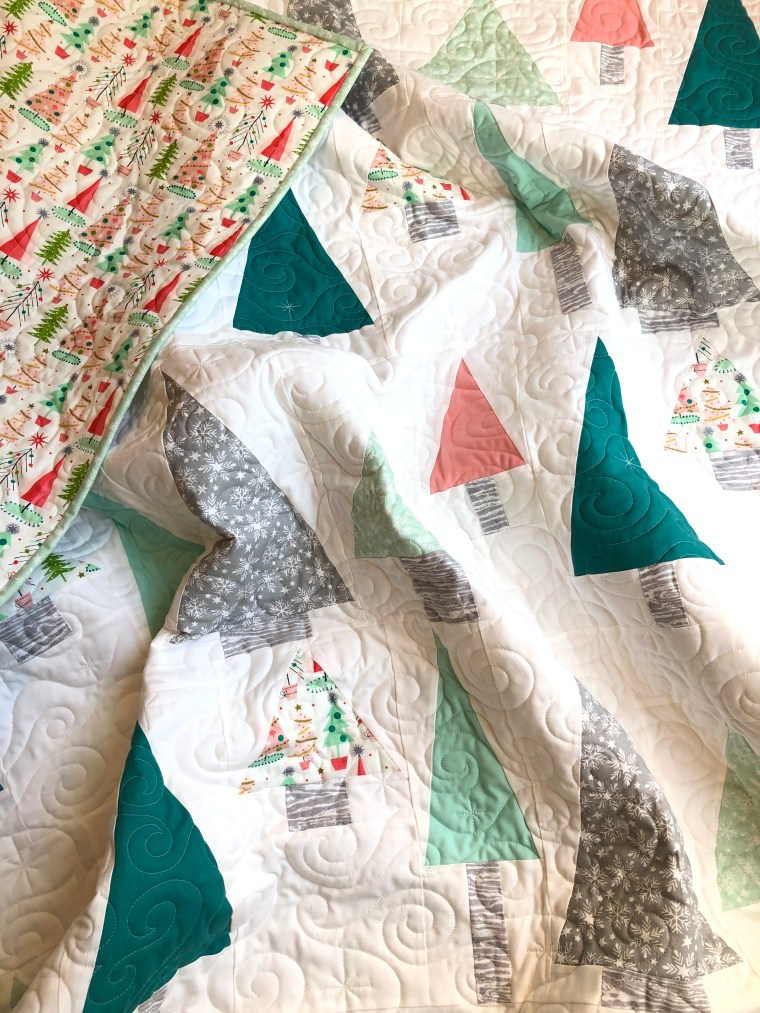
I chose this aqua snowflake fabric for the binding. With it being her favorite color, and also featured among the tree motifs, it frames the design pretty well. I try to make my binding at the time the tops are finished, but to be honest, it’s the stage at which I usually lose momentum. The secret is to gift quilts; those get finished! I don’t care to admit how many quilts are stacked in my studio waiting for this 1% final piece of the puzzle.

The original feature fabric is the entire back of this quilt. I just love it. The whimsical trees, the old fashioned-ish ornaments, images reminiscent of “tinsel” trees from the 60’s (is that when those were popular?); it all makes me smile. If she wants a pop of color, this can be draped on a sofa or the foot of a bed with the backing facing out, rather than the front.
Binding finished, one swift “shaking it out” and setting it down for a look…I exhaled. It’s as I had hoped and it embodies work beyond my own hands. Some of the swirls remind me of the first letter of my name; some of the stars, the first letter of her name, the quilty details made possible by a woman in another state. It’s good. Collaboration is good.

Last, but not least, photos for documenting the finish. New England is traditionally known for snowy winters, yet, no snow on the ground when this was done & ready to be sent. If you know me well, you know that I don’t often pray for snow. Like ever; except maybe on Christmas Eve, then not again. However, I did pray for snow the night before this photo. The cool colors of these trees, the holiday vibe & the winter forest just begged for snow. Asked & received. God is good. Today, barely a week later, the snow is mostly melted. For now. Seriously, I don’t want to jinx myself!
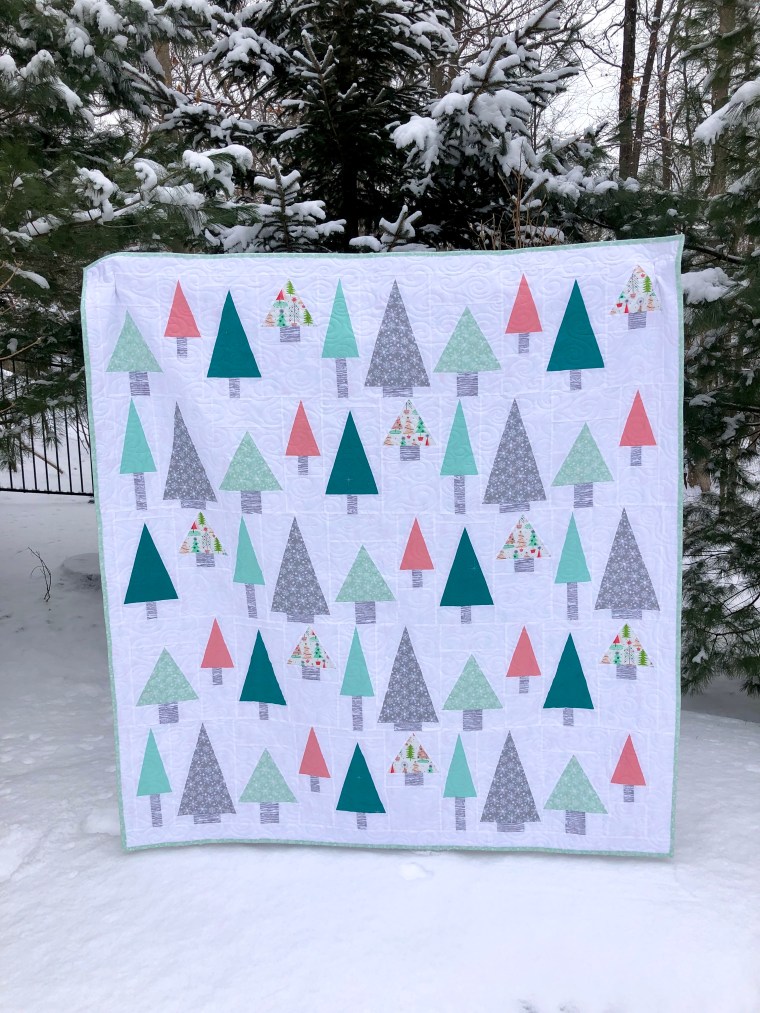
When I woke to snow, it was a good day. There, I said it. I was happy with this weather. My husband always helps with photos and if you look closely, you can see that he walked AROUND the frame so that his big footprints wouldn’t be tracked into the photo. Bonus, I didn’t even think of it, but he knew. Well done, hubs!
Holiday Hills #2 is now at home with Tammy. She un-boxed her gift on her instagram stories @whitelilacfarmhouse and her reaction literally brought me to tears. Her crying, my crying…her jokes about how “Stacey really taped-up this box” (if you know, you know). It was funny even through our happy cry fest. That unboxing moment is why I do this. I want my family & friends to feel loved. Geography doesn’t allow me to be with all the people I care about on a regular basis, but sharing something handmade, one of a kind, and made with love, can transport us across the miles. I’m so thankful for the opportunity to be able to share this skill/hobby/interest of mine with those I care about. Tammy, remember it’s meant to be used. Use it, love it, wash, dry and repeat.
Enjoy…..
All photos and content property of Two Terriers Studio; not to be duplicated or shared without written consent of the author.

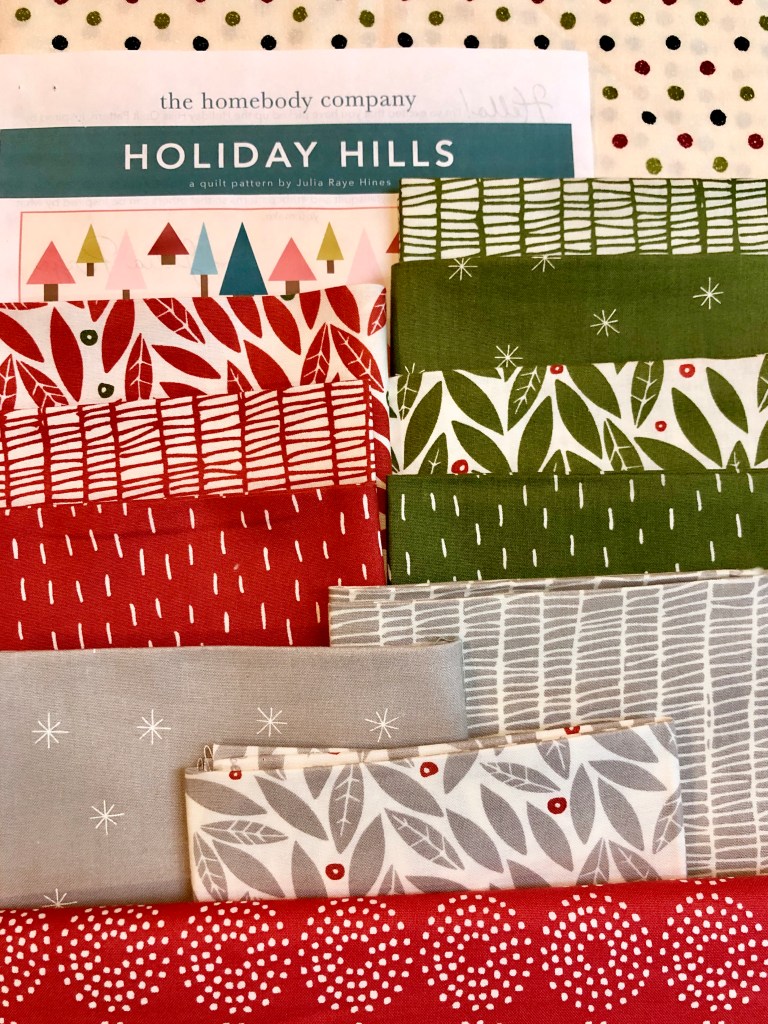
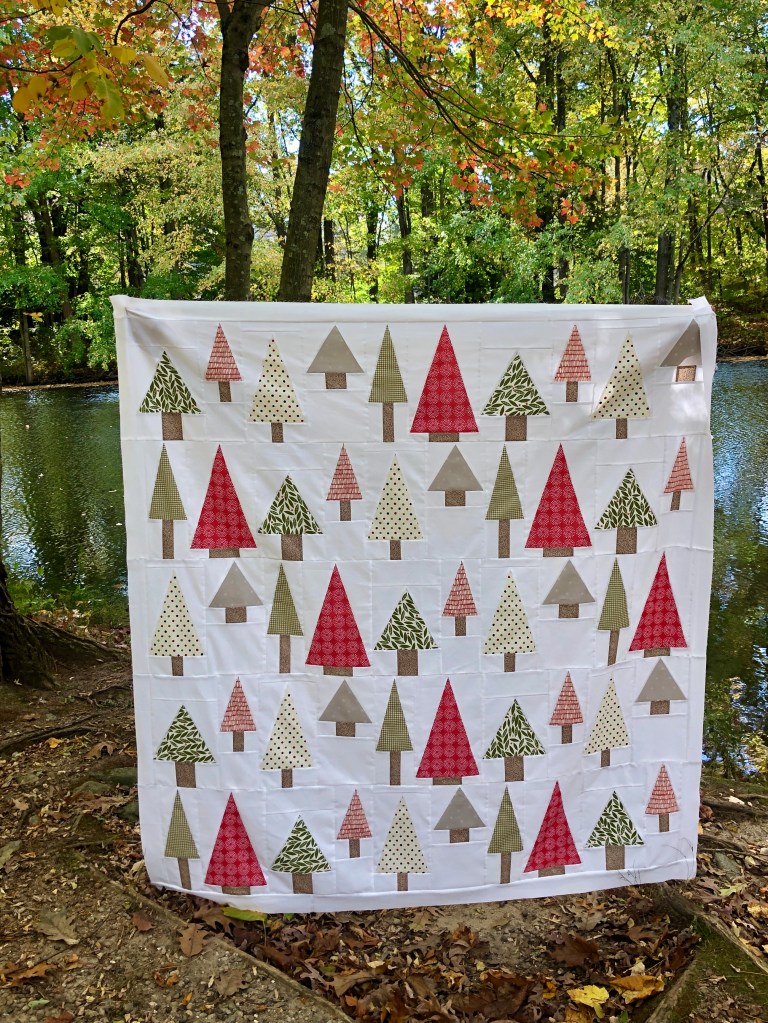
I’ve been a little quiet in this story telling space, but today is the pattern release day for the Holiday Hills Quilt and time for me to get back to the writing of these quilt stories. As the leaves change from vibrant green to red, yellow and now a tinge of orange, it’s clear winter is on the way. It’s perfect timing to prepare for the holidays and handmade gift giving, or to even make something festive for yourself. Truth be told, I will most certainly be keeping this quilt for my family.
I was fortunate to work with Raye, thehomebodyco.com, who designed the Holiday Hills pattern. She began the initial discussion with testers in 2020 and as you might imagine, there were a few other things that needed attention in that crazy year. Quilting was certainly a positive distraction, but when you’re offering a product to so many people, distractions may not be the best element in the equation. Fast forward to 2021 and this quilt was entirely worth the wait. While we all wanted to go-go-go in 2020, it was wise to settle in and wait; make it perfect. It is well-written, with precise details, easy to make and might I add, FUN.
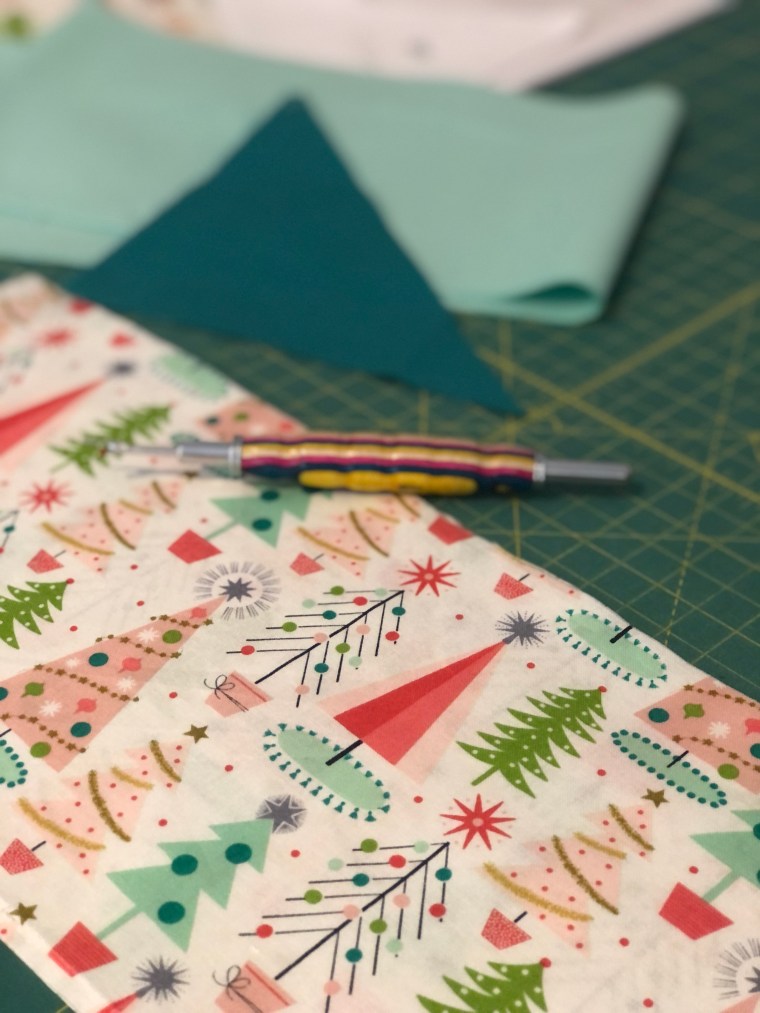
I have been mindful of “sewing from my stash”; Lord knows I don’t NEED more fabric, as fun as it is to shop and add to my collection. I did want to make a quilt with a traditional color scheme, so I headed straight to my Christmas bin of textile goodness. I pulled this collection, called Merrily by Gingiber for Moda Fabrics. Adding in some coordinates by Cluck Cluck Sew and Sweetwater, I was all set. Let the cutting begin.

There’s always something a little delightful about seeing these fabric trimmings piled together. It’s a sign of what’s to come, but also indicative of little waste, which is a good thing!

Seriously, just having these beauties lined up on my cutting mat was the inspiration I needed. I could already tell how much I would love this quilt.

If you’ve been around here for very long, you have seen the photos and heard the stories of all the creatures, great and small, we see in our neighborhood. The black bears seem to be the ones who garner the most surprise and awe, but we also have almost daily visits from deer; the occasional bobcat sighting, and often the hooting of an owl in the trees behind our home. It continues to be magical, if not also frightening at times. I mean, nobody wants to find themselves 15 feet from a bear without any warning (and it happens!). Long story long, that is what drove me to purchase several yards of this fabric. It looks and feels like home. I was shopping with my daughter and stopped the moment I saw this bolt, “isn’t this perfect?” Her reply, “what are you going to do with it?” I had no clue in that moment, but the pine boughs, deer, owl and vibe of it, drew me in. It came home with us that day! I knew I’d figure something out & that it would be used and loved.

Another common thread is my love for summer. It might seem odd that I was as thrilled as I was to dive into a winter holiday quilt. It’s not hard to be excited about changes when things go smoothly. That smoothness isn’t always the case, but in the wait for this pattern and seeing how well it all came together, I was mostly on board for letting summer fade away to focus on the next thing.

If I’m quilting a small item or baby size quilt, I’m comfortable with doing that on my domestic machine. This quilt’s size and my vision for the pantograph meant sending it to be professionally long armed. This quilting work was done by Jenn at knottedthread.com. It’s exactly what I imagined. The ornaments give a feeling of snow and wind gusting through the hills of trees, but also a nod to favorite Christmas decorations. It finishes the “story” perfectly, in my opinion.

I’m staking claim to this one, for snuggles by the fireplace this holiday season. It’s a simple theme, but each element ties together feelings of home for me. To think the fabrics were purchased years apart and that the pattern was a year in the making, it was just meant to be. Timing is everything, correct? I think timing worked out pretty well on this one.
The Homebody Company is releasing this pattern today, November 10, 2021 for purchase. You’ll find this quilt in both printed and pdf versions, as well as an extension for making a pillow and even a paint-by-numbers kit. It’s a win-win. Special thanks to Raye for including me in the tester team. It’s always a joy to work together!

Thanks for stopping by! More projects coming soon.
This is not a sponsored post; all opinions are my own. Content not to be copied or distributed without written permission of Two Terriers Studio. All data and photos property of Two Terriers Studio.

What’s the saying, “better late than never”? That applies to this post! The timing of my blogpost has nothing to do with my enthusiasm for this pattern or quilt. I finished the quilt top MONTHS ago, but I’m just now getting around to showing the final project.
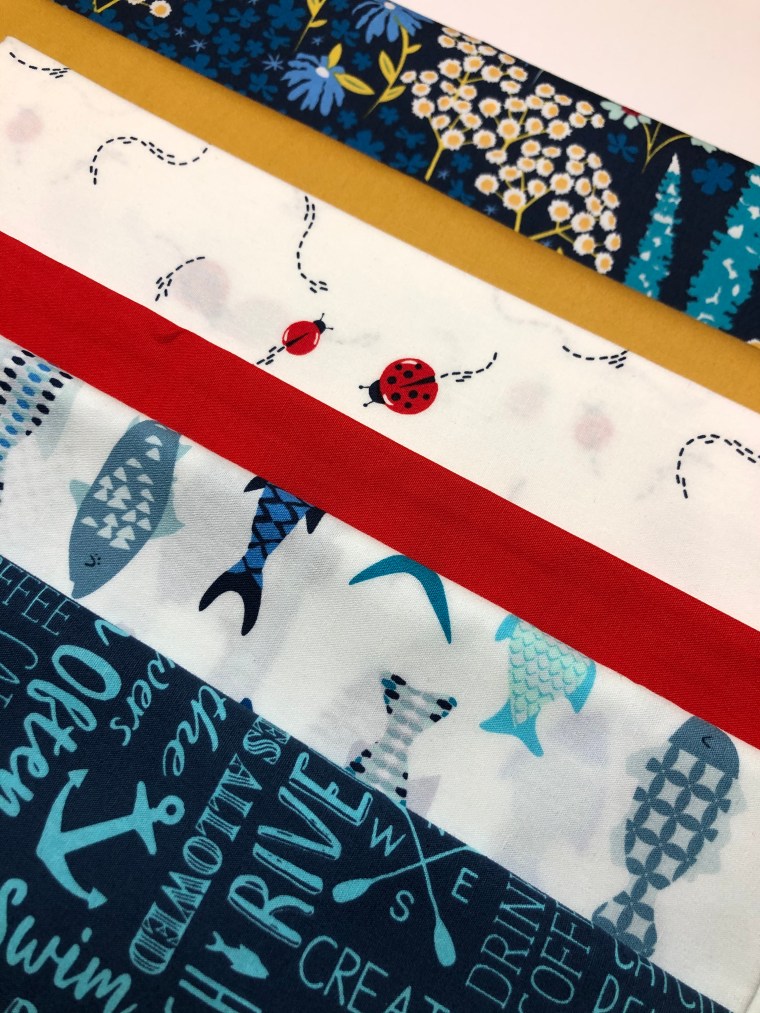
In the spring of 2021, I was asked by Karen, http://www.bloomingpoppies.net to test this pattern, the Urban Light Quilt. When I saw her mock-ups and how the color choices influenced the overall design, I knew immediately I wanted to make this. Not to mention, just wanting to work with a designer who loves improvisation, like I do.
I pulled from my fabric stash and settled on this Catch & Release collection by Art Gallery Fabrics. More than 2 years ago, I sewed for the AGF Look Book & Blog party, and at the time I was so obsessed with the designs, I purchased several yards of each fabric after the maker projects were done. I’ve hoarded it a bit over the past couple years, but finding ways to incorporate it into new quilts has been nice.
The Urban Light Quilt comes in 5 sizes, I made the large throw. One thing to note about this quilt is that the blocks are large, they repeat and make for a fast finish. The cutting instructions are very easy to follow and if my memory serves me correctly, I was able to put this together in just a couple days. I preface that with the reality that I have few distractions and blocks of time each day to sew. In any case, it’s not a pattern that will take much time given the design and overall block size.

There are traditional elements like flying geese in this design. I love the no-waste approach. I did incorporate text fabric in my quilt and while some of it “reads” correct, directionally, I decided to not be too fussy about the blocks individually. With this particular print, the text is multi-directional on it’s own, so there didn’t seem to be an “up” distinction anyway. Also, with a square quilt, who even knows which direction it will be used on any given day. It all works out; don’t sweat it.
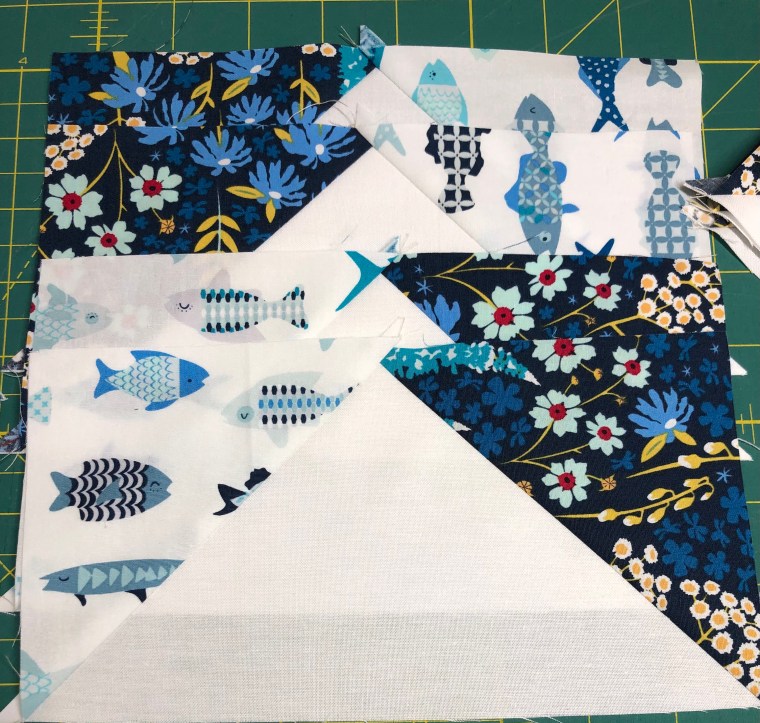
Aren’t the fish & florals just a perfect nod to summer? I think they are so sweet. There’s something whimsical about it that made me look forward to summer days.

This block, on its own, would make a beautiful pillow cover to accompany this quilt.
My favorite color is red and I chose to add a pop of this AGF Pure Elements Solid to the mix. In my opinion, it’s the perfect, clear red. I believe it’s actually called “London Red”. Favorite color and one of my favorite vacation destinations, how could it not work?

As I mentioned, this quilt top and the pieced backing were finished in the spring of 2021. Snow was still on the ground in New England, but this bright fabric was calling for summer. I really like the simplicity of the blocks, but each time I look at it, I see another element in the design that pulls my attention.
Fast forward to summer, June 2021 to be more specific, and my Urban Light is back from the longarm quilter. I brought it along on our family vacation, knowing that these water colors, fish, florals, and the patriotic feel would be perfectly photographed at the beach.

I chose an edge to edge pantograph that mimics the ripple of water. Don’t forget that the thread and this quilting is yet another element to be considered. After all the work to piece it together, I have to remind myself that there’s one more decision to be made. No time for snoozing. With so many angles, I like the smooth curves and motion across these blocks. The binding is done in a small floral, framing it all in red, white, and blue.
This is a pattern I would highly recommend and it’s available on the designer’s website mentioned above. Take a peek at her account or follow the hashtag to see the other tester’s variations; it’s interesting how color choice changes the look of this quilt. Seeing my own version, sometimes the center appears to be a floral motif, sometimes I notice the stars, sometimes it’s the POP of red. How fun to have a quilt with such dimension. I love it and hope it brings cozy snuggles to anyone who gets a chance to use it.
I’m appreciative of the opportunity to work with Karen & to have tested this pattern. I’ve worked with her again since making this one & that second quilt will be posted soon!
Happy Quilting…
All photos and content property of Two Terriers Studio; do not replicate or distribute without permission. This is not a sponsored post.
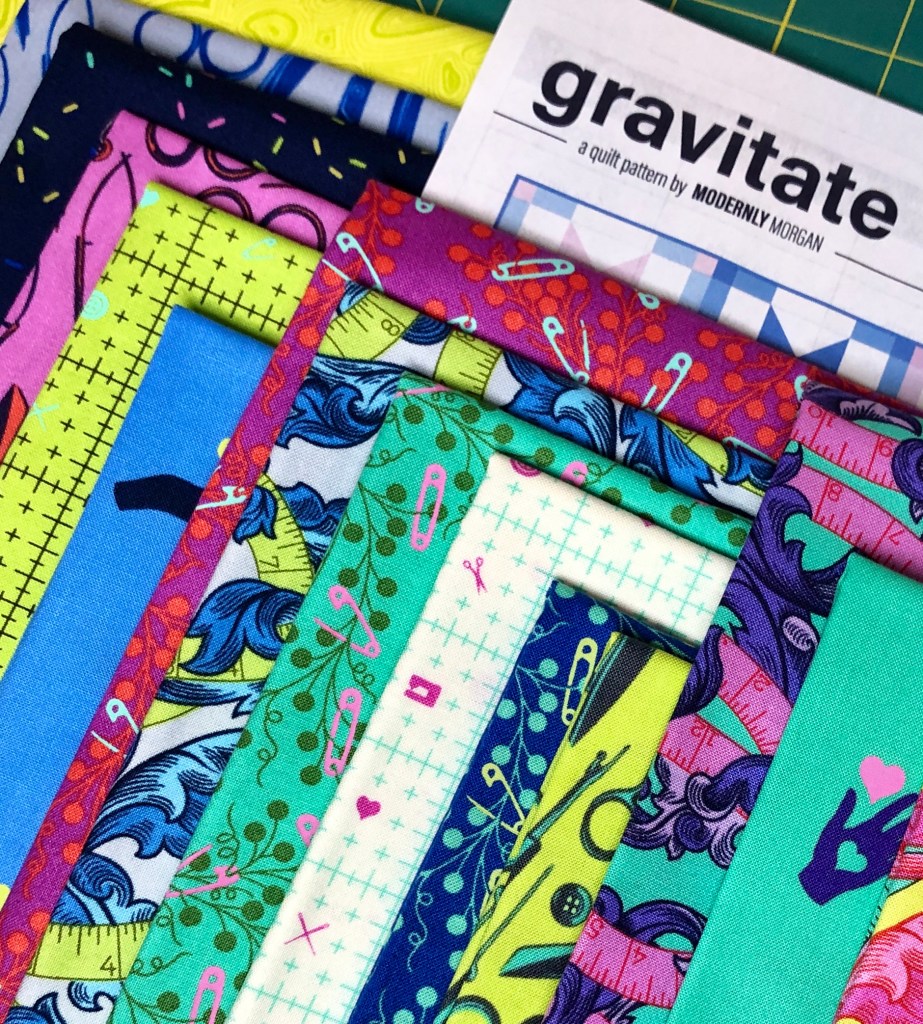
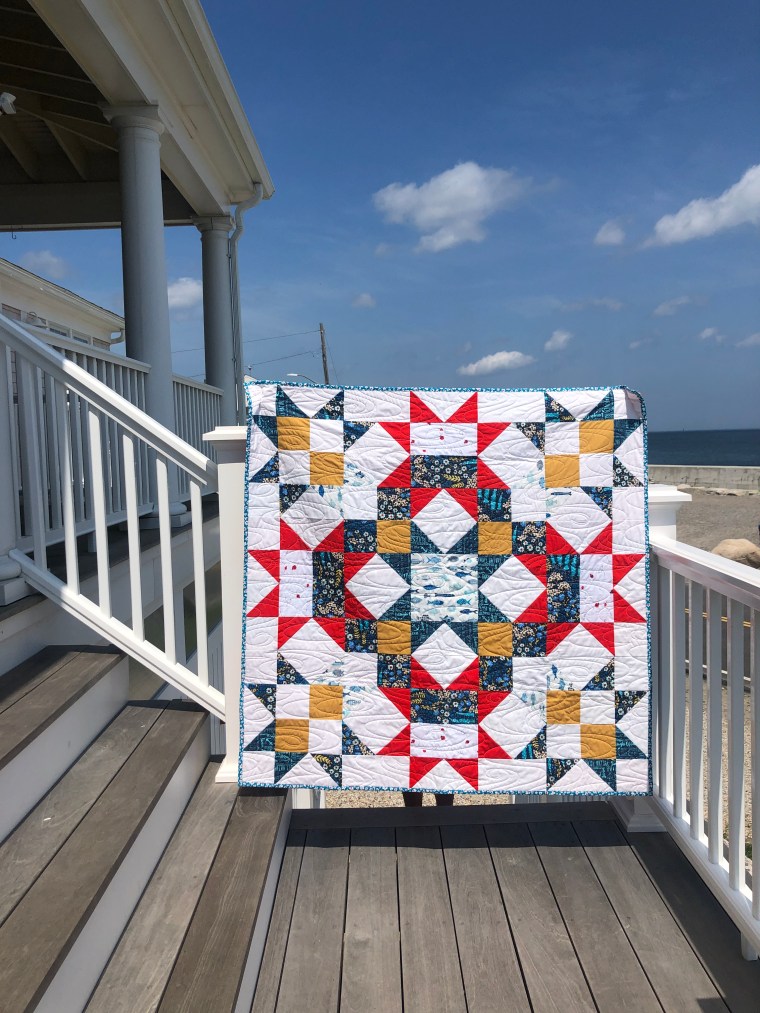
Summer, sunshine and star block quilts. It’s a winning combination, as is this new pattern by Modernly Morgan (www.modernlymorgan.com).
Having tested Morgan’s last pattern, the Cozy Cabin Quilt, I was definitely excited when she asked if I’d test this one as well. She and I share a love of star blocks and stash-busting quilts, so I knew it would be a great project. It’s a fat quarterly friendly pattern, and I decided to cut into my Tula Pink “Homemade” bundle. In this process, I learned that accuracy is important before making the first cut. Not all my FQs were accurately sized, so I had to swap a couple in the preparation process. This pattern is designed with very little waste, so having a FQ that is too small (it happens!), is something to take notice & choose accordingly.
I do use a wool pressing mat and a mini Oliso iron when pressing blocks. My family gifted both these tools to me and I use them both every single time I sew. For me, it sure beats moving to a large ironing board over & over while making blocks.

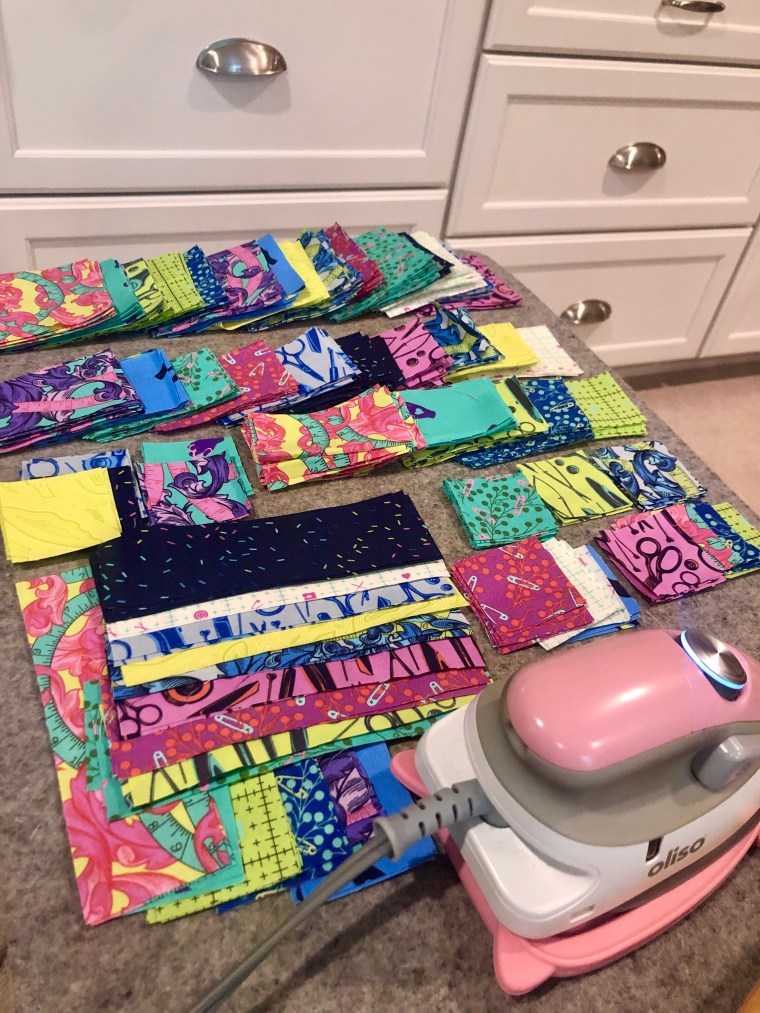
In making this quilt, I looked through each of my cut pieces and assembled piles or sets of each block I intended to make. Sometimes, I choose as I go. This time, I knew I’d be working in more fragmented sewing sessions as my calendar was a bit hectic. Setting aside all the pieces and being able to fit in a block here or there made the most sense. I definitely fell into a rhythm and the written directions are so clear and concise, I was able to pick up a block set and sew as time allowed. I’m still amazed at how quickly a quilt of this size came together, even with my studio time being less flexible recently.
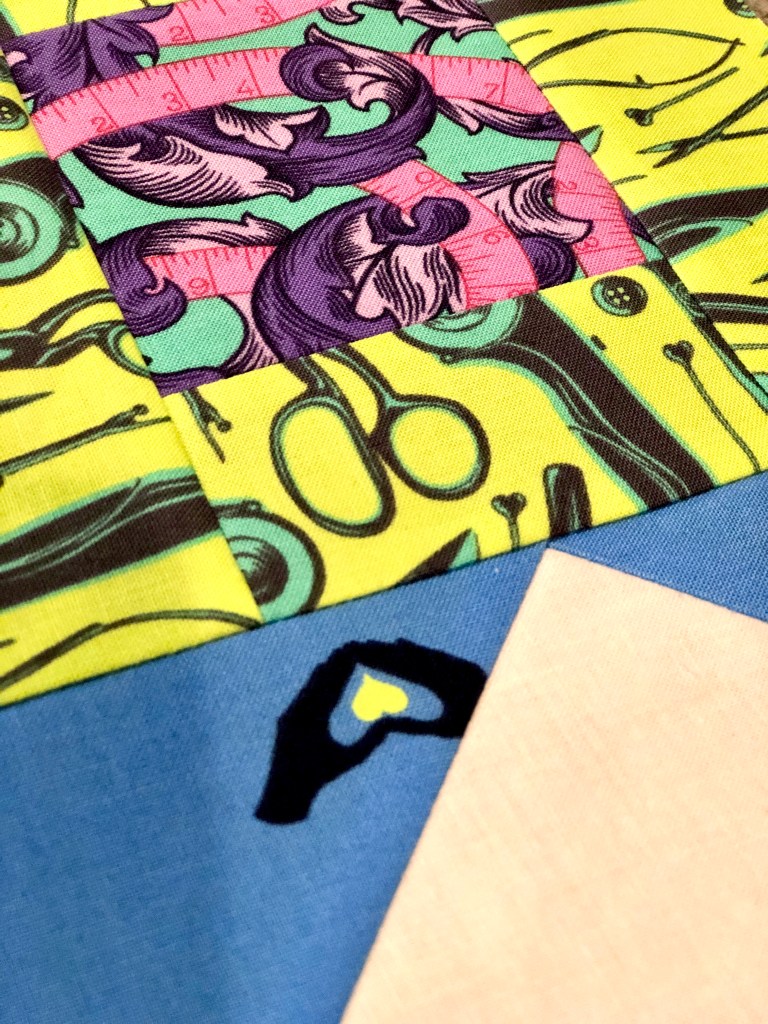

I have always been a fan of bold graphics and colorful fabrics. I keep a bin of Tula Pink fabric for those moments when the feeling, “I need a BRIGHT quilt”, strike. Because I like a scrappy look and her collections are so well matched in color and tone, I find it easy to blend prints without too much worry. This particular line, “Homemade”, features all things sewing related. It’s perfect for me & my hobby-loving heart. I will say that I’m not 100% focused on directional fabric matching every single time. None of my quilts are on beds. They are all used for picnics, days at the beach, watching movies or wrapping up little babies for warmth. That being said, the directions shift with each use, so I’m personally OK with the fabric facing different (all?) directions. Of course, if there is a specific need for it to be directional, I make that effort; it mostly applies to text print. It’s fair to say, I’m not overly fussy when I know it’s a quilt I’m keeping for myself or my family.
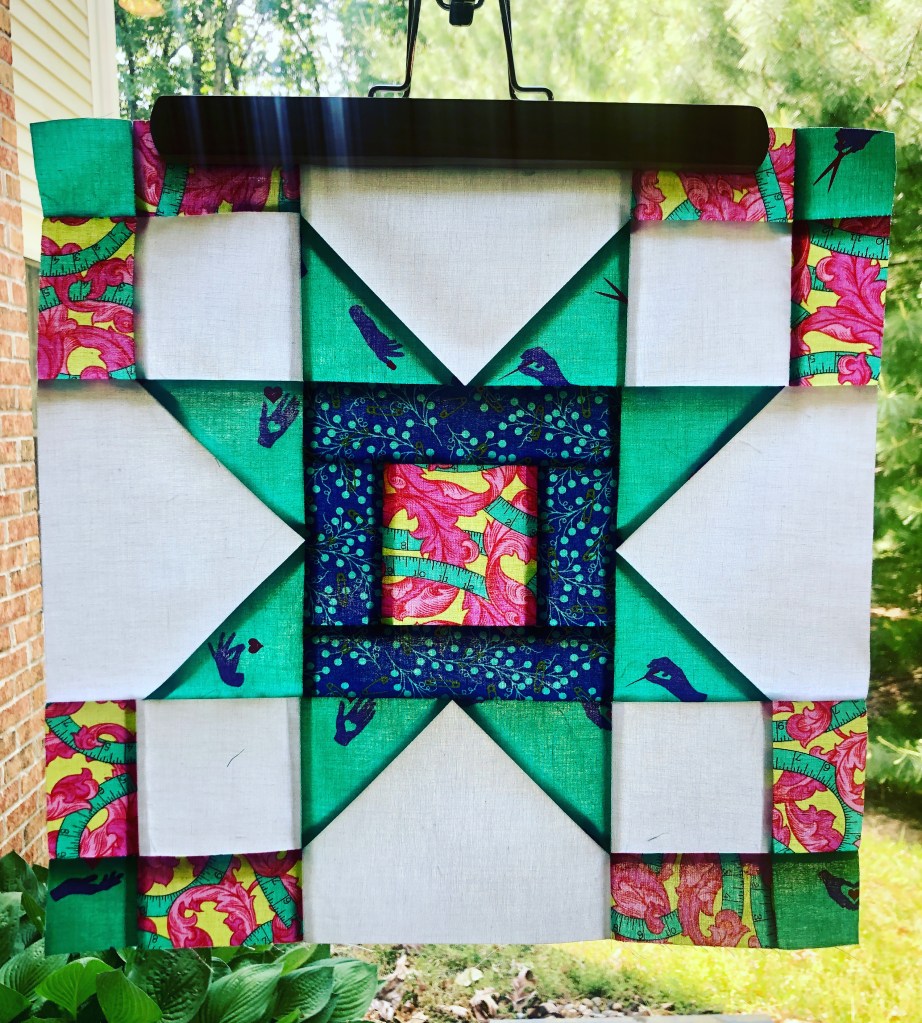
Once all the blocks were made and the quilt top was pieced, it had to be a quilt swirl! In addition to my love of quilting, I also have a sweet tooth. This type of swirl is all the beauty, none of the calories. How could I resist?
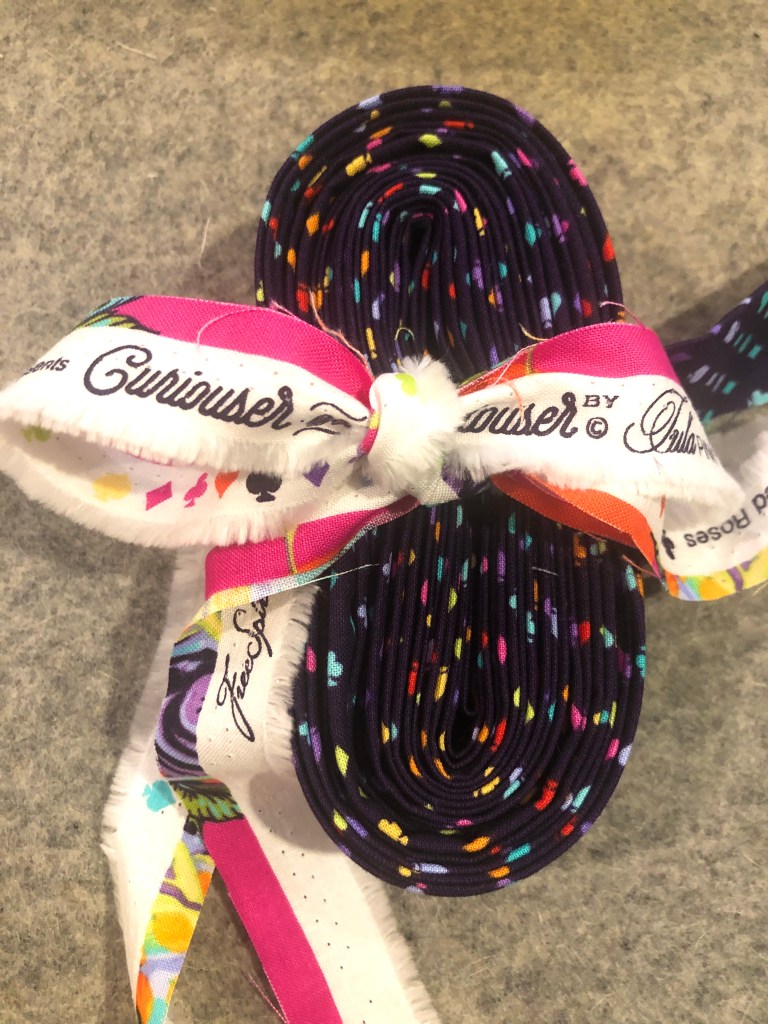
As you can see, I blended a few collections here. Homemade, Pom Pom, True Colors and Curiouser & Curiouser. For those of you who may be new to fabric acquisition, my one bit of advice would be to choose a favorite fabric and buy enough of it for a quilt backing at the same time you buy a bundle. I didn’t always do that & now I have a stash of beautiful fabric bundles or precuts or maybe even smaller yardages, but not always a piece large enough for a large backing. If matching matters, this is a helpful tip. If not, ignore it. For my Gravitate Quilt, I wanted it to be cohesive. Thankfully, my local quilt shop had just stocked this newest line of prints and I was able to purchase enough to finish my quilt. They did not have yardage of the other collections. I’ve been working very hard to not purchase new fabric until I use more of my existing fabric; Lord knows I have enough already.
This quilt was quilted by Jenn, @knotted_thread, on Instagram. I cannot say enough good things about her skill and customer service. She is responsive, reasonably priced and I’m happy with the finish work she did on this piece.

I anticipate this being a well-loved (ie – often used) quilt, so I opted to machine sew the binding. Most of the time, I machine sew to the front and hand-bind to the back. With this one, it’s all machine sewn. It’s a little stressful for me, because I know hand-sewn is more precise and “hidden”, but I also know I can only get better at machine binding if I actually practice. Finding a good thread match is key; especially in the learning stages.
Thank you, Morgan, for including me in this pattern test. I’m already envisioning this in different color-ways and looking forward to making another. Special thanks to my HHQ, “husband holding quilts”. He so willingly helps me scope out locations and keeps my work from getting dirty, or in this case, sea soaked.
If you’re looking to make a star block quilt, definitely check into this one.
Happy Quilting!

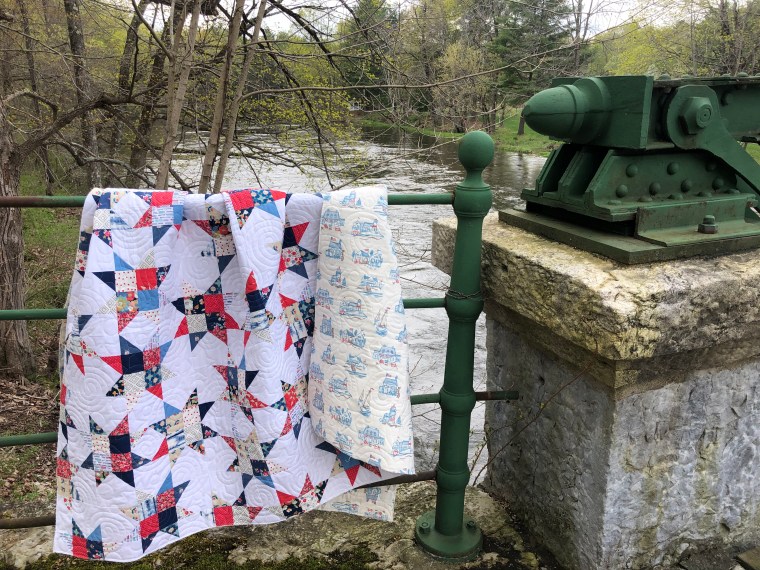
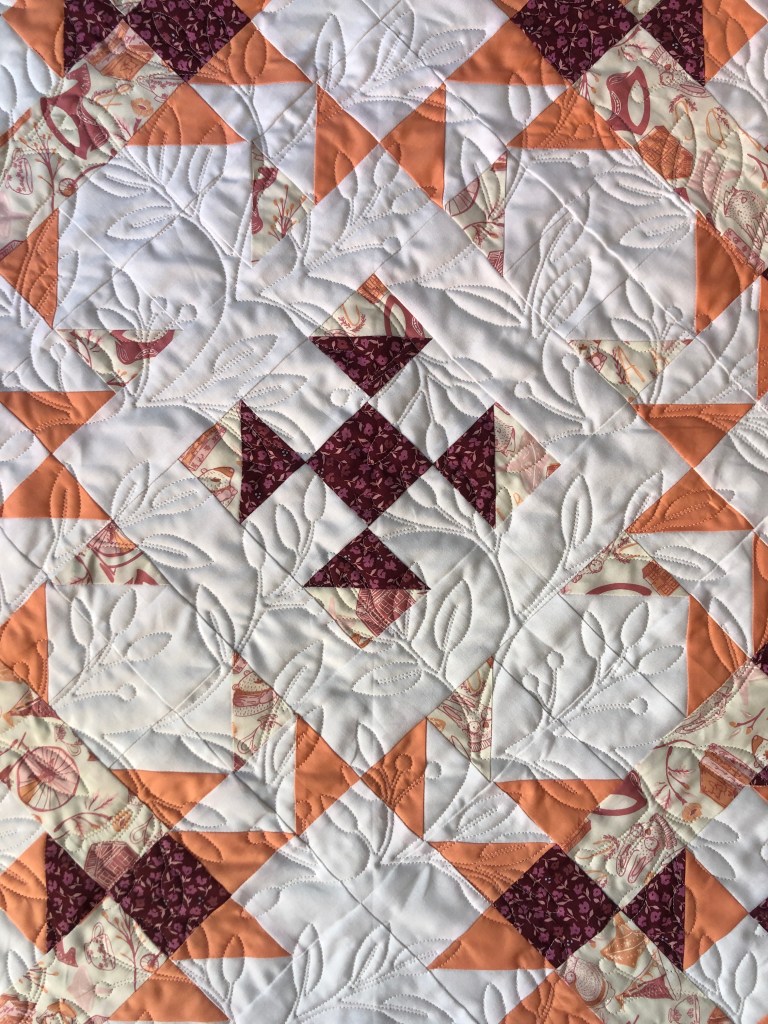
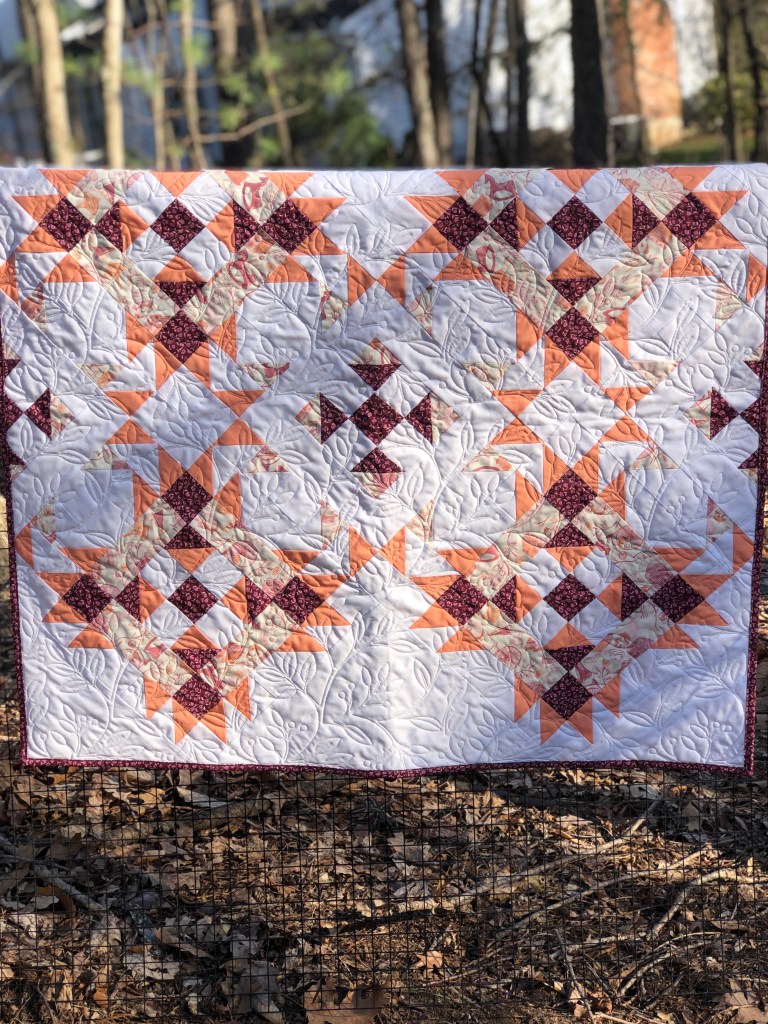
It’s now May 2021 and I’m ready to be outside, enjoying all the spring gardens have to offer. Coincidentally, it’s also pattern release day for this latest quilt, designed by Brittany Tunison for White Plains Quilts. Meet the Garden Paths Quilt!
When the opportunity to test this pattern came up, I had zero hesitation. All of Brittany’s patterns are well written and make creating a unique quilt a breeze. I had recently seen a fabric by Art Gallery Fabrics http://www.artgalleryfabrics.com called “Little Clementine” and it was the catalyst for this color scheme. I was drawn in by the whimsical graphics of animals, florals, lettering, bicycles and more. The peach and plum colors are a bit out of the box for me, but I really love this print. I asked Brittany to “kit” fabric for me using this and a floral by Amy Sinibaldi for Art Gallery Fabrics called “promenade plum”. I could not be happier with the outcome.

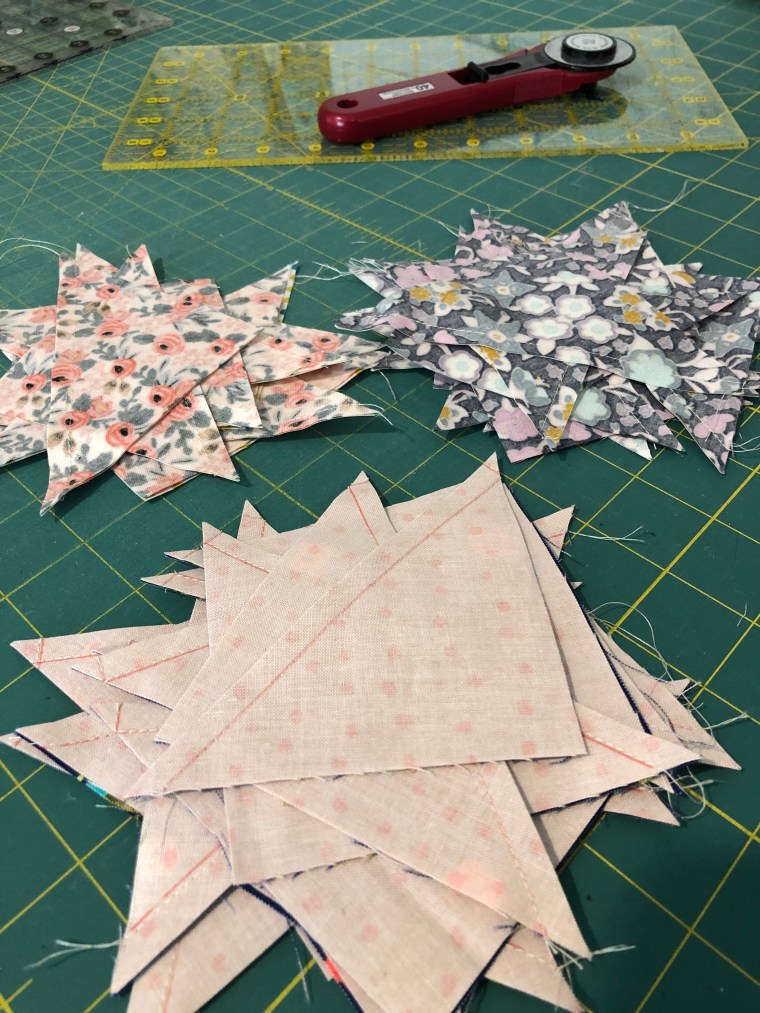
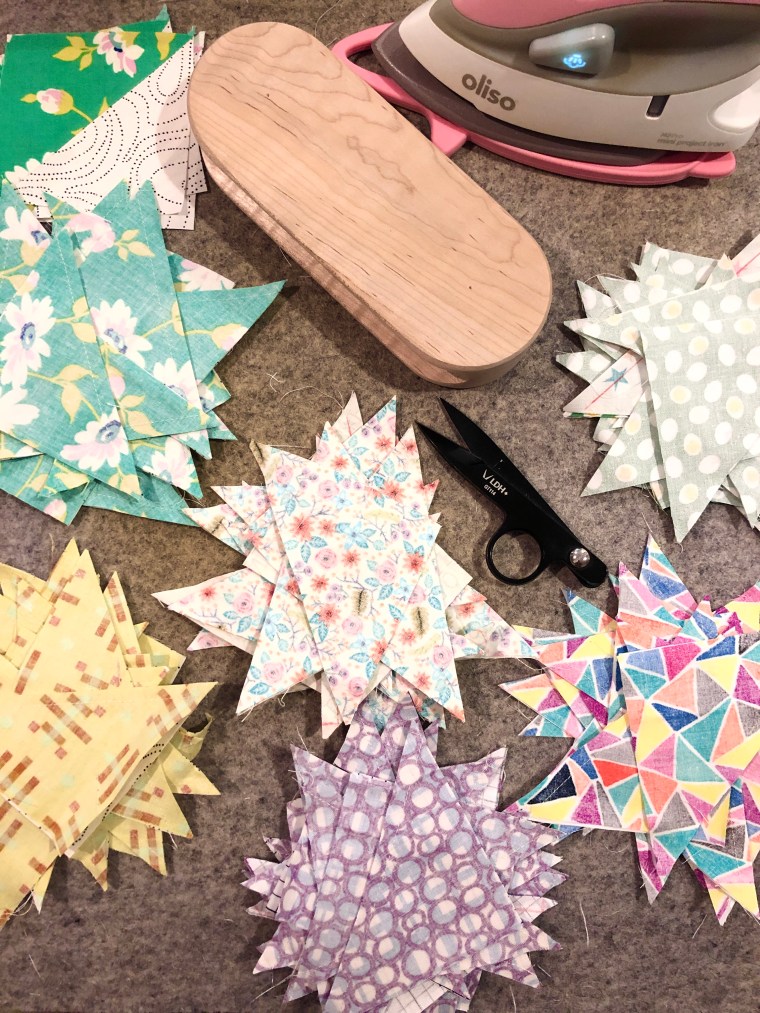
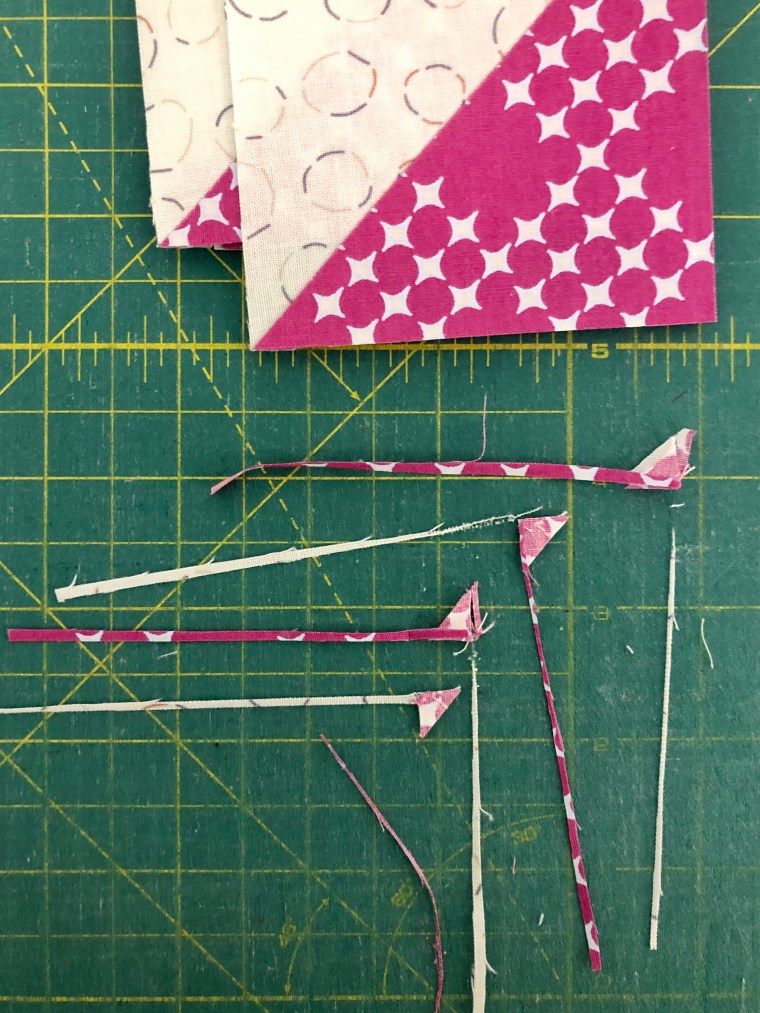
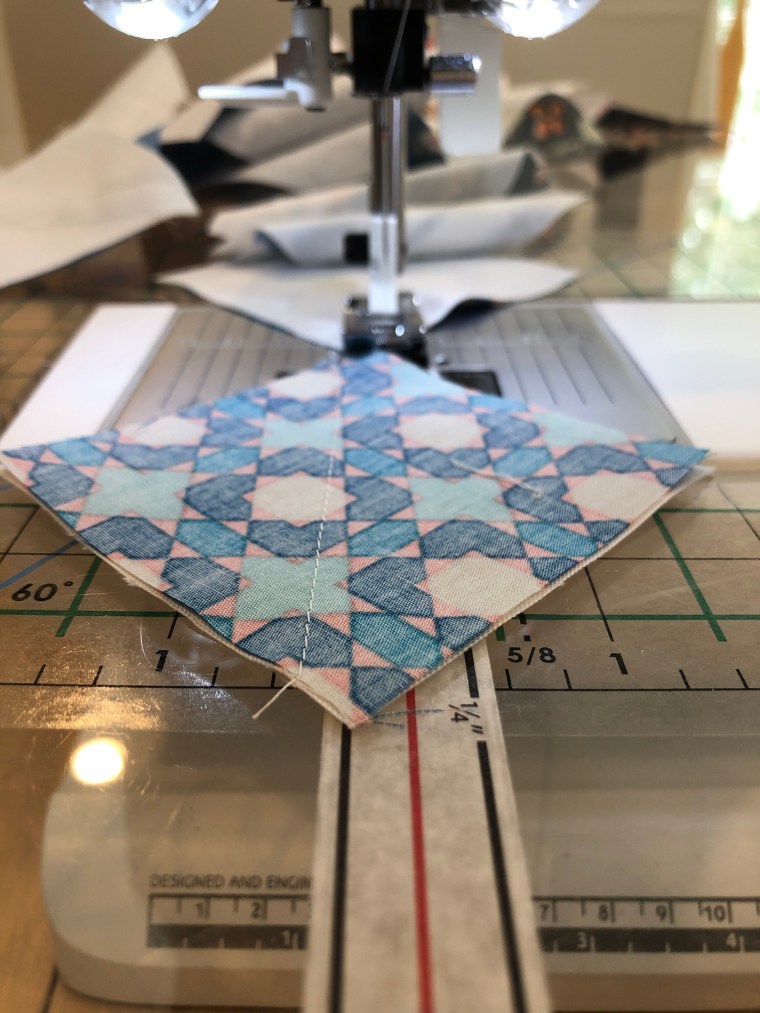
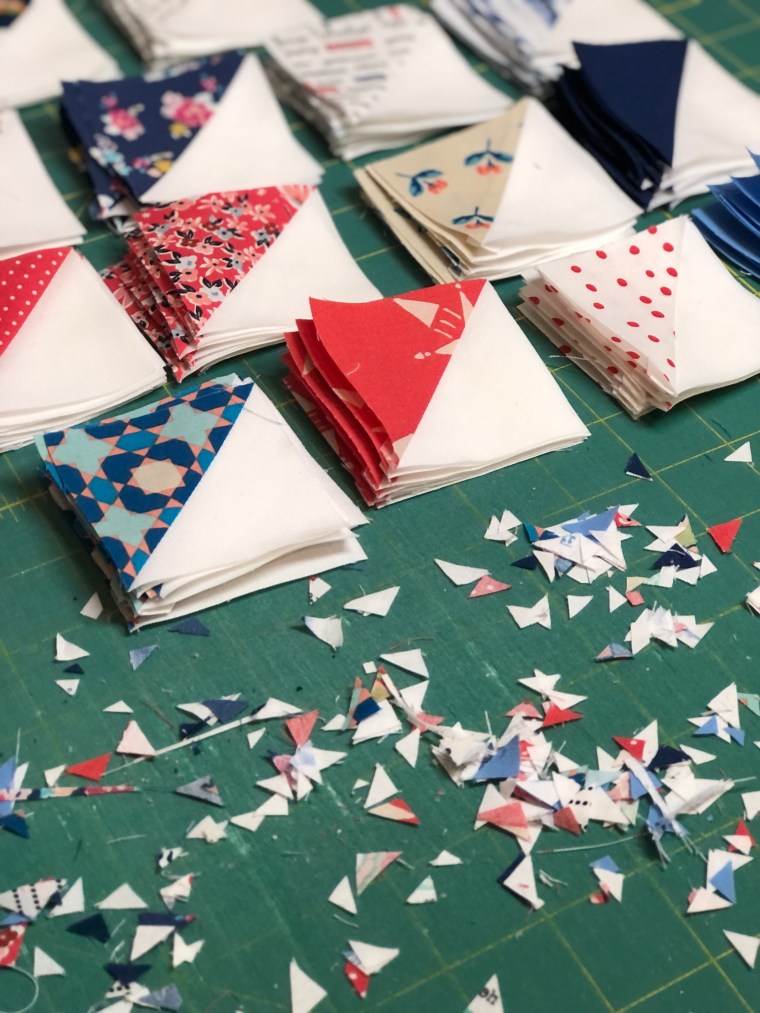
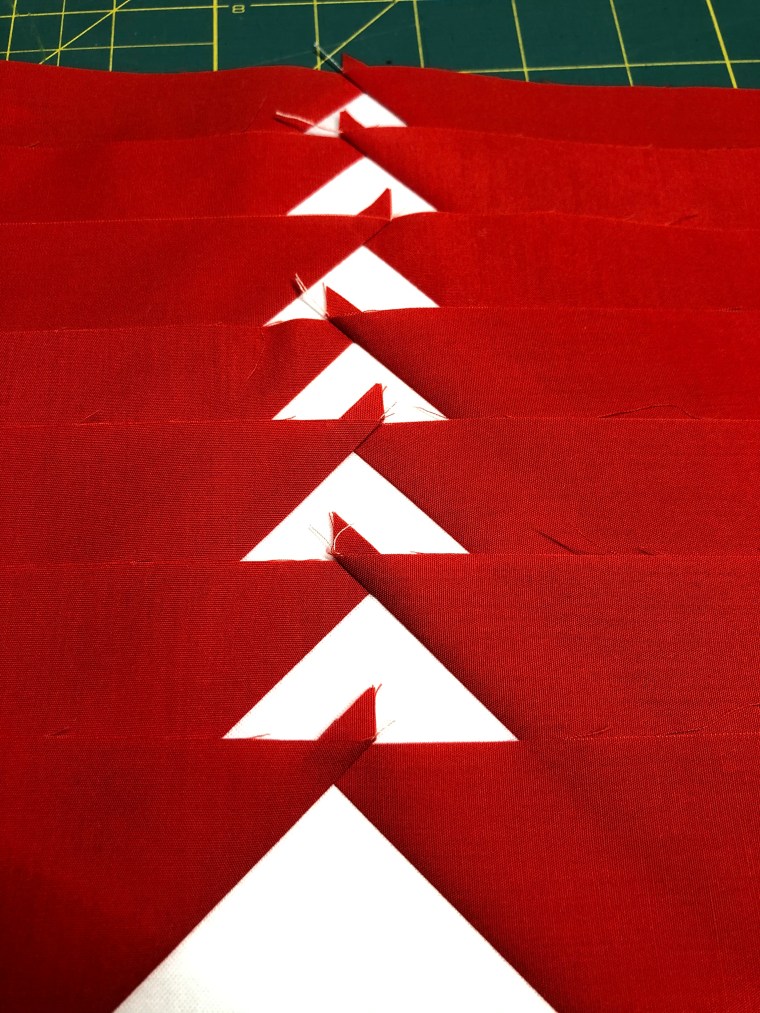
This pattern is heavy on the half-square triangles, probably best suited for an advanced beginner or someone who is interested in mastering their HST skills. I mean, I’ve made hundreds (thousands?), of half-square triangles, but there’s always room for improving those points, right? I think back to the early days of my quilting journey, about a decade ago now, and remember thinking, “Do I need to trim all these dog ears?” The answer is YES. It may not seem like much, but squaring up blocks is important and that little bit of excess over the entire quilt does add up to a lot of inaccuracy. Just take the time to trim your blocks, if you’re not doing it already. Added bonus, look at all that fabric confetti goodness.

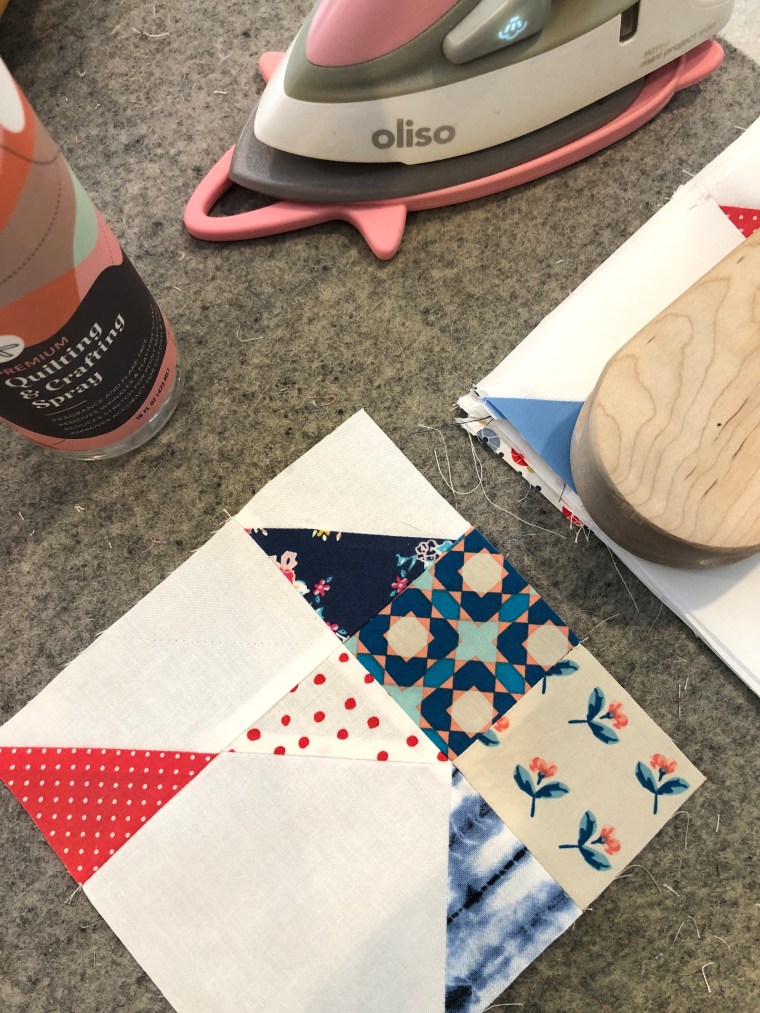
I like to press my block seams and see all the pieces lined up along the way. Sometimes progress is slow, but having pretty fabric and little piles of finished pieces is motivation for me.

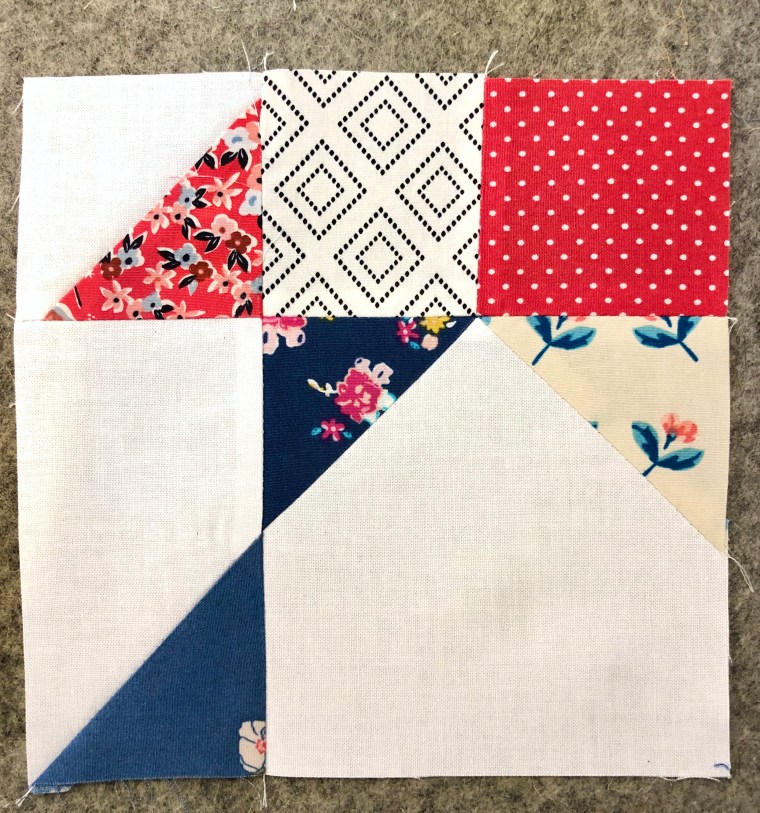
The Garden Paths Quilt is designed around two block structures. You’ll make a different quantity depending on the size of the quilt. In this case, the baby quilt I made was relatively fast to assemble. This pattern comes with instructions for three sizes: Baby, Throw and Twin. I opted for a bleached white background, but now having seen other tester’s quilts, as well as the designer’s quilt in a dark background, all color combinations are stunning.

I had this quilt professional long-arm quilted by my friend, Deb, of Owl Quilt It. I’ve said it before, but choosing the motif or pantograph at the end of the piecing process, is often the hardest choice for me. This is a baby quilt, but the colors are not specifically “baby”. There are beautiful graphics in the fabrics and I wanted to highlight the theme and name of Garden Paths. When I saw this design, I knew it was right. Notice how the leaves and berries so closely mimic the florals of the Little Clementine fabric? No doubt this was what I was looking for in the quilting. 99% of the time, I opt for a white thread; I want it to blend into the quilt, and not be distracting. This one will get cozier with each wash & tumble dry!
I like dense quilting. Some quilts lend themselves to more open stitching, but I like it when my quilts have a little tighter sizing on the edge to edge quilting.
Even my husband noted how much he likes this quilt. He’s my sidekick when it comes to photographing quilts, but also the one cheering me on along the way. He’s seen plenty of bright, bold, graphic prints and colors, so this one really got his attention. He said, “this isn’t usually what you choose, but I really like this one. I wouldn’t have thought I’d like it so much, but I really do.” Go figure….it’s OK to step outside our comfort zone of color!

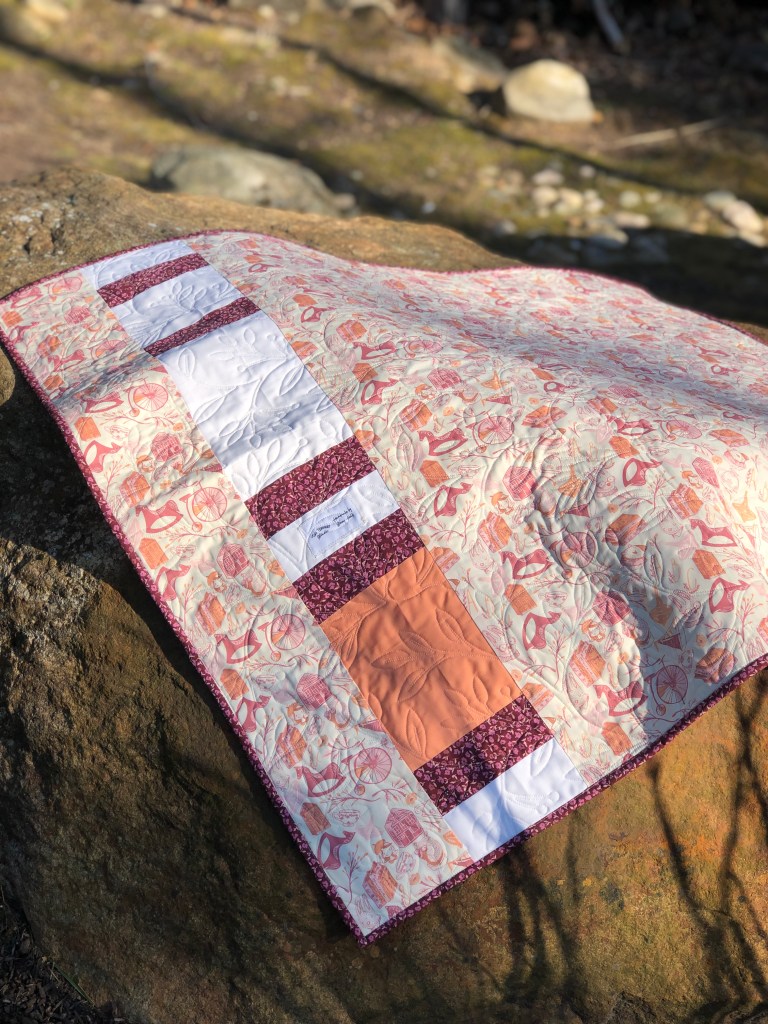
If you follow me long enough, you’ll see a pattern of pieced quilt backs. I LOVE them. I do think there’s a beauty in a single fabric background, but I see the quilt back as one more chance to make something unique…it’s good “real estate”, if you will. You never know which side will be right side up when getting wrapped or cuddled with a quilt, so I want the back to be interesting too. It’s a good way to use any leftover bits and pieces that indicate what is found on the other side. You can see the Little Clementine fabric here, in all it’s glory. How sweet is that? It makes me smile. Oh, don’t forget to label your quilts! Artists sign their work; quilters should too.

This pattern is available beginning today, May 4, 2021 from http://www.whiteplainsquilts.com. All orders placed there today will be entered for a drawing to win $20.00 in shop credit. Patterns from this site will be discounted 20% until May 7, 2021. Brittany will also have limited quantities in quilt kits available, so shop early if you’re interested. This is not a sponsored post; I’m sharing these details so that you, too, can make this beautiful quilt pattern.
As I mentioned, I’ve used fabrics from Art Gallery Fabrics in prints and pure solids. This is also not sponsored by AGF (but I secretly, not so secretly, wish it were!). The feel of their fabric is delightful. The drape is something you just need to feel.
Thanks, Brittany, for including me once again in your team of pattern testers. I enjoyed it & I’m so happy with this fabric pull and finished quilt. I’m adding it to my collection of favorites!
All photos and content are property of Two Terriers Studio and not to be copied or distributed without written permission. This is not a sponsored post.

When we think of Scenic Roads, it may bring memories of wide-open country spaces, city skyscrapers, or rocky cliffs with an ocean on the horizon. Each of us has a different place we consider scenic or that calls for us when we need space. When I think of scenic roads, the very first vision is that of a particular bridge that leads into one of my family’s long time summer get-away towns. Crossing that span, windows down, arms out of the car, inhaling the salty sea breeze equals summer and time together. It is a blessing.
I was asked by Amanda, of www.artbycritter.com, to test her Scenic Road Quilt pattern and when I learned the back story, I was all in. Her father created a real, wooden barn star, that now hangs on a barn at the corner of Scenic Road and Hubertus Road in Hubertus, Wisconsin. This quilt design was a tribute to his work and a collaboration for them in the form of this quilt. Having grown up in the midwest, and visiting farms of my own extended family, this concept and design rang true for me in many ways. I remember the drives down gravel roads, the barns, the barn stars. I also thought of how fortunate I’ve been to see so many places across the USA and how each is scenic in its own way. Family, special places and horizons meshed into a quilt? Yes, please!

For my version of this quilt, I opted for solid fabrics that remind me of the shore. The blues, greens, gray and a hint of pink are all reminiscent of sunsets across a sandy beach. I spent the first 18 years of my life, land-locked in the midwest, but the ocean is where I feel most at home. This quilt design and these colors seemed a perfect union of those two things. I also realized this would be my first-ever, all solid fabric quilt top. I tend to lean toward bright colors and graphic prints, so this was a new scheme. I selected fabric by Art Gallery Fabrics http://artgalleryfabrics.com from their pure elements collection. The drape of this fabric is perfect. So smooth and easy to sew. It makes for a dreamy finish.
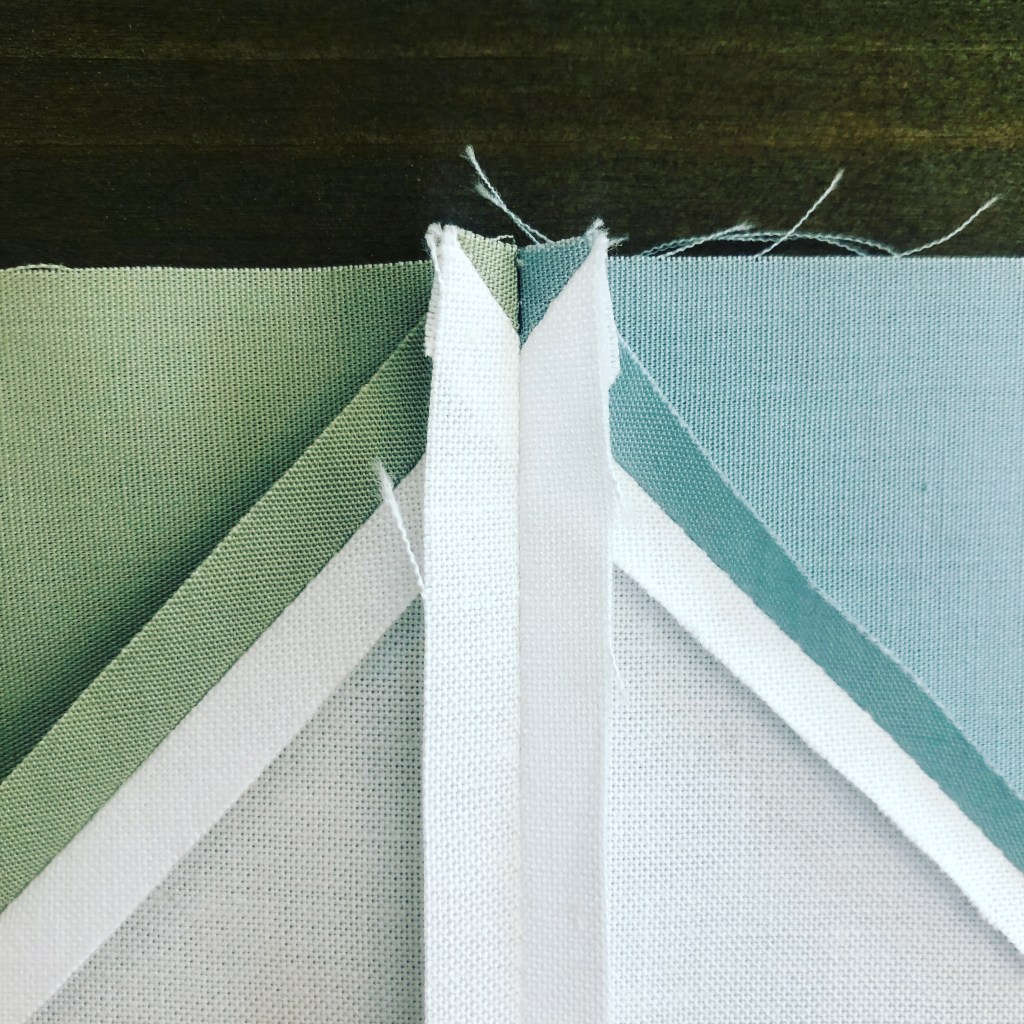
Even the “inside” of a quilt brings beauty. We so readily focus on the finish, but all great quilts start with a precise and solid foundation. I’m the first to admit, I like a quick to finish project. However, I’m slowly learning to enjoy not only the joy of that last stitch in a binding, but the measured and precise steps along the way. It all adds up, so I’m slowing down & enjoying the journey.


Once my quilt top was complete, I wanted to get it photographed. I was so happy with how it turned out and couldn’t wait to share. Finding a place in New England in the spring became a little challenging, because Mother Nature was delivering the wind. Lots of quilt-whipping wind! My husband helps me with every photo shoot and I was so thankful he had a good grasp on my work as we moved from place to place looking for stillness. This may have been day 2 or 3; the first day sent us home pretty wind-blown; toting a quilt that needed another pressing.
I love this shot taken at the Hillstead Museum. A beautiful home, now a museum, is the first architectural project of Theodate Pope Riddle, the fourth registered female architect in the USA. She is an early proponent of historical preservation and caretaker of the family art collection. I thought it a fitting scene for this project

This is a large quilt, so I had it professionally long-arm quilted by my friend, Deb, of Owl Quilt It. I think she did a wonderful job and I really like the edge to edge design that swirls though the straight/geometric blocks. It reminds me of leaves, the wind and if I look just right, an “S”, which is the initial of my first name. I truly try to tie it all together with my projects, from the pattern to the final stitch.
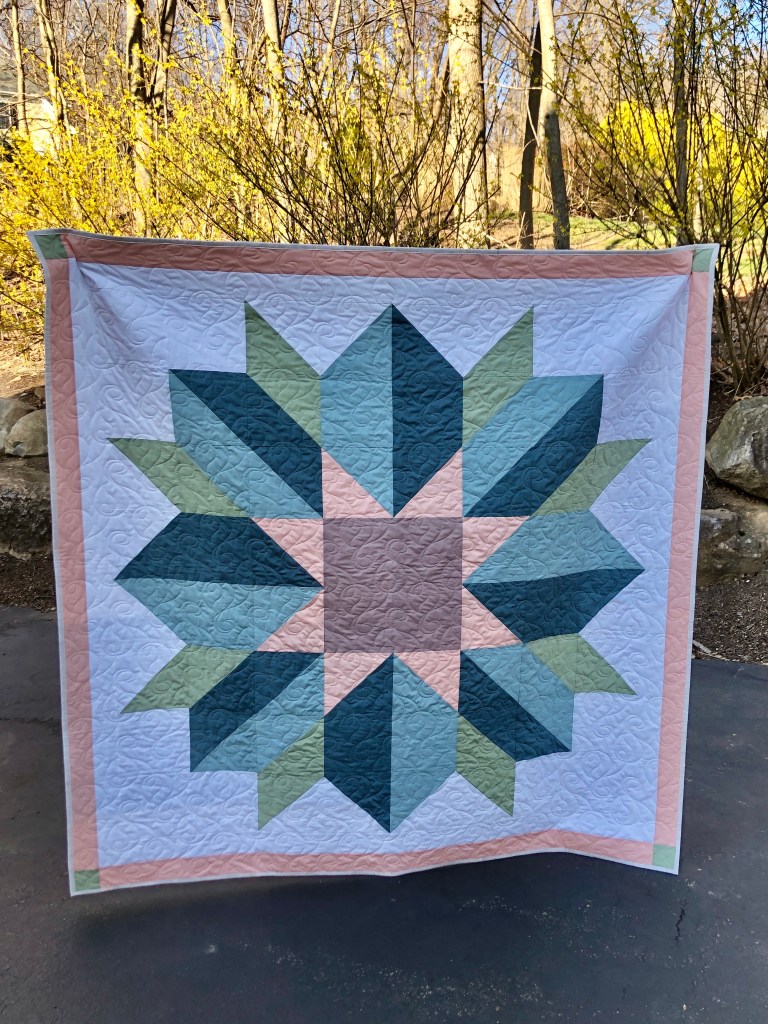
Ta-da! It’s all done. I’m thankful for the opportunity to have been included in this pattern tester group and I’m happy to add this to the collection of quilts that will stay with my family. The large blocks, simplicity and accuracy of instructions lead to a quick finish and a quilt I love.
Today, April 17, 2021, the pattern is available for purchase. Amanda has designed a limited edition art print and a sticker that are also available for purchase. Look at her Instagram account (@quiltsbycritter) for the link in her bio for these items. Proceeds from the limited edition print will be donated to @mentalhealthamerica.
I hope all roads lead you to places of joy, health & prosperity. Thanks for being here to see my version of the Scenic Road.
Enjoy & happy quilting!
All photos and content, property of Two Terriers Studio; not to be duplicated or shared without written consent. This is not a sponsored post. (I wish it were!)
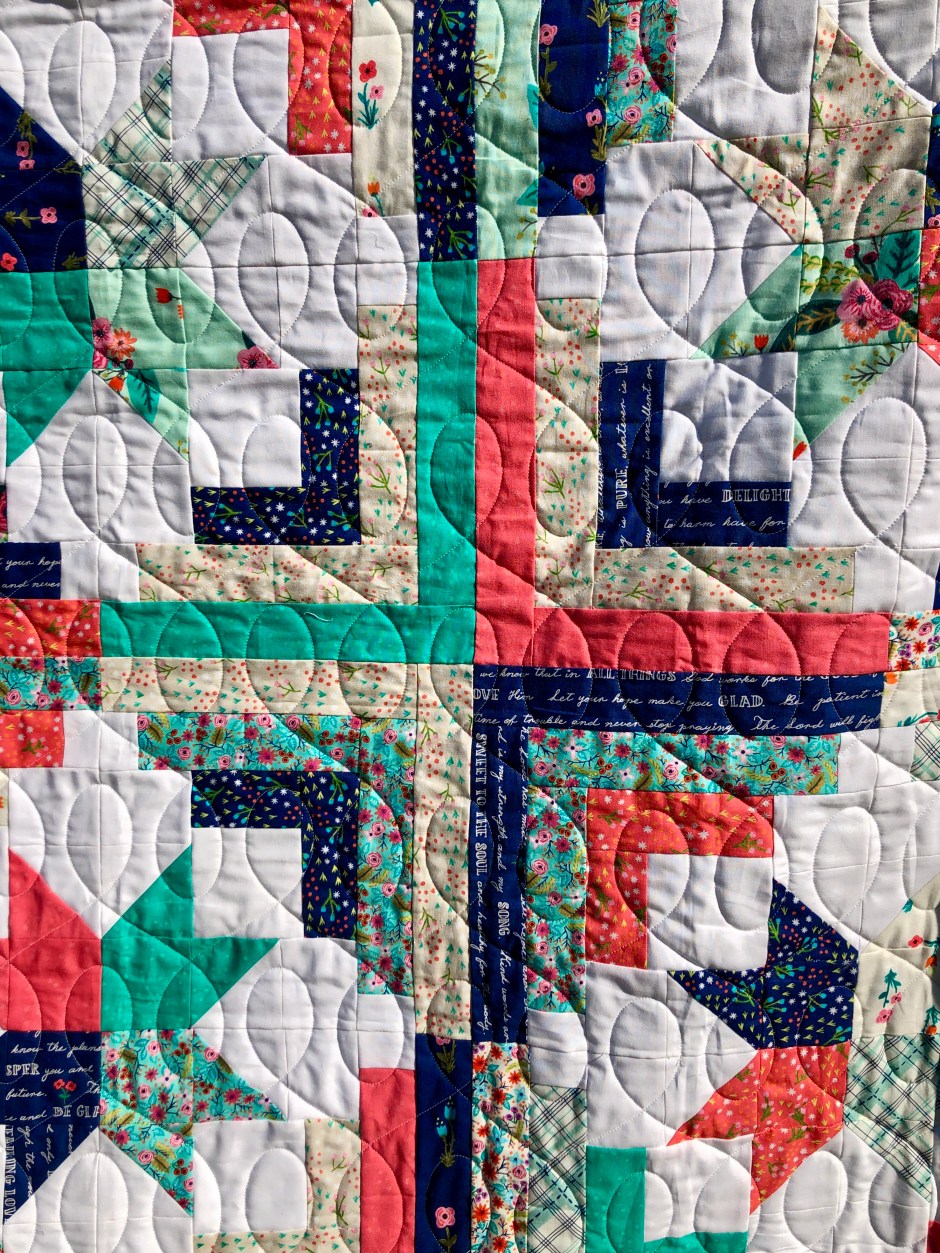
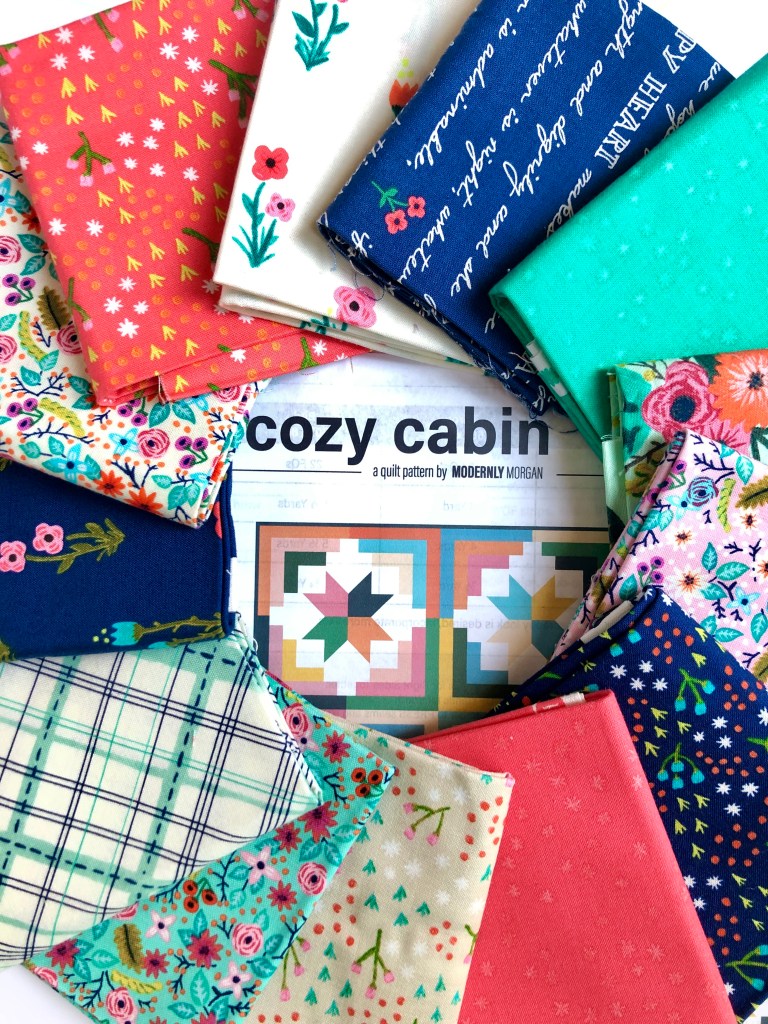
I’ve often admired quilt patterns by designer, Modernly Morgan, (www.modernlymorgan.com) so when she asked if I’d test this latest design, it was an easy “YES” from me. Morgan and I both have a love of scrappy quilts, so I was excited about the opportunity to work together. This pattern comes with instructions for three sizes – Baby, Throw and Bed. I made the 60″ square throw size.
Let’s just say, this pattern is a keeper.
Cozy Cabin is a modern twist on the traditional log cabin quilt block. The scrappy element is just a bonus, in my opinion. For my version of this quilt, I pulled a fat quarter bundle by Windham Fabrics www.windhamfabrics.com, designed by Amy Gibson, called Meriwether. The variety of florals, plaid, text, and blenders seemed the perfect foundation for this project. It’s bright and has a spring-like feel; just what I needed after a long winter.
I wouldn’t call a fat quarter bundle, “scrap”, in this case, it was “stash”. I purchased this collection a while back and saved it, knowing the right pattern would come along. Enter Cozy Cabin! When I first purchased this bundle, I didn’t have a pattern in mind, so I hadn’t accounted for the backing or binding. I consider myself very lucky that my local quilt shop had bolts of yardage, in stock, when it came time for me to finish the quilt. With the variety of colors and prints, I could have found a different fabric or collection to coordinate, but I’m thankful to have been able to keep the entire quilt in the Meriwether collection.
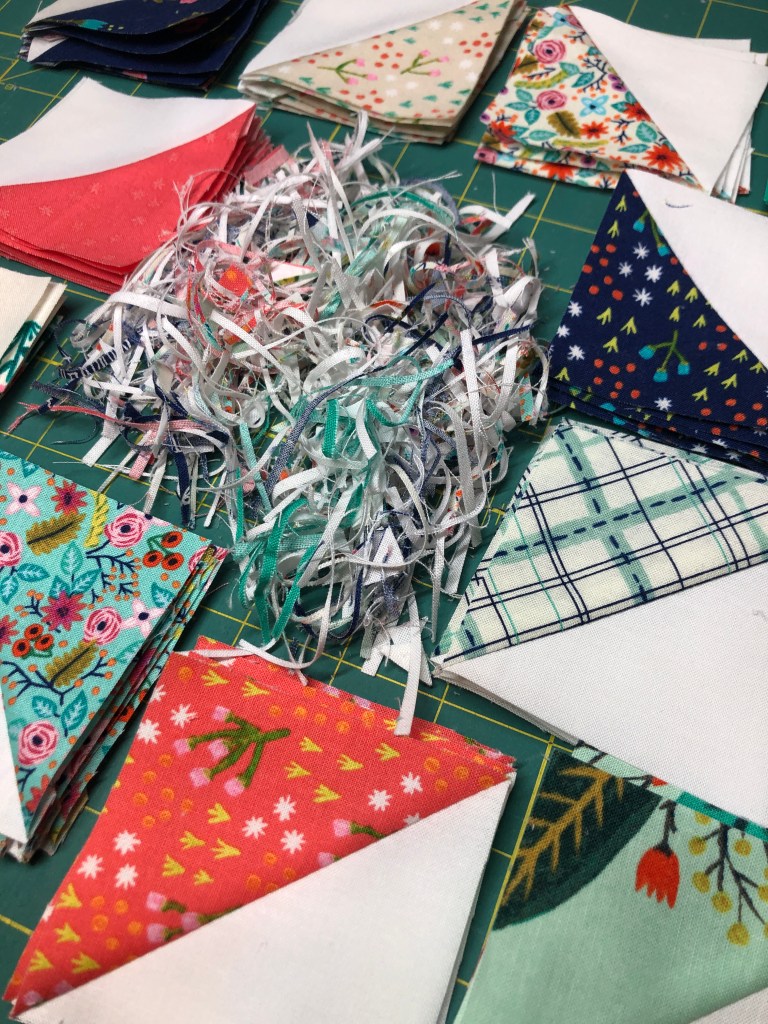
Squaring up half-square triangles is an act of patience and accuracy. I actually prefer when a pattern has a little “wiggle room” in the measurements so that I can square-up to a perfect size, but I also like not having a lot of waste. This pattern calls for scant 1/4″ seams and as you can see, produces blocks with little waste.
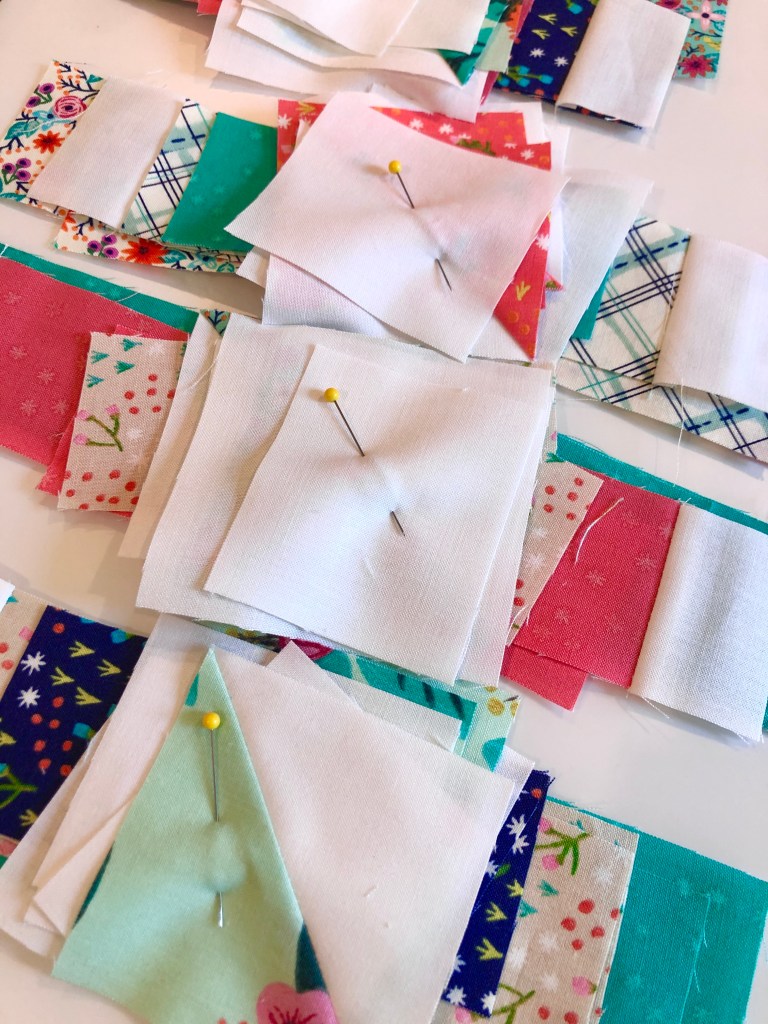
Once the HSTs were made, I organized my remaining pieces into sets that would become one quadrant of each block. This step made it easy for me to pick up a set and sew as time permitted, even if I only had a few minutes between other obligations. The accuracy of the pattern made testing it a breeze. I was able to move through the sewing without issue.
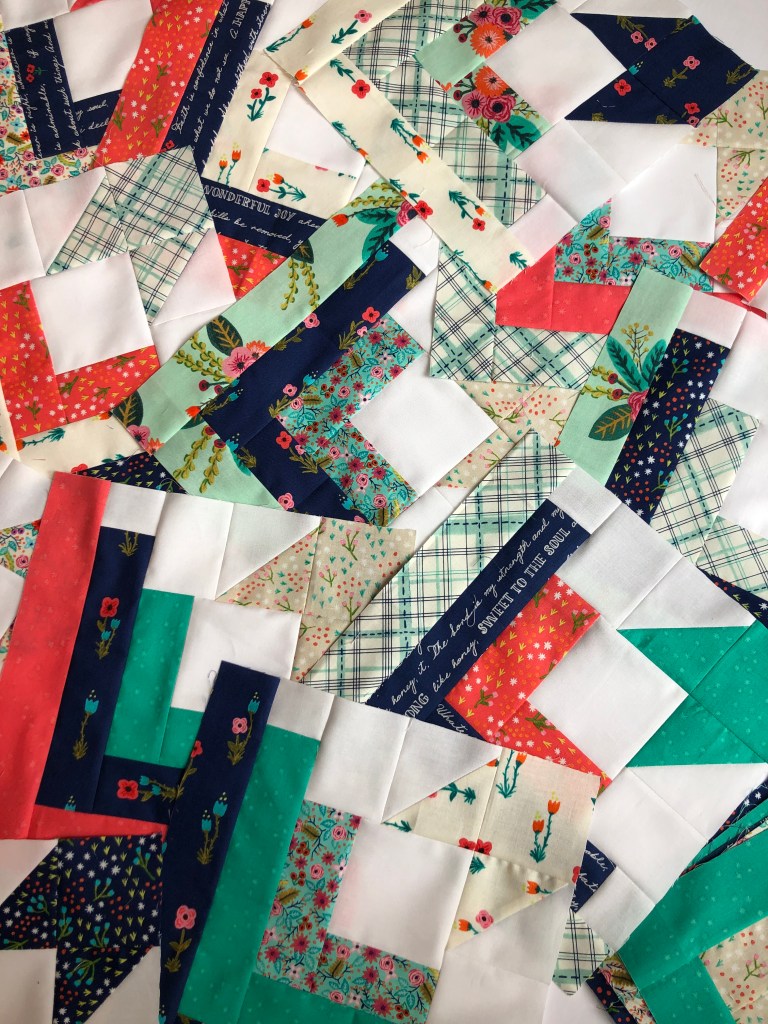
This quilt came together so quickly. It’s a combination of the same block, repeated and rotated, throughout the layout. Once the pieces are cut and the HST trimmed, it was a lot of chain piecing for efficiency. I don’t tend to overthink blocks if I’m creating a scrappy look. Loving all the prints and knowing they work together certainly takes some of the worry out of the process for me. I had no doubt it would be cohesive.

I like the rotation of the blocks as it allowed me to think about the placement of pieces with text/font and how it would “read” once completely assembled. Additionally, if this were being made with a truly scrappy style, you could make each block independently with small pieces of fabric and make quite a dent in your scrap stash.
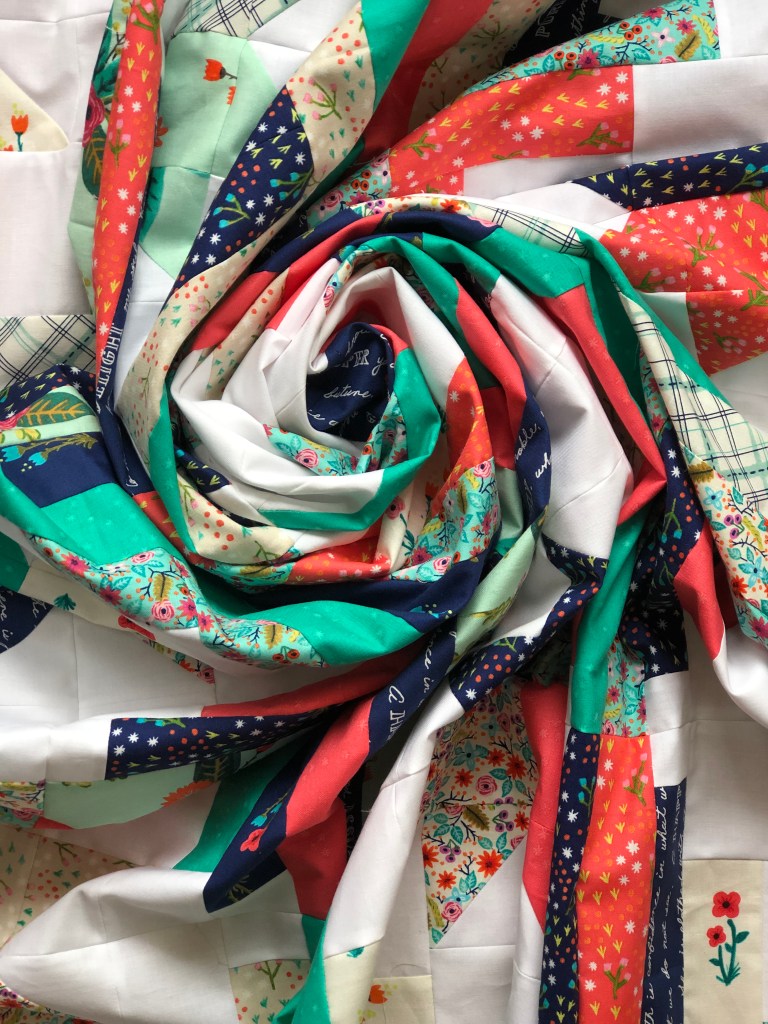
The top is pieced & swirled. This is the kind of cinnamon roll-like swirl that is calorie free! Look at all those delightful colors coming together.

There is always something fun for me in photographing a completed quilt top. My husband helps me every single time & thankfully, he’s tall and can keep them off the ground. To stand back, and see my effort and time spent creating a quilt, is gratifying. I think about the pattern, the designer, the fabric choice and how it tells a story. Seeing it from a distance also shows the secondary pattern; do you see it? Not just the stars, but the bands, joining the blocks. In our home, quilts are made to be used and loved. Seeing my favorite people enjoying something I’ve made makes it even more special.

With this being a larger, 60″ square quilt, I opted to have it professionally quilted. When I make baby quilts, I feel more confident quilting them on my domestic machine, but I opt for straight lines and nothing too fancy. There are so many edge to edge designs available and I think this decision is one of the hardest for me to make in the entire process. Once it’s quilted, it is what it is and all the layers and seams are connected. It has to be right. I never want to get this close to the finish line and wing it. I used a 2.5″ straight cut binding and finished it by machine. Lately, I’ve been doing more binding by machine than by hand, because it takes practice and I’m comfortable practicing on quilts I know I intend to keep. Quilts I gift, those are mostly done with hand-stitched binding.
Here’s a closer look at the quilting pantograph. It’s an edge to edge design called Modern Twist.
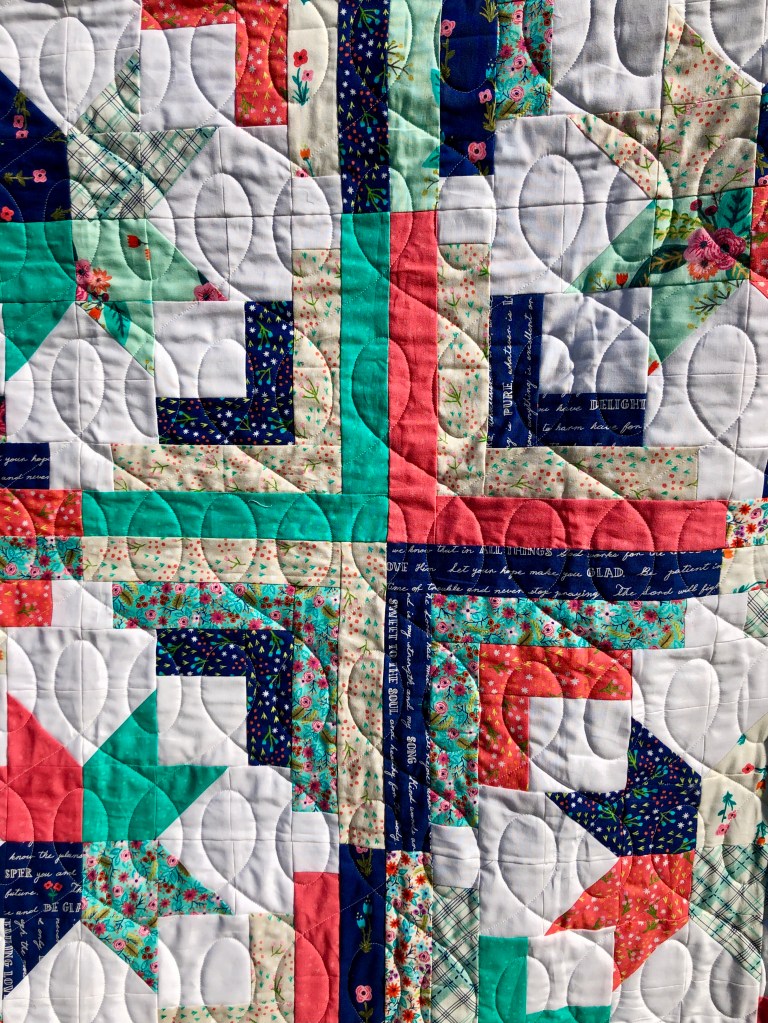
Fabrics with text, fonts or inspirational messages are among my favorites. I wanted to include a large section of this yellow fabric in the quilt back, as well as using it for the binding. The evenly spaced rows of words almost give the binding a subtle stripe.

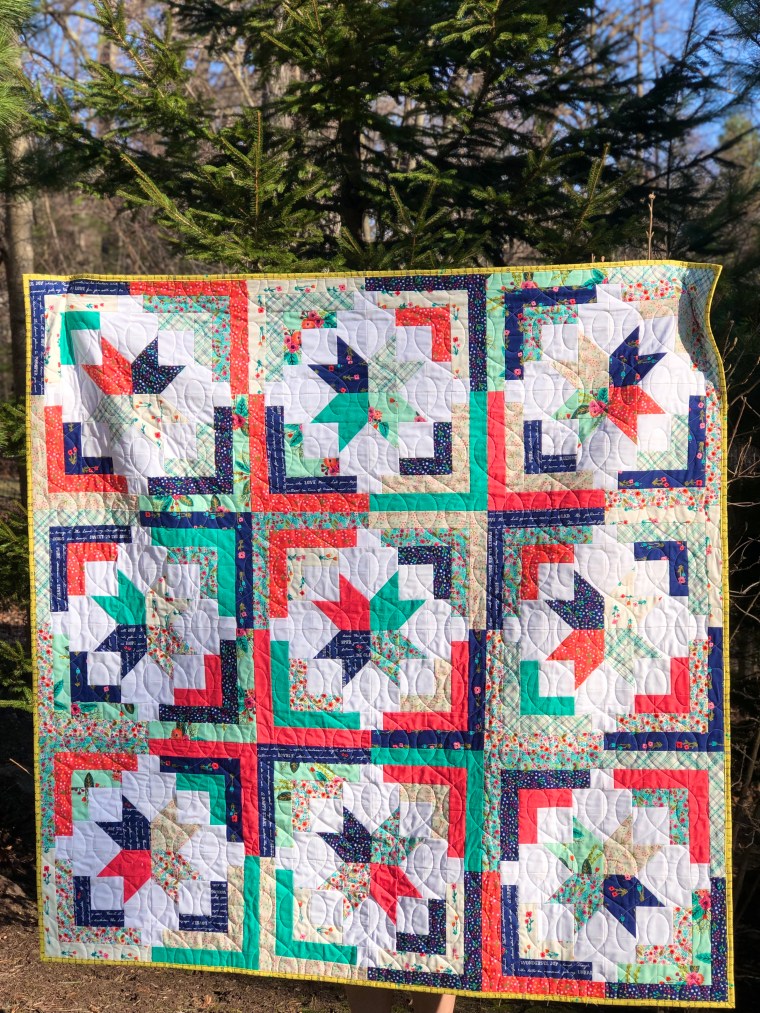
I enjoyed making this quilt & 100% plan to keep this one for myself! It’s a pattern I’d recommend and I think when you see the designer’s version and the other sizes and fabrics chosen by the team of testers, you’ll see that it works well in all colors and themes. Take a minute to visit Modernly Morgan on Instagram (@modernlymorgan) or her website, shown above, to purchase your own copy of this pattern. It is being released April 14, 2021.
Enjoy and happy quilting!
All photos and content property of Two Terriers Studio; not to be duplicated or shared without consent. This is not a sponsored post.


I’m often asked if I buy fabric with a specific quilt in mind. Sometimes, yes; most of the time, no. As I’ve mentioned previously, creativity comes to me by way of “the story”. If a fabric quickly reminds me of someone, a special location, or an event, I’m easily hooked. This collection by Art Gallery Fabrics (artgalleryfabrics.com) is called Little Forester Fusion. The moment I saw it, I added to my cart! No hesitation. (Thank you, Victoria, @midnightquilter!). I live in a very wooded, full of creatures, kind of neighborhood. We have more squirrels and chipmunks than I can count; deer tracks criss-cross our snowy lawn, not to mention the bears, bobcats, owl and red fox. Yes, bears. Our home is surrounded by woods & over the years we’ve lost a dozen trees to ice storms and planted more in their place. ALL the nature I see at home, I see in this collection. Even the marshmallows on a stick. We have so many family memories of making s’mores around the fire pit. I had no doubt this collection would one day be a perfect quilt for my family.
Almost simultaneous to buying this fabric, I was asked to test a pattern, the Sawtooth Shine Quilt, designed by Brittany Tunison of White Plains Quilts (whiteplainsquilts.com). It was actually more of a discussion about which of TWO patterns I’d like to make, as she was planning a double pattern release for February! TWO. Can you imagine? We’ve worked together on several other pattern tests and they have all been great experiences for me. She is talented; such an eye for detail and precision. I appreciate that she’s likely made several versions of a pattern before even considering sending it to testers. I enjoy the collaboration; seeing if I understand the instructions as she intended and if there is occasionally something in my experience that may be helpful to her in the written portion. It’s a really cool process, I think.

In this pattern release, there is the Sawtooth Shine Quilt (as I’ve made) and Sawtooth Sparkle Quilt. Each pattern has three different size options: baby, throw and twin. Additionally, both quilts will have two different layout options. It’s truly like having access to six quilt designs with each title. There is room for unique personalization. Yes, at first glance they may look similar, but there are subtle differences between the designs, and therefore also in the method of cutting and piecing. The blocks finish at a size that could potentially be a pillow cover, mini-quilt/wall art. The limits are only in the maker’s imagination.
As they say, measure twice, cut once. So much accuracy in a quilt is found in the initial cutting. Pressing. Pressing, not ironing. Who knew this was a thing before they became a quilter? One more thing I have to consciously remind myself to do; pause, press, not iron.
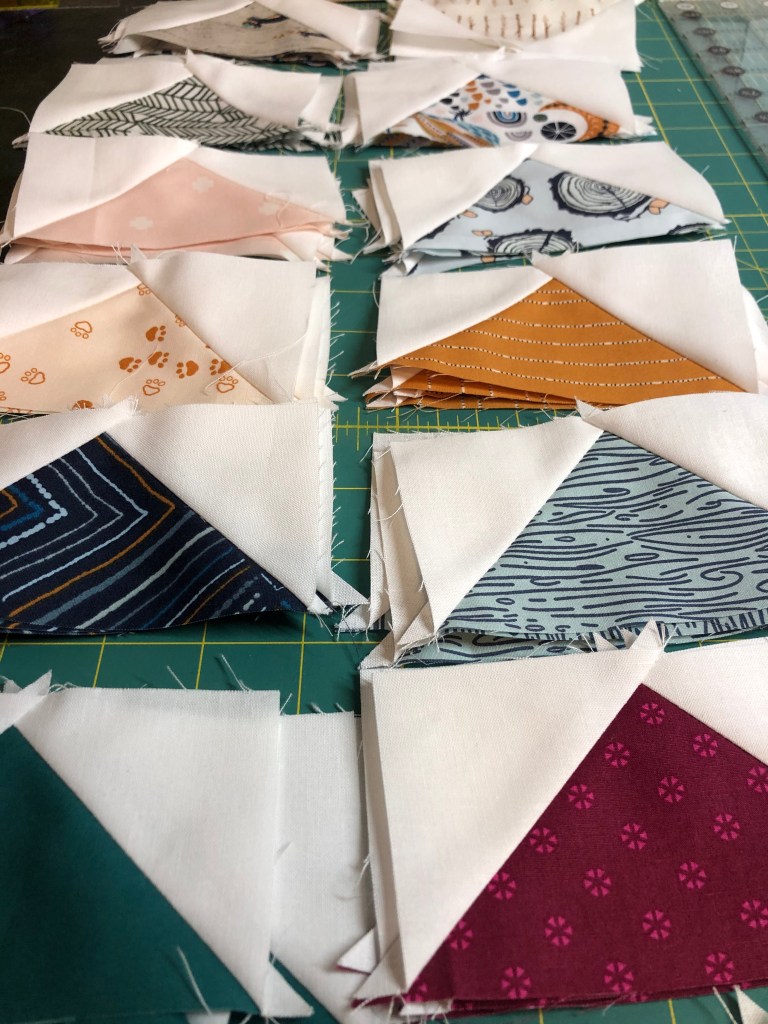
I like to stack my quilt block pieces as they should appear, just to double check seam allowances and directions of prints. It’s easier to move things at this stage than after it’s all been sewn. For this particular fabric, I wanted the print to be in a top to bottom linear format. On the more bold prints, as shown below, there would be some pieces turned on their side.
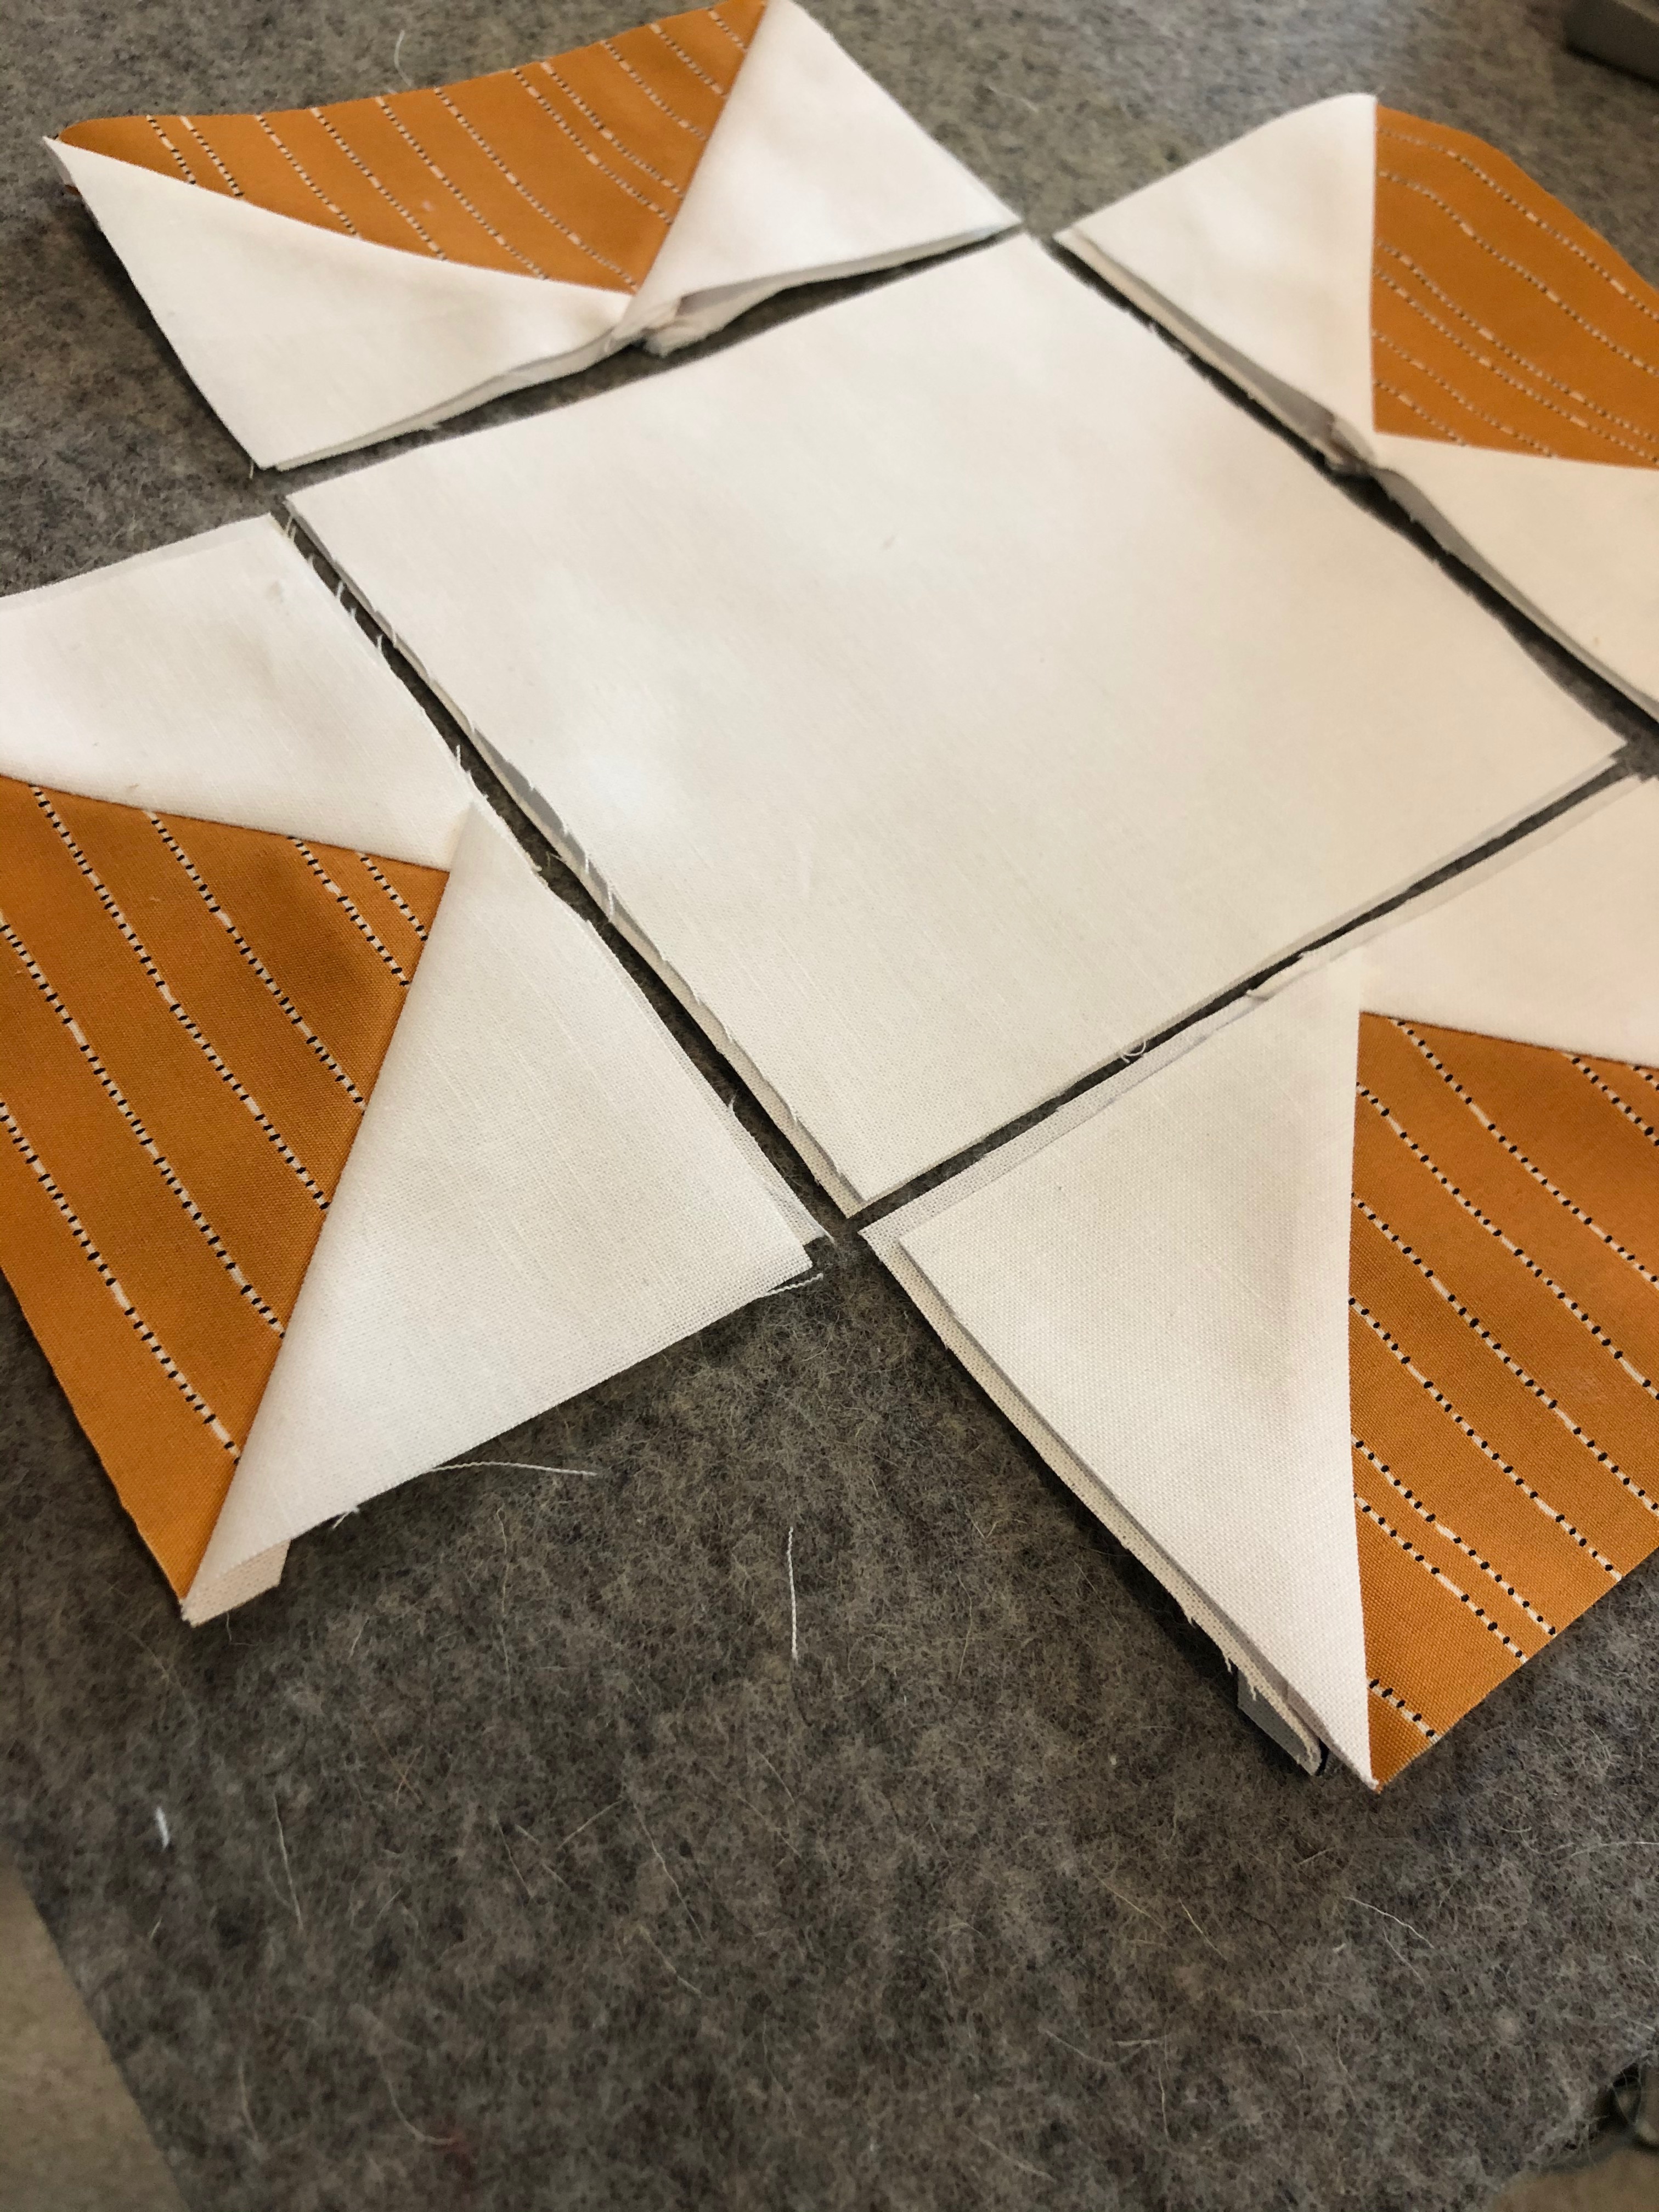
Coincidentally, as I was sewing this block with an owl print, designed by Jessica Swift, I could hear the faint “hoot” of an owl in a tree outside. I hadn’t heard it much before & now it seems more of a regular occurrence. One more element of the story built into this quilt. There truly is beauty all around if we stop, look and listen. Having lived in a city, with all of its bustling street noises, adjusting to the “woods” was a learning curve for me. I’d miss these critters, sounds and clear night skies if we ever moved elsewhere. The crescent moon reminds me of my youngest and the rainbows – ALWAYS the sign of a promise.

As I make each block, it is my new favorite. Until the next one is made, then IT is my new favorite. Thankfully, I didn’t have any that I didn’t like in this quilt! Does that happen to anyone else?
Secondary patterns emerge as the blocks are joined. The boldness of the stars is echoed in this secondary element, almost like a pinwheel. Look at those bees, and the squirrels gathering acorns. How cute are they?
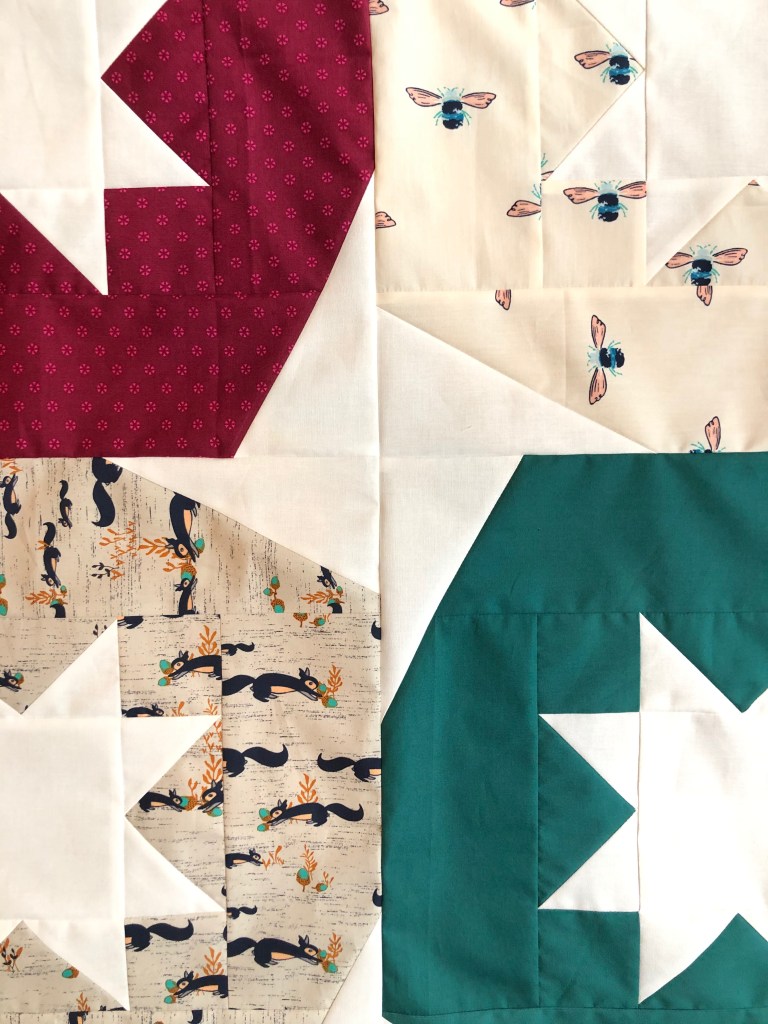
When the blocks are complete and the quilt top gets that ‘held from the corners, whip into a full length view’, it’s the moment of truth. This page of the story is the culmination of the designer’s idea, the interpretation of the instruction, fabric selection and layout of color. Did it work? Yes, I think so!! I’m so happy with this result, even with one more chapter, the quilting and binding yet to be completed.
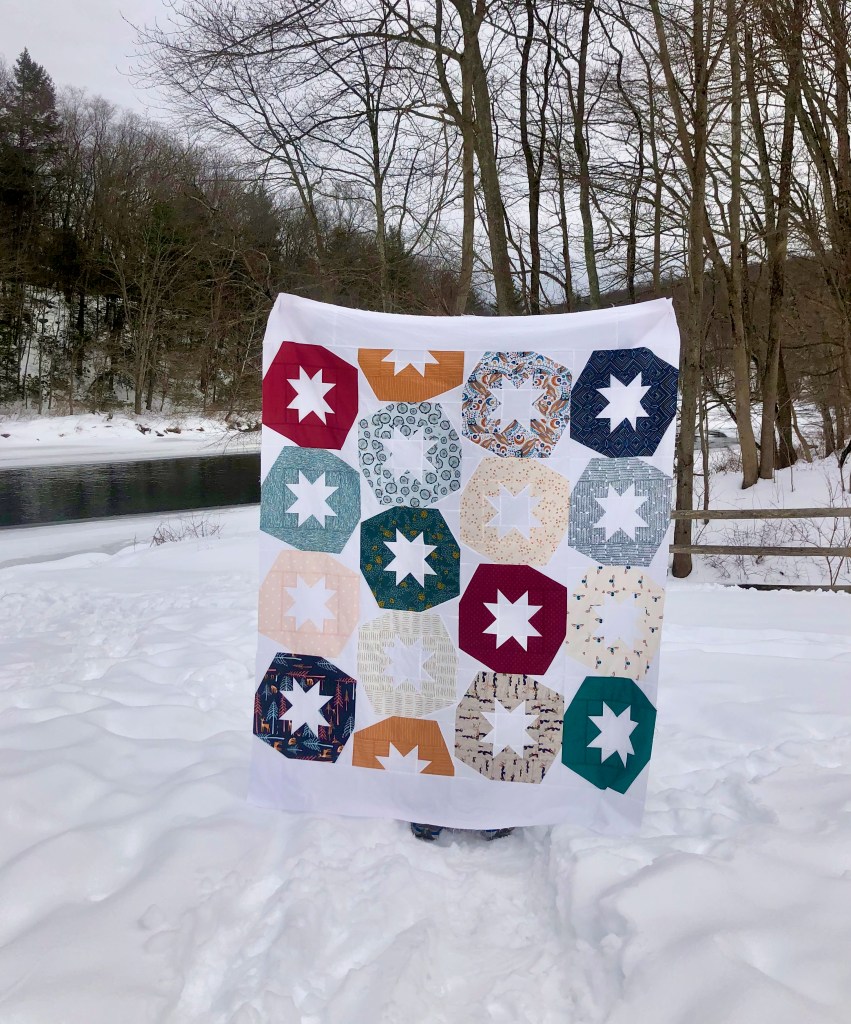
Just as each new block becomes my “favorite”, trying to choose a backing and binding fabric turns into a question of which fabric do I like best? Which of course, isn’t fair, because I like them all. I’m still uncertain which to use or whether I may make a pieced backing. For now, I’m happy with this top and I’m taking time to decide the last steps of the process. It’s going to be a quilt that will surround my family in handmade love for many years to come, so I’m not rushing it.

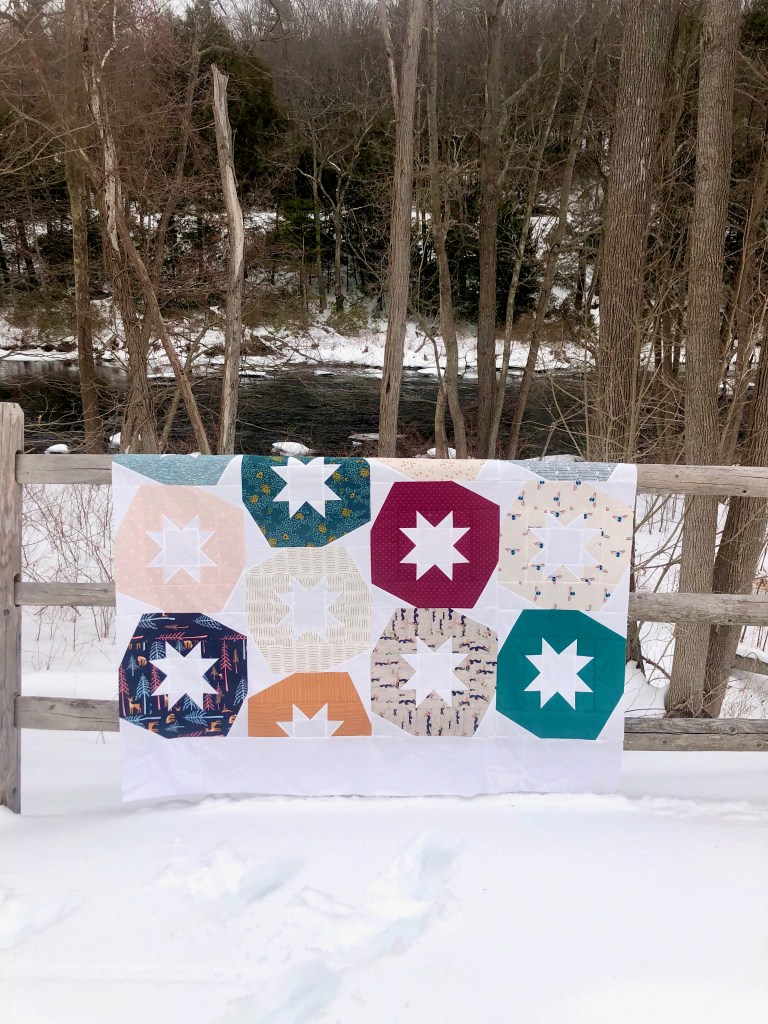
In celebration of her double pattern release day on February 19, Brittany will be offering a 20% discount on patterns in her shop through Sunday, 2/21/21. For those who can’t pick a favorite, or for anyone who loves a deal, a bundle option will also be available. Shop: whiteplainsquilts.com
I’m so thankful for the opportunity to work as a pattern tester. It improves my skills and results in quilts I can keep for my family or gift to other friends & loved ones. I take my role in reviewing text, layout, instructional details, as well as sewing, seriously. It’s creative & fun, yes, but it’s also a collaborative effort to put out the best finished product possible. While it is most obvious that a tester works to assist the designer, I have to say that designers assist me too. I learn something new with each test. I’ve built relationships and made friends I would not have had without these projects. It’s a blessing. It’s a part of the story I did not anticipate when I started sewing as a hobby all those years ago.
Make something beautiful…
This is a non-sponsored post; all comments and photos property of Two Terriers Studio and not to be copied or distributed without written consent.

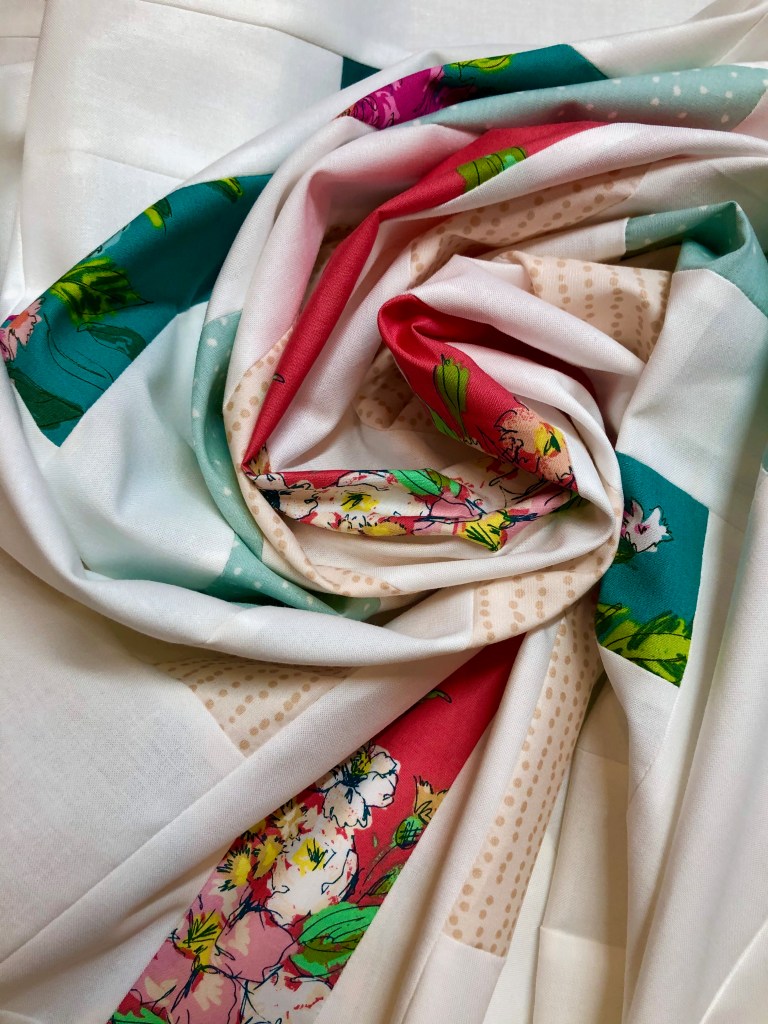
Meet the Spinning Top Quilt, a pattern I tested in February 2021 for Monika Henry of Penny Spool Quilts (pennyspoolquilts.com). I’ve worked with Monika before this project & always find her patterns to be well-written, which also results in a lovely finish. This one is no different & I might add, I was able to finish piecing it in one, uninterrupted day. Yes, one day. The linear design & mirror image layout speeds up the process without sacrificing interesting design.

I used a couple of collections from Art Gallery Fabrics (artgalleryfabrics.com) for my baby sized version of this quilt. The florals are called Extempore Fancy and Extempore Celebration, designed by Sharon Holland (sharonhollanddesigns.com). I added pieces from both Art Gallery Fabrics “Fusion” Collections, Serenity & Ballerina, and a touch of Pure Solids. While I really like the softness of these colors together against the bleached white background, I think a bold or dark background fabric is equally pretty.

This pattern features cutting instructions for three sizes, pillow, baby & throw. As a consumer, I like having more than one size option for a specific design, but the add-on of the pillow size is really nice. While I could most likely adapt the pattern & calculate it to suit my needs, having the pillow dimensions already available is a nice touch.

For my pillow, I recreated the front of the quilt and kept the quilting simple with a few straight lines. The back of the pillow is a single panel and I opted to add my zipper to the bottom edge. I like this placement because when I sit it on a bed or chair, I orient the zipper to the bottom and it’s virtually invisible. It also keeps the back panel as one continuous piece.

I sent this quilt to be professionally quilted on a long-arm machine. Some of my projects, I quilt myself, others, I leave to the pros! More specifically, if I have an intricate design in mind, or if the quilt is large, I send it out. This quilt is called Spinning Top. It’s a very linear design & initially I thought concentric circles would bring an illusion of “movement” but also break up the bands of horizontal color. When I shared my ideas with the pattern designer, she was already quilting her personal quilt with concentric circles! We laughed, realizing that we had the same idea. I then saw this edge to edge pattern and it immediately represented the mark a spinning top would leave, as it moved across the floor. Done. This is my choice. When I create, I’ve found the best results come when it all ties together for me into a story. The name, the fabrics, the feeling, the design. Granted, not all projects have that need or nuance, but when they do, I really like it and feel more connected to it from start to finish.

I underestimated how tricky it might be to get good lighting and photos of a quilt with a white background on a snowy, February day. Luckily, my husband is more than willing to drive around with me until we find the right location! I could not do this without his help.
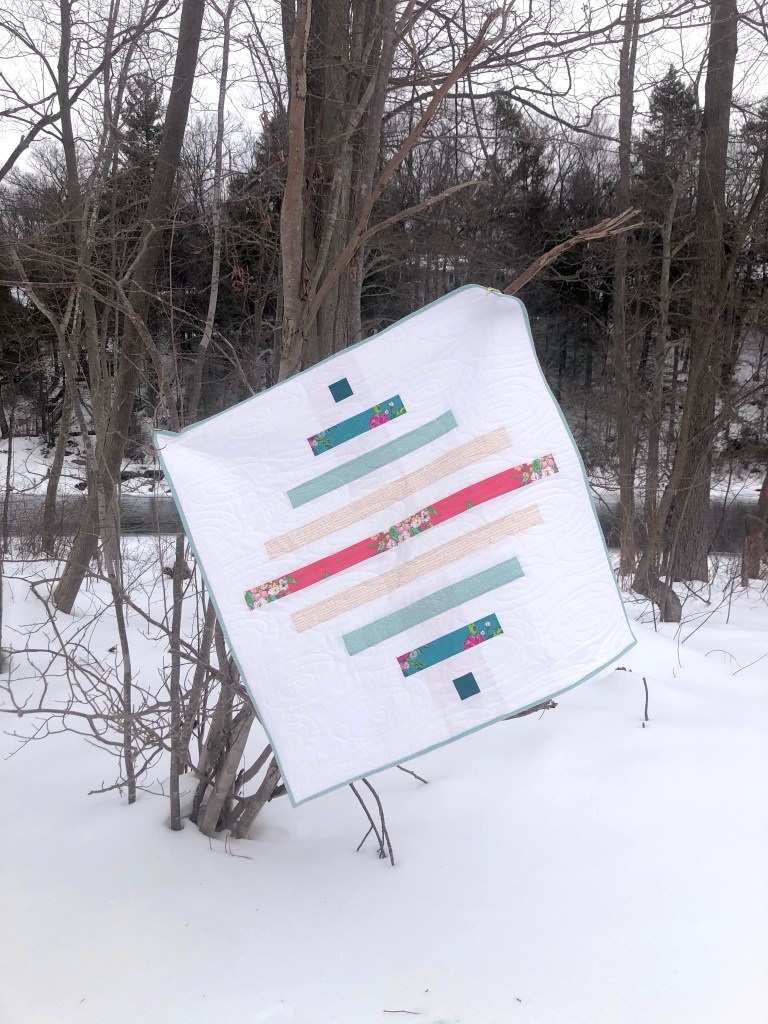
I had someone in mind as the recipient for this, but guess what? That someone is now “my collection”. Maybe there will be a duplicate in the future, but I’m not ready to let it go. Oh man, are we all singing that song, in our minds now?
Monika is offering 15% off the pattern price, in her shop, until February 21, 2021. No code will be needed at checkout, and the pattern will be available for purchase after that date as well.
Happy Quilting….
This post and project are not sponsored; all comments and photos property of Two Terriers Studio; not to be duplicated or shared without permission.

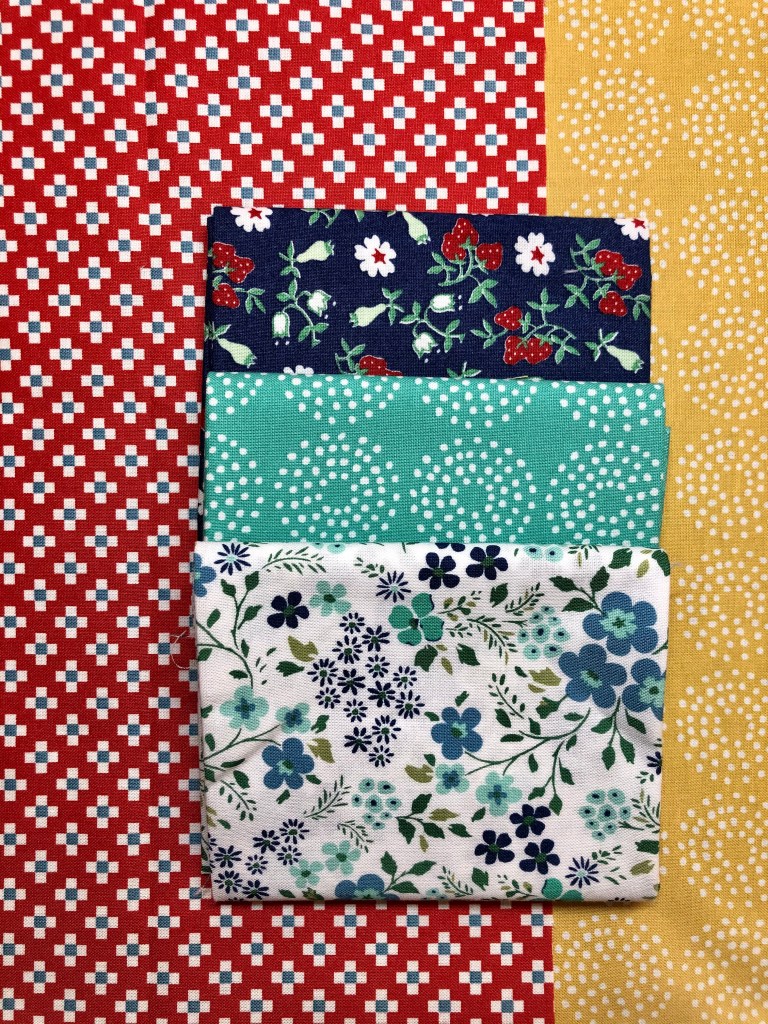
I remember, as much of the world does, watching Lady Diana Spencer become Diana, Princess of Wales. Yes, I woke at 4am to watch the Royal Wedding, before heading off to school. Don’t judge, maybe it isn’t your thing. I wasn’t a princess & fairytales kind of kid, but this was entirely different. I had never seen anything like a royal wedding and I found it all quite fascinating. In the process, I fell in love with images of the UK; the castles, the countryside, the hustle and bustle of the city, the “proper-ness” and even the music scene. It seemed a world away and I really liked it. I had no first hand knowledge, but I wanted so badly to go see for myself.
Fast forward a few decades. I traveled to London with my husband and children, after I’d waited so long to see it all in person. It was even better than I anticipated. The feeling I had about this place was etched in my mind and being there was exciting. We walked or used the London Underground for all our transportation. Those rings became a new symbol for my “London Story”. One aspect that was new to me since that fairytale wedding years before, was that I had become a quilter. A new stop on the “to do” list became Liberty of London. WOW. What a store. A fabric haven, if there is such a thing. In London, no less. That stop made me look at fabric and florals differently than I ever had before.
It may not the be case for everyone, but creativity in quilting, especially for me, comes from a feeling. I don’t know that I can perfectly explain it, but it’s never just the pattern or the fabric. It’s not the desire to work with a specific designer or fabric collection. It’s ALWAYS a feeling for me. A connection to something personal, a memory, a spiritual significance, a reminder of someone or some place; it’s the story. I work best when it all connects. All aspects ultimately count, but I’ve tuned in to that little voice or emotion and what I’ve learned is that my favorite quilts come from tying together the story.
The Londoner. When I saw those tell-tale, iconic symbols of the underground transit system of London in a new pattern, I was all in on making this quilt. London. Yes, please. This is a must make.

This pattern by Megan Lopez, founder of The Athena Workshop (www.theathenaworkshop.com), was a delight to make. Do not let the sewing of curves derail you. She has designed these blocks with detailed instructions and room for squaring up to achieve precision in the finished block.
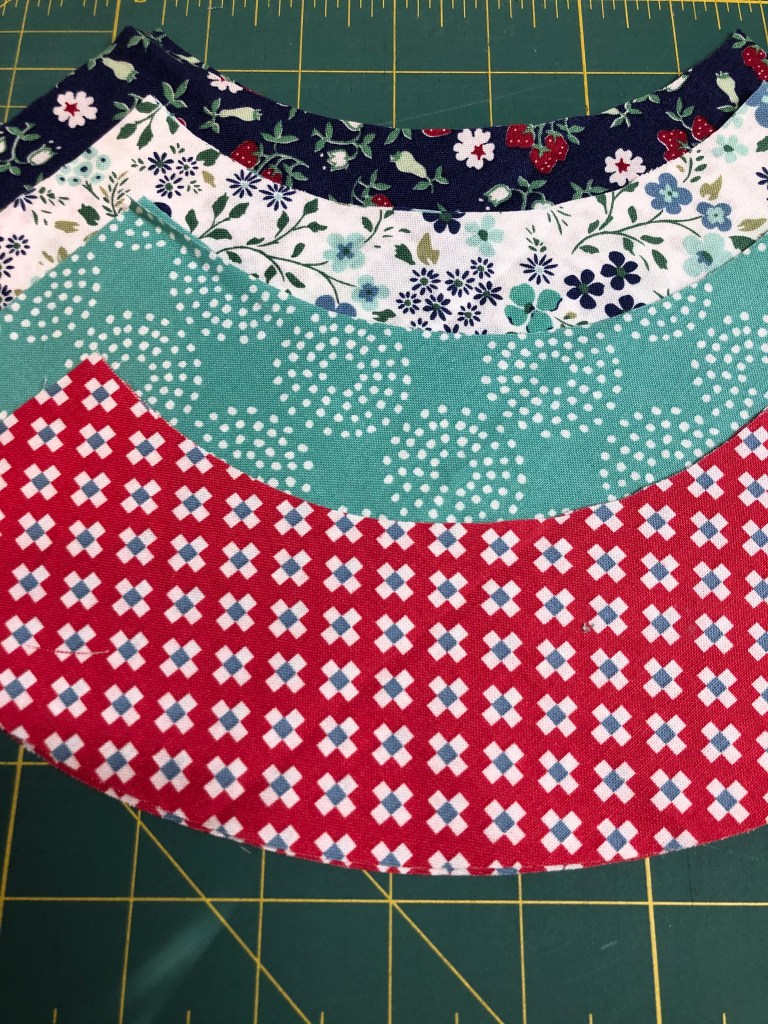
I opted for non-traditional colors, as we know the London Underground symbol to be red & blue. There are hints to the original colors and circular pattern, so it clicked for me as a lovely option for a baby quilt.

If you’ve ever sewn with me, you probably notice that I don’t often pin straight seams. That is not the case when I sew curves. All the tips & tricks are in the pattern, but squaring up the edges, pinning the center, and sewing slowly works well for me.

One thing I vividly remember from my visit to London, are the expansive gardens and so many beautiful flowers. These prints are a nod to the colors of the original symbol, and my memories of the flowers. The yellow cross bar echoes the circles as well, although in reality, it would be a solid red.

Once the quilt top was pieced and a backing chosen, I made the binding. This plaid turned out to be a fun frame and matching the patterns at the joined seams was a challenge I set for myself. Let’s just say, sometimes you win, sometimes you rip seams & start again.

The last step of the pattern is how it will be quilted. I wanted to have this professionally quilted or “longarmed”, so I had a few more design options available than what I would be able to do on my domestic machine. In keeping with those feelings and memories of London, I chose an edge to edge design that reminded me of a subway map. Those tracks are never straight lines, they do go around corners and often intersect and look at bit haphazard.


It may be small, but it is mighty. The memories, the flowers, the freedom of travel, the TUBE, and now the quilt. What a serendipitous moment to have it all come together for me in this quilting project. I am so grateful for the opportunity to work with Megan and to have tested this pattern before its release to the public. Her story of London and her current work outside of quilting are an inspiring read. I am moved by the final few pages of her patterns. Let’s just say, she is not only sharing her love of quilting and design, but she is working to help others who may need resources and assistance out of incredibly difficult situations. The power of giving back and helping other lies within all of us.
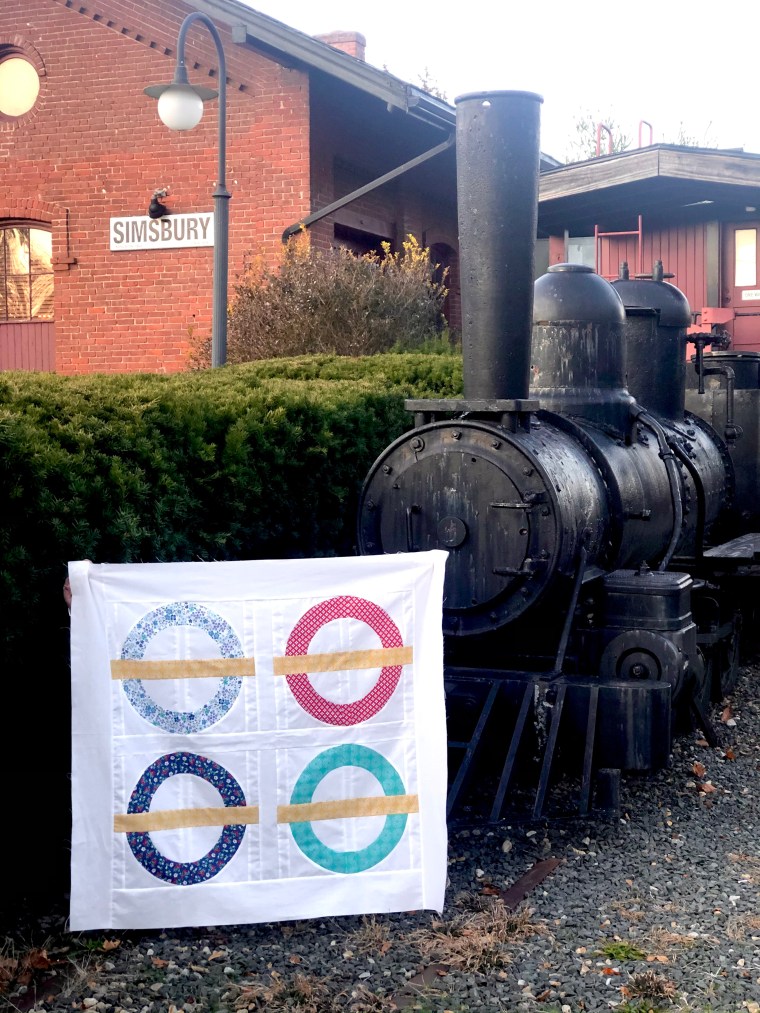
This quilt pattern has options for crib, throw, and bed sizes. It is also fat-quarter friendly. Today, 12/4/20 through 12/6/20, you can find this pattern and all other @theathenaworkshop patterns on sale for 20% off. If you love all things UK or consider yourself an “anglophile”, I’d suggest adding this pattern to your collection. I enjoyed making it and I’m inspired by the original color schemes and those the other testers have been posting online. On Instagram, follow the hashtag #londonerquilt.
I “may” have already purchased some London themed fabric to make a larger version to keep for myself. We can’t leave out those red phone booths, crown & scepter or Stonehenge, right?
While my version came together based on my personal love of London and tying it together into a quilt, let your creativity and your story drive your quilting endeavors. Quilts are the embodiment of love. How will you tell the story?
All content and photos property of Two Terriers Studio and not to be shared or duplicated without written permission. This is not a sponsored post; just a reflection of my own thoughts & sewing.
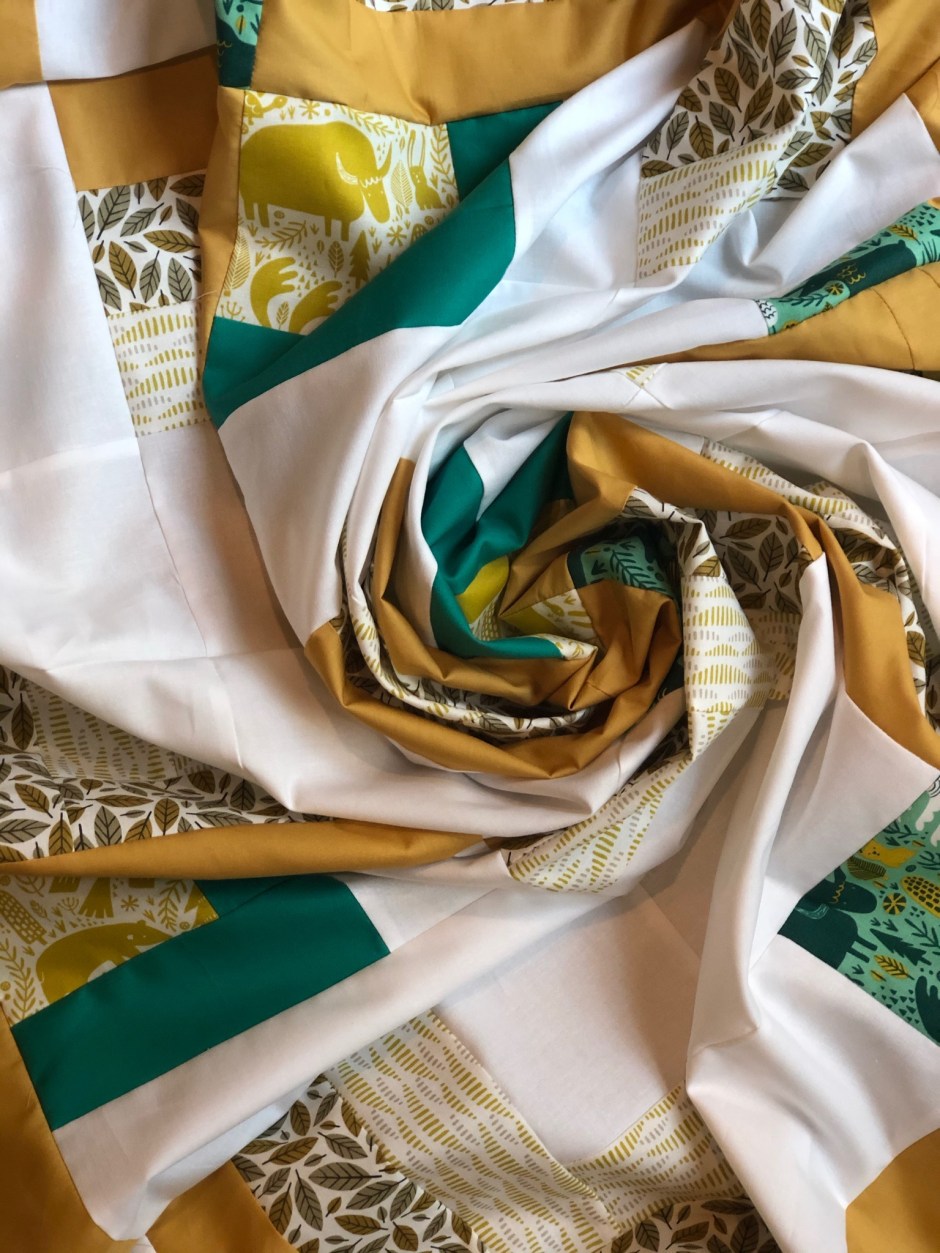
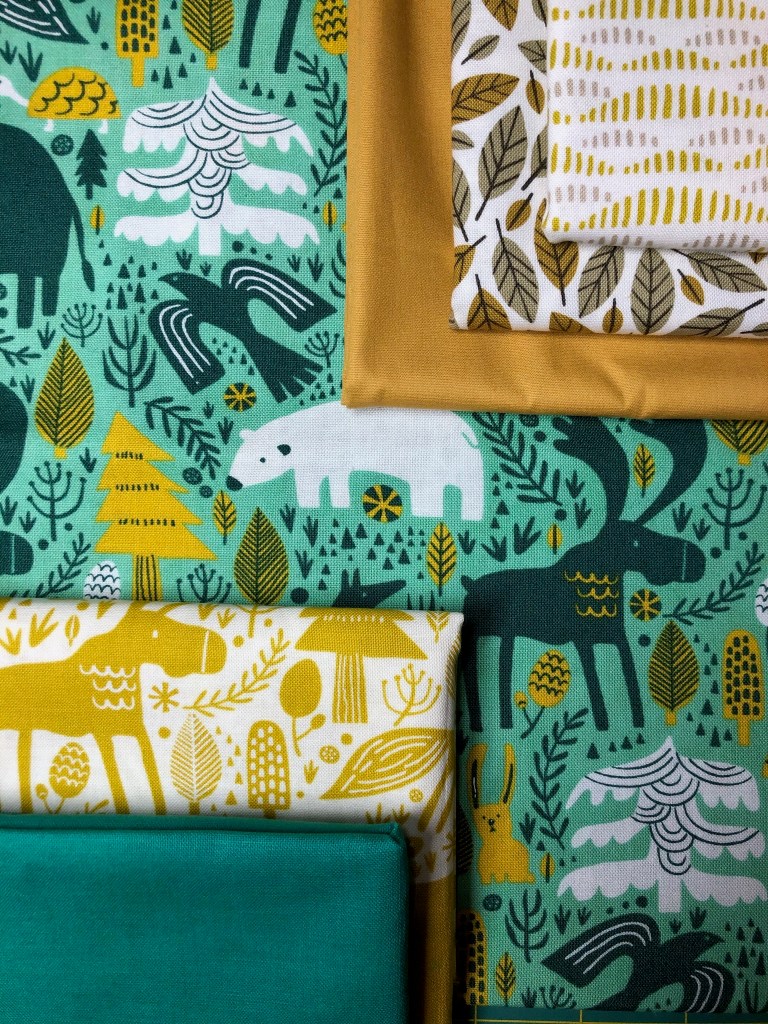
Have you ever purchased fabric for one project and when you finished, you wished you had more yardage for something else? This Big Sky collection by Annie Brady for Moda Fabrics is that fabric for me. The first time I saw it, the nature scenes, animals and colors just grabbed me, but I didn’t have an intended project. My yardage choices were random, because I didn’t really have a plan, but I knew the right thing would come along. I didn’t want to miss out on this beautiful collection. Fast forward a year (or more) and the Firefly Cabins Quilt pattern by Brittany Tunison for White Plains Quilts came my way. I knew right then, that this was the pattern for this fabric I’d been saving.

There’s something to be said for simple, efficient patterns. Firefly Cabins is an efficient, yet still so interesting pattern, in my opinion. I like to sew or create most days, and sometimes, being able to quickly put a quilt or gift together is just what I need. I never want my work to look rushed or half-done, but I often have so many things in progress, that the one “simple” finish is a blessing. What I like about this pattern is the repetitive nature of the blocks, the ability to showcase the fabrics in larger swatches and the option to chain piece. There is a time investment in cutting, and we all know that the best cutting accuracy leads to the best finished product. However, because of these block designs, once the strips are cut, chain piecing fits right in for a rapid finish.

As most of my readers probably notice, I choose and use bold prints far more often than solids. I am slowly learning to incorporate low volume prints and solids into my fabric stash and luckily, this Art Gallery Fabrics Pure Element Solid in “Honey” was the perfect match. It’s just what I needed (and fortunately, already had!).
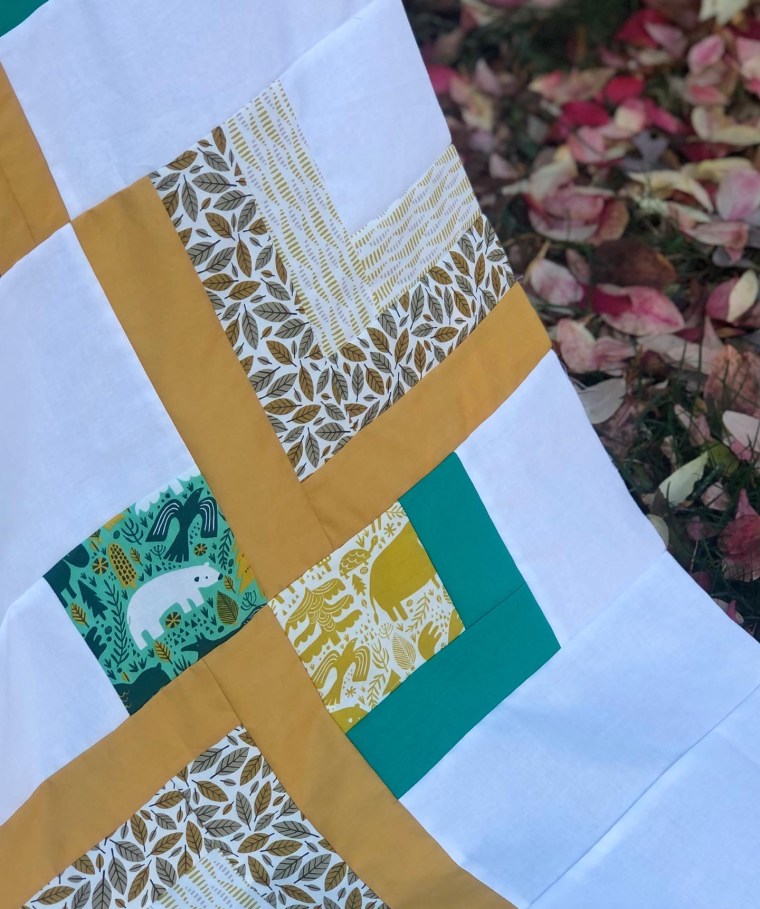

Another feature of this pattern are the center set blocks which would be perfect for fussy-cutting a favorite image. Mine aren’t necessarily fussy-cut, but the repetition of animals in the largest blocks makes me smile.

I send a lot of my quilts to be longarm quilted, since I’m not always 100% thrilled with my own quilting on a small domestic machine. I do quilt my own, when the project is smaller or I think I’ll be happy with straight line stitching or a simplistic design, but more often, I lean toward a theme and need some talent from other professionals! This leaf theme, edge to edge design, was just the ticket. It mimics the fabric design and pulls in that feel of nature. If you look closely, you’ll see that the thread choice is a pale yellow. I rarely venture into colored thread for quilting, but Deb of Owl Quilt It, encouraged me that this would be a good choice and she was exactly right.

I opted to bind this quilt by machine, rather than my “go to” hand-binding. I have a funny relationship with quilt binding. I want it to be perfect, but I also want it to be DONE. By hand is always more precise for me, but I recognize the only way I will improve in machine binding is to do it & practice. What’s that saying about 10,000 hours? Goodness, how many quilts would it take to fill 10K hours of practice?

Finished. This quilt has a pieced backing with the Moda Bleached White, and two prints from Big Sky. The binding is also a third color-way of the Big Sky leaf motif. A single piece backing is clean & neat, but I also like to think of the back of a quilt as an option for more interest and a hint of what might be found on the front side. It’s almost like two quilts, literally bound together.
The pattern for this quilt can be purchased from Brittany Tunison (@brittanytunison) on Instagram.
I’m curious if you purchase fabric you love first and then find the project, or only purchase with a project plan in mind. Tell me in the comments! To be honest, I’m a little bit of both.
Happy quilting…
All photos and content property of Two Terriers Studio and not to be duplicated or shared without written consent.


Hooked. I don’t know how to crochet, and I can only sort of knit, but this fabric collection by Mathew Boudreaux, aka Mister Domestic, had me hooked the minute I saw the sheep. Well, the sheep, the text, the readers, the florals. OK, I like all the colors too. Sign me up. Working again, for the third time with the Mister Domestic Master Maker group for a fabric collection blog party release was a lure too. As is Art Gallery Fabric. Have you felt it? It’s magic and sews up beautifully. “Hooked”; it hooked me.
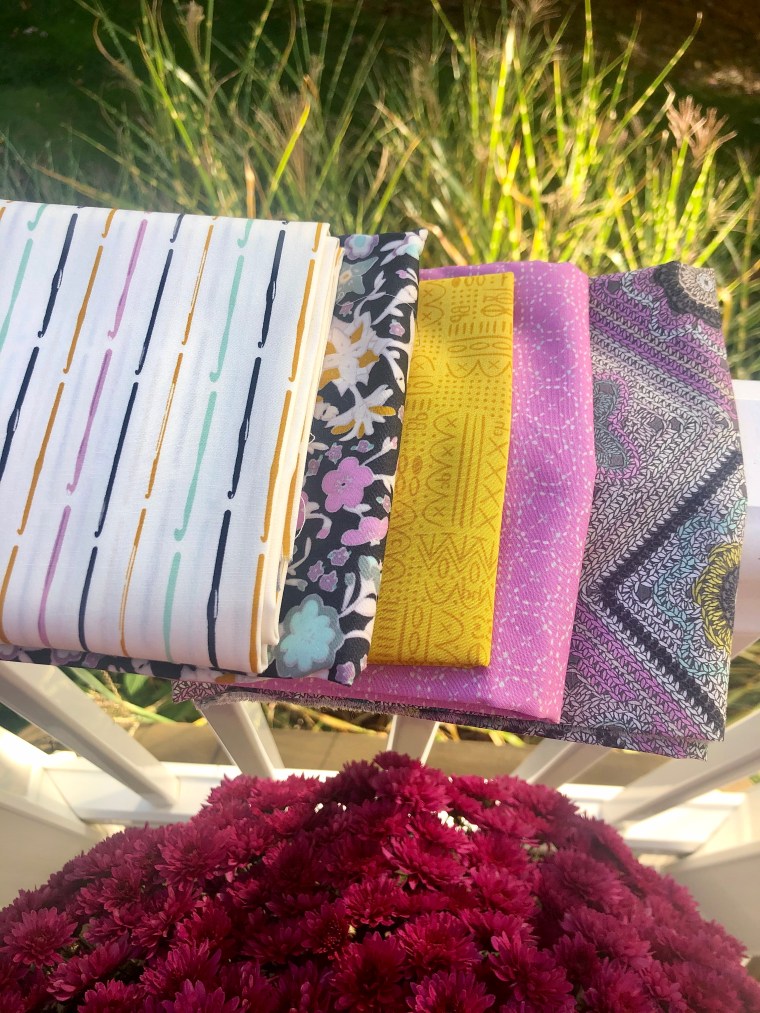
When I thought of Hooked, it obviously brought to mind visions of crochet & knitting projects. What does every yarn enthusiast need? A project bag. I mean, yarn and hooks are portable, so a unique and handmade bag is in order. I think the most challenging aspect of the project was deciding which fabrics to use. The pattern choice came easily as I’d been admiring the Juniper Basket, by Svetlana Sotak of sotakhandmade.blogspot.com. Her patterns are so well written and easy to understand.

This Juniper Basket comes in two sizes and features an interior patch pocket and an exterior zipper pocket. The handles at each side, in addition to the drawstring closure make for several interesting design elements. I opted to make my own drawstrings from one of the prints in the collection, but this could easily be swapped for cording or a decorative ribbon. When I’m working with a new fabric collection, I’m inspired to incorporate as many fabrics as possible. I like to show as much of the artist’s work as I can. This basket fit the bill perfectly; I used six different prints in this one project.


Once the Juniper Basket was complete, I knew I wanted to also tie my love for quilting into this blog party. I believe winter crochet projects are made better by snuggling under a handmade quilt, right? We all love a good quilt, don’t we?

New fabric collections are a fine time to let a quilter’s talent shine. I looked at many intricate quilting patterns and kept coming back to the idea of letting the fabric speak for itself. To me, this collection has several stories of its own; between the sheep, spectacles, historic crochet blocks and more…it made sense to let that be the forward message. I also wanted bigger blocks so that the images had more space to be seen.
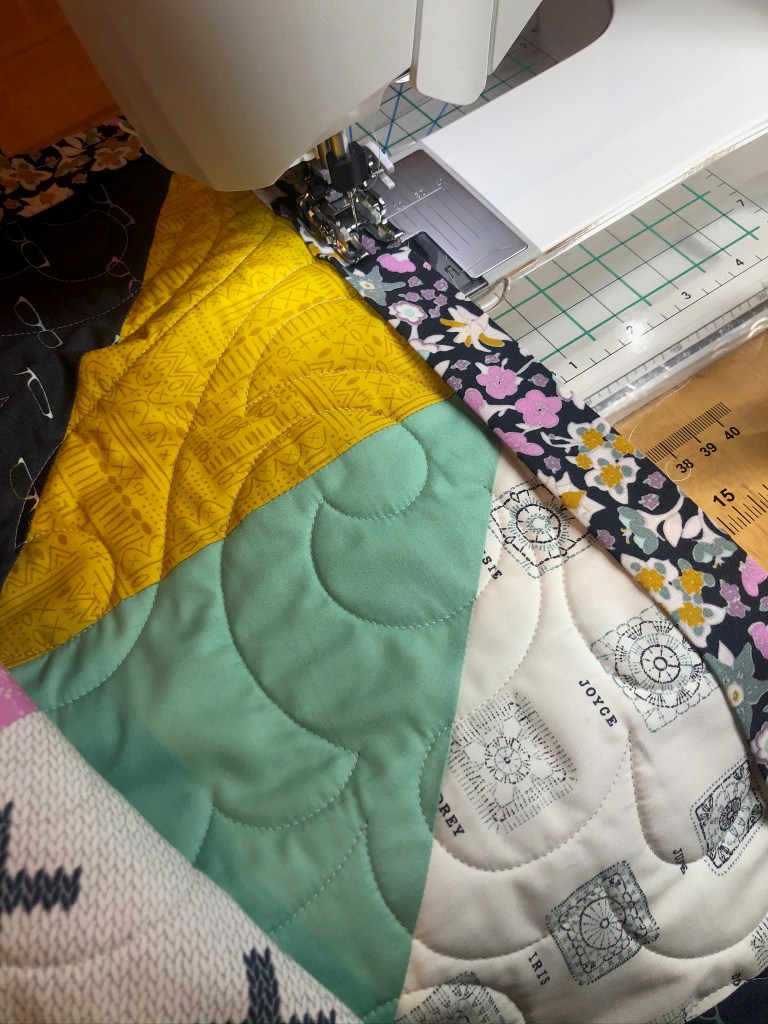
The pattern I chose is called Star Light Star Bright, by Craftsy. I’ve had this pattern in my “things to make someday” notebook; someday became NOW. Meet the merging of the pattern I’ve been saving with the fabric that has just arrived, courtesy of Mathew. I’ll let you in on a secret. That green solid fabric shown above…it’s an Art Gallery Fabric Pure Elements solid. Look familiar? It coordinates with Mathew’s last collection, “Playroom”, for which I also made several projects. I didn’t think anyone would mind if I added an earlier 2020 fabric into this new quilt. Honestly, I think it matches perfectly with those little highlights in the crochet blocks. It’s also what I do; blending past & present. I like the fact that his collections coordinate and are cohesive, when you see them lined up against each other.

Here’s another not-so secret, secret. I like a crinkly textured quilt, that just gets more cozy with every wash. I’ve yet to wash this one, but look at that texture. Do you see the sheep? Hello little cuties. While I’m not personally looking forward to chilly winter nights, I am looking forward to sitting under this quilt.

In addition to the AGF Pure Elements solid in Warm Wave, I added Pure Elements in Snow for the corners of the star block. I wanted it to “pop” against the other prints. I think it’s just enough of a frame to let the other colors shine. I backed this quilt in the sheep print, “wool origins”. It’s precious.

I’m thankful for the opportunity to work with such talented makers, fabric designers and fabric manufacturers. It truly is an aspect of sewing and quilting that I never could have imagined just a couple of years ago. Artists continue to create new designs and my fellow makers encourage me and one another; they raise the bar in a way that is inspiring. You all push me to be better. Thank you.
Mathew, thank you again for this fabric. I appreciate it and had a lot of fun sewing for your latest collection release.

Golden Light. What do you envision? Sunrise or sunset, autumn colors as they fall upon us? When I began to work on this pattern by Julia Raye Bednorz, http://www.thehomebodyco.com, I thought about how we can see rainbows and clear skies after a storm. There is golden light if we stop and look for it. It also reminded me of a time when I lived on the west coast and often carried an umbrella, because their hazy skies meant “impending storm” to my midwest rooted mind. So many colleagues would say, “you’re not in Kansas” and we’d laugh. I eventually understood the marine layer; I still had my umbrella.
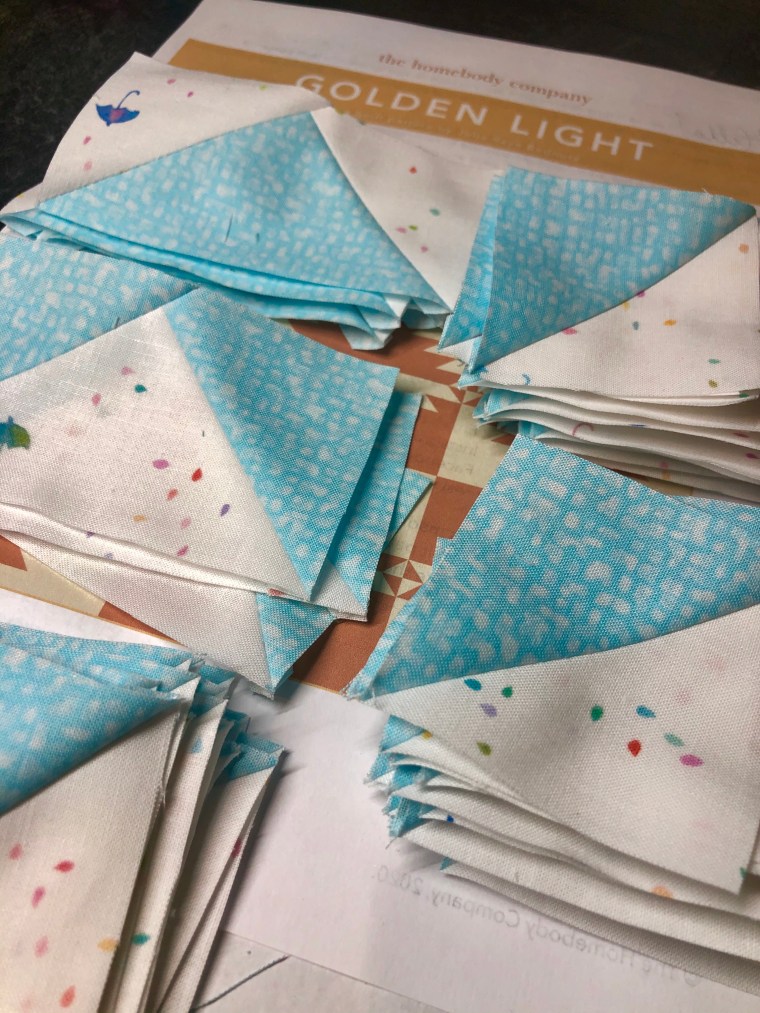
The pattern includes six sizes from a wall hanging to a king size quilt. I opted to make the baby size quilt first, but having seen other versions in larger sizes and colors, I look forward to exploring those options.
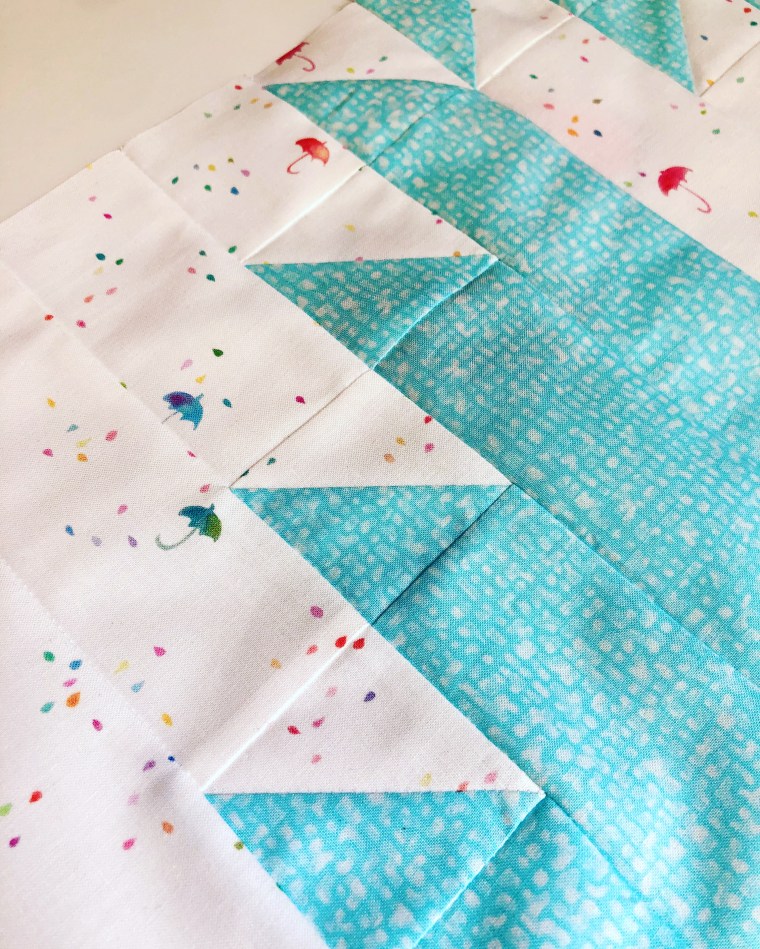
With strip sets, half-square triangles and flying geese, this pattern offers the opportunity to work on and improve matching points.
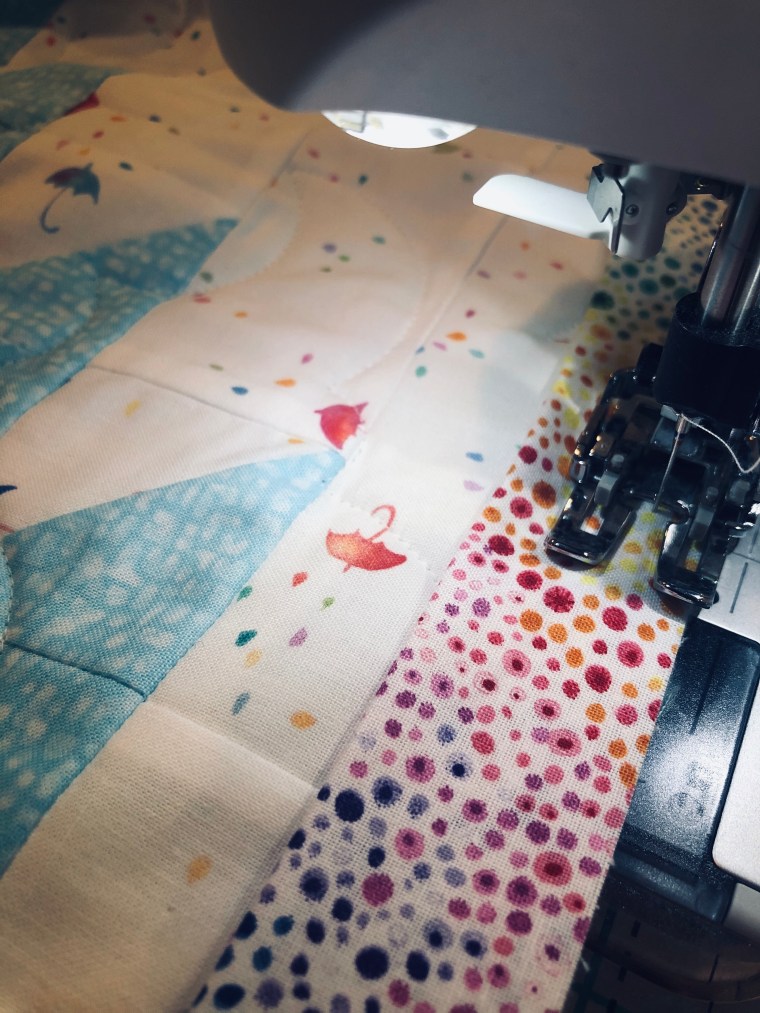
This rainbow print by Wilmington Prints perfectly complements the raindrops of the Robert Kaufman Fabric next to it. I noticed how the drops are saturated, faded and feature little stars within the “splatter”.
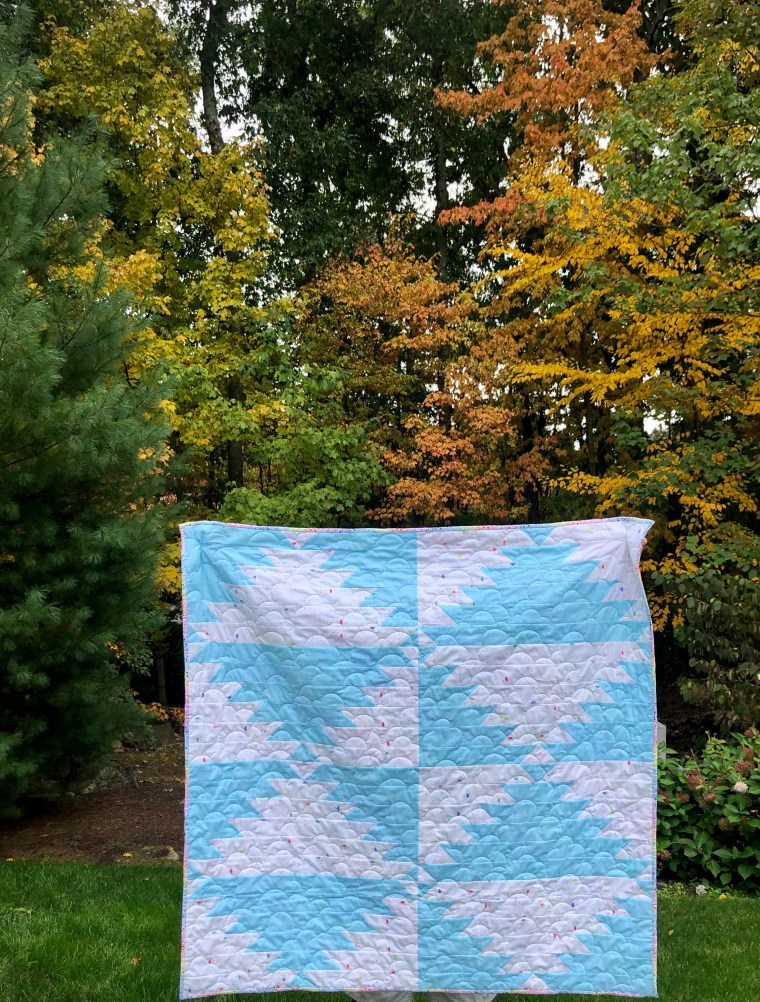
Finished! This pattern has a lot of individual pieces, but it does come together quickly. I like how the blocks and finished quilt have primary and secondary patterns. I made mine in a two-toned palette, but there are other testers with ombre, scrappy, halloween and multi-color quilts. If you’re on Instagram, take a peek at the hashtag, #goldenlightquilt, to see the variety. It’s really impressive how we all interpreted this pattern.
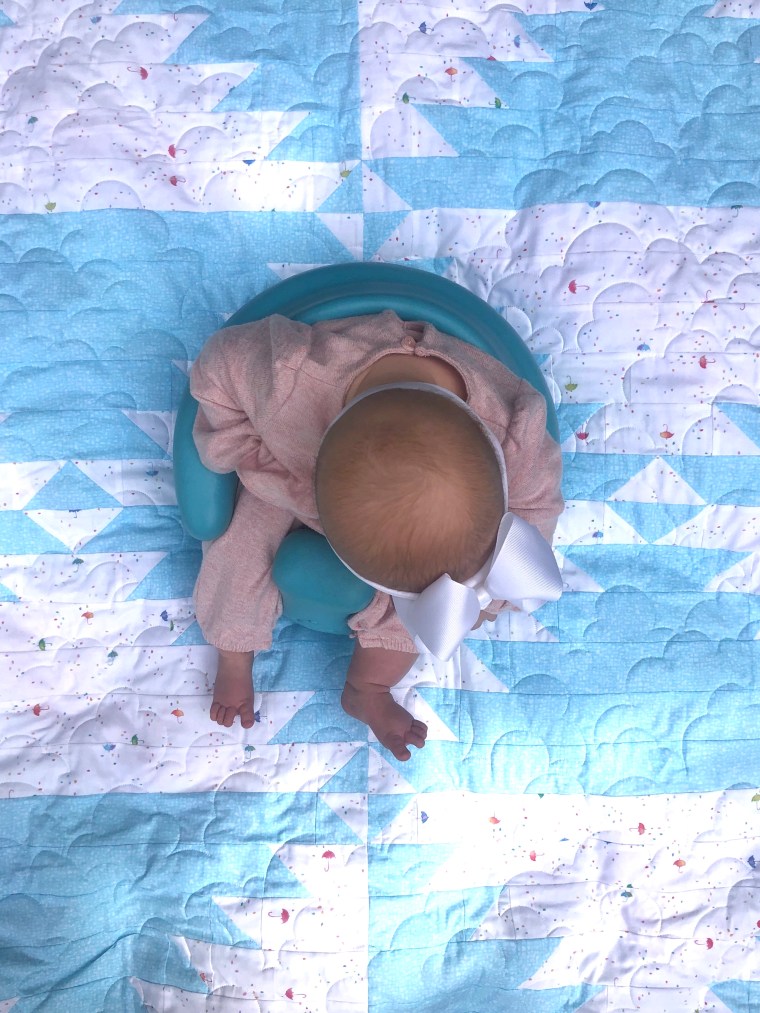
Yes, babies improve quilt photos! It may look like she’s studying the cloud themed long-arm stitching, but she might have been wondering why I was standing over her on a step stool taking photos and not holding her instead. When she’s with me, I rarely set her down.

This backing fabric is by Henry Glass Co. Isn’t it just wonderful to find fabric from multiple manufacturers that work so nicely together in a finished piece? Sometimes when I quilt or make other projects, I strictly follow one designer or manufacturer for the entire project and I love the outcome. This quilt has so many things going on and I love it too. In my opinion, when you follow your eye and your gut, it tends to work out. When I see this rainbow dot binding against the two-toned front, I think it hints at what you will find on the back. The circles mimic each other in different sizes throughout the quilt.
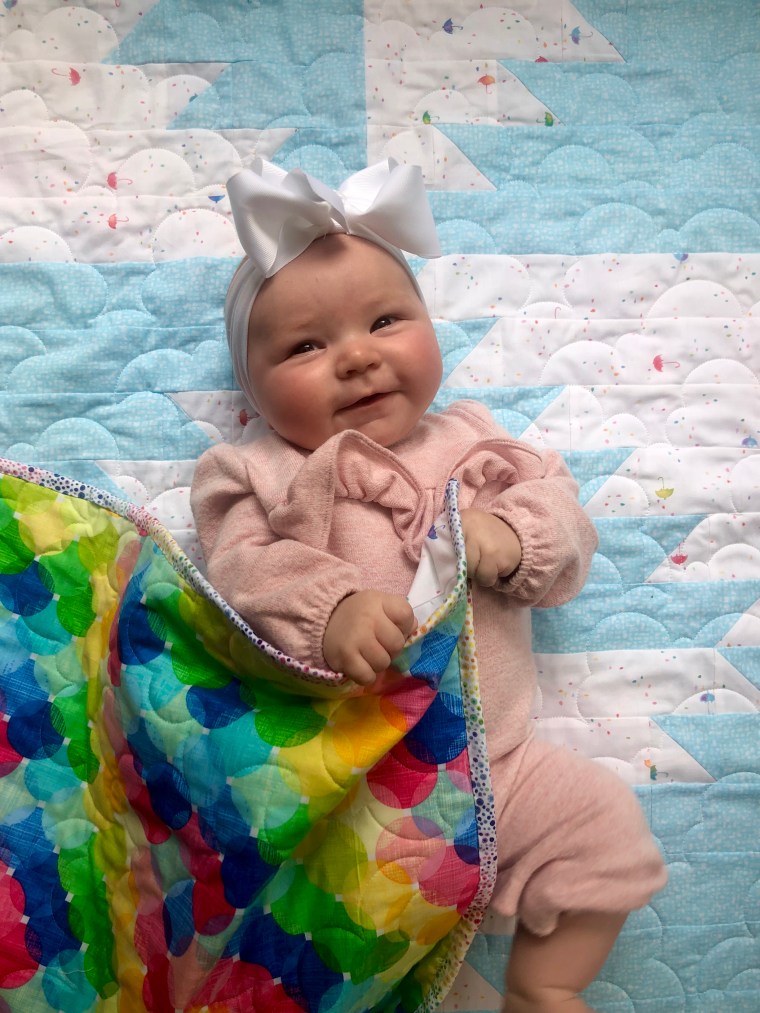
Again, babies for the win. Before anyone asks, no, this isn’t my baby. She’s so sweet & I’m blessed to have young neighbors.
I’m often asked if my quilts are for sale, and to date, I’ve not sold any. I have made so many for my family and I’ve made some to gift for birthdays, weddings and new babies. As I’m making new quilts, the thought does run through my mind of who I’d consider gifting it to and when I finish, it’s sometimes hard to part with quilts I love. The day is coming when it’s going to be time to unload some finished projects. How many does one person need? If you don’t sew, do you look for quilted gifts?
If you’re new to quilting, I would rate this Golden Light Pattern, beginner to intermediate friendly. Check out the designer’s website, Instagram (@thehomebodycompany) and consider purchasing the pattern for yourself. Be sure to look at the Instagram hashtag and see how versatile it can be given different fabric choices and color themes. I think you’ll be impressed by what has been created.

Let’s finish with a quilt and a baby. This is truly a “Golden” moment.
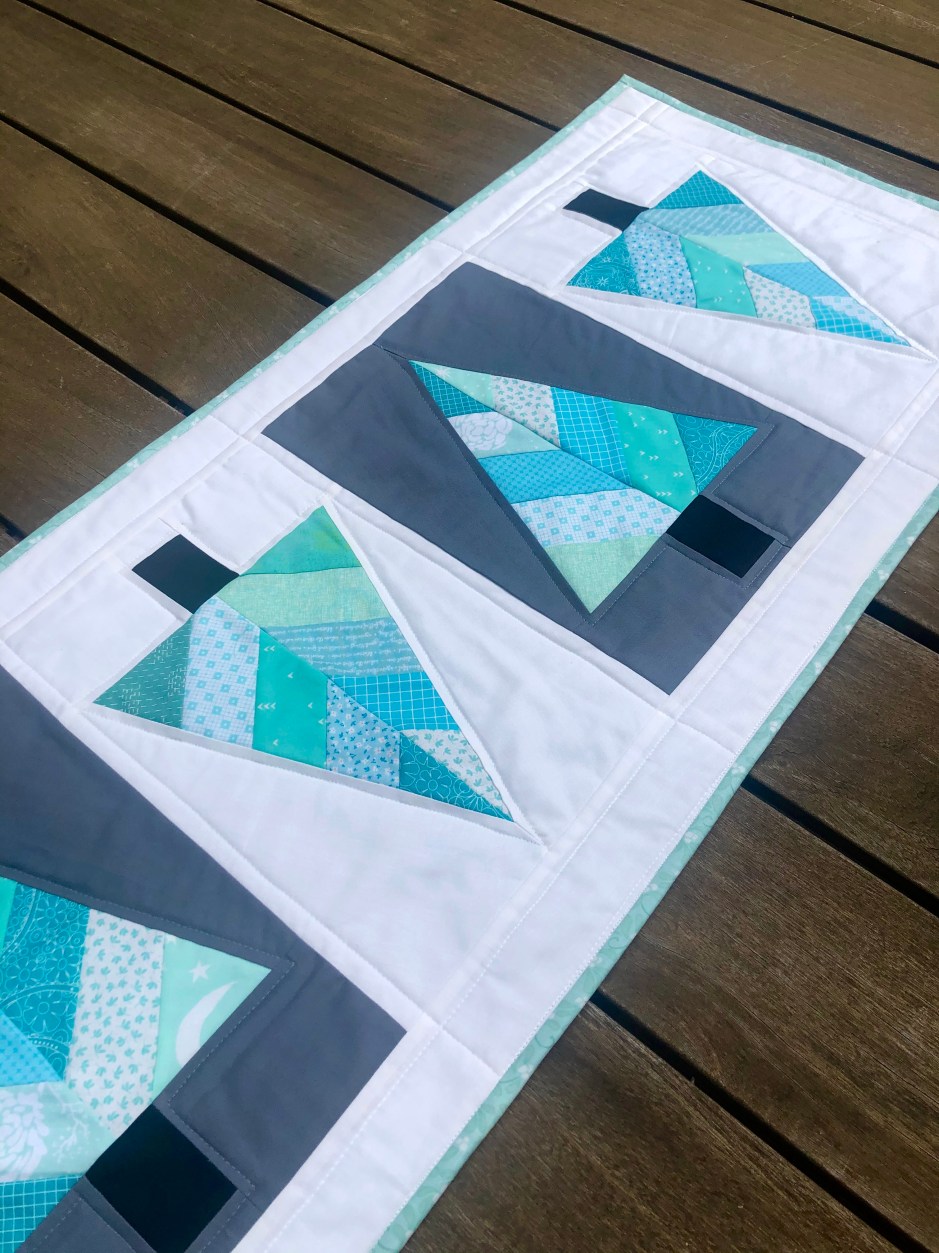
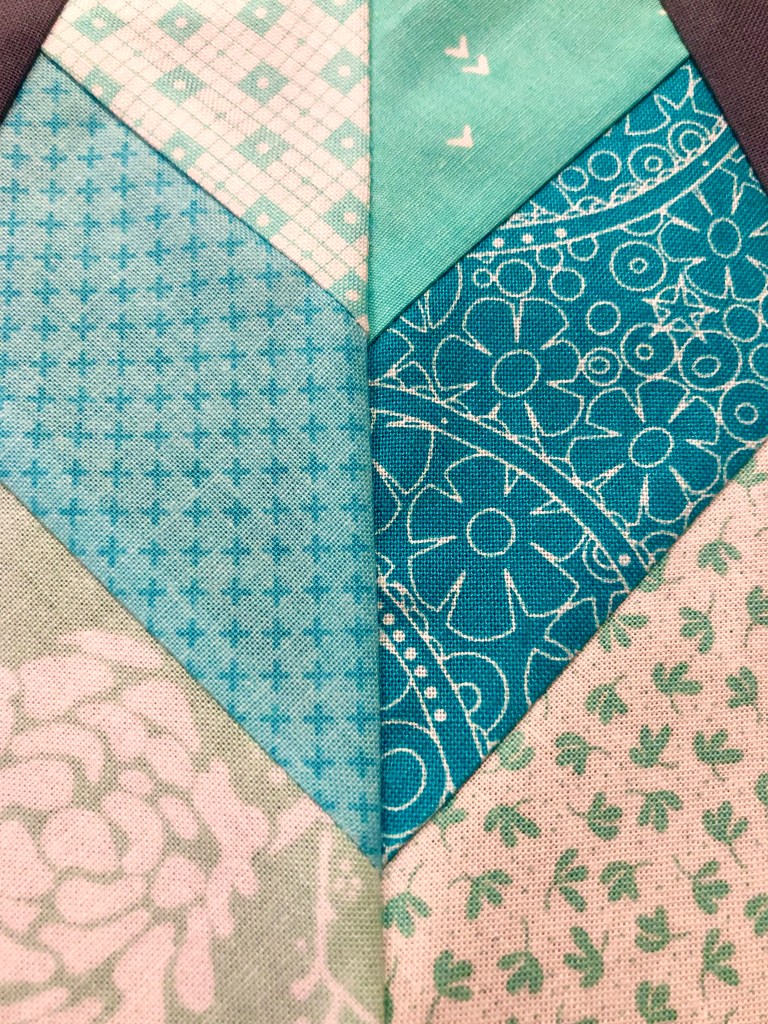
It’s still September, but there are Christmas trees in my studio. I am not one to jump ahead in holiday decorations, choosing instead to savor the current moment. However, when the opportunity to test a pattern for Monika, @pennyspoolquilts, came about, I gladly set aside my Autumn projects and worked on some scrappy Christmas trees. I’ve tested patterns for her before & knew this one would also be a quality project.
This particular pattern is based in foundation paper piecing, which is not outlined in the pattern, but assumes the maker has a basic understanding of this technique. I found it to be a simple FPP pattern; the pieces are easy angles and manageable sizes. No tiny piecing here.
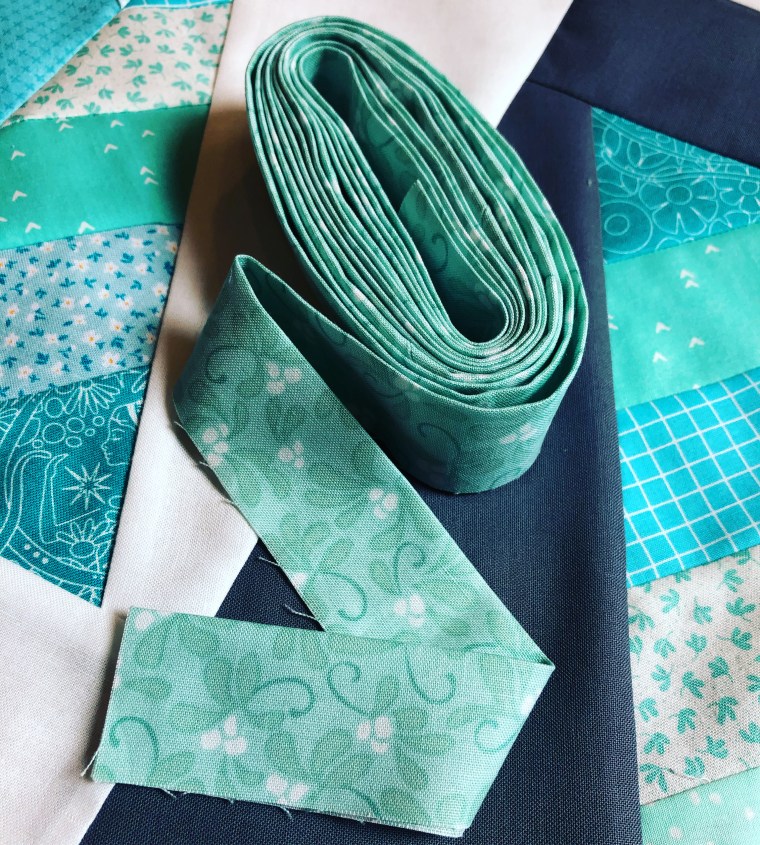
I’ve made two projects with this pattern; each using a different template size. The first, this turquoise, gray and white table runner using the larger of two tree sizes. Compiling four blocks, alternating their “top” direction, it has become my first holiday gift to be finished for the Christmas of 2020. That seems so odd to say…I’m sewing Christmas gifts in September. That’s not a typical event for me; maybe it’s a new trend. I opted for these non-traditional colors so that I could coordinate with the recipient’s decor colors. This pattern would be lovely in a coordinated fabric pull or any variety of multi-colored scraps. The versatility is limited only by the maker’s imagination!
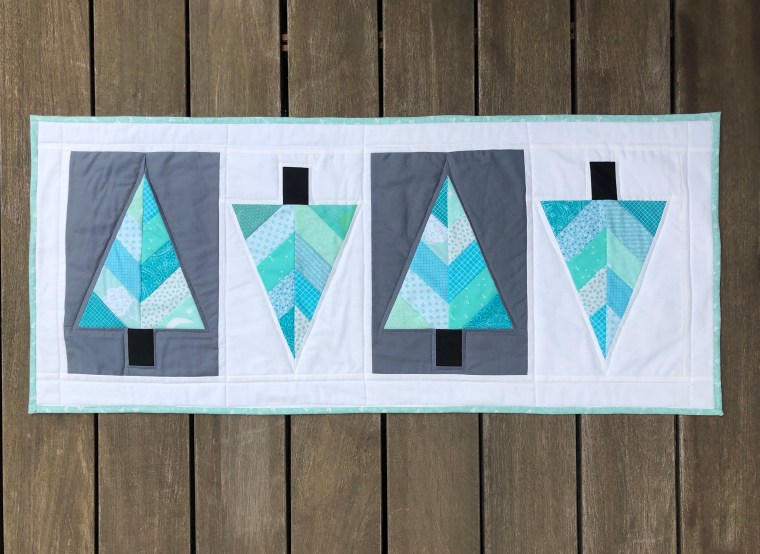
In my second project, I shifted the color scheme to one that is considered more traditional. If I’m going to be making Christmas gifts a few months ahead of schedule, I’m going to include gift bags! I truly think the sky is the limit in how this block is depicted; color choice could make it more or less holiday-themed. Go with bright colors like hot pink or yellow and make it a retro vibe. In a variety of greens or backgrounds of darker colors, this could easily be a woodland theme.
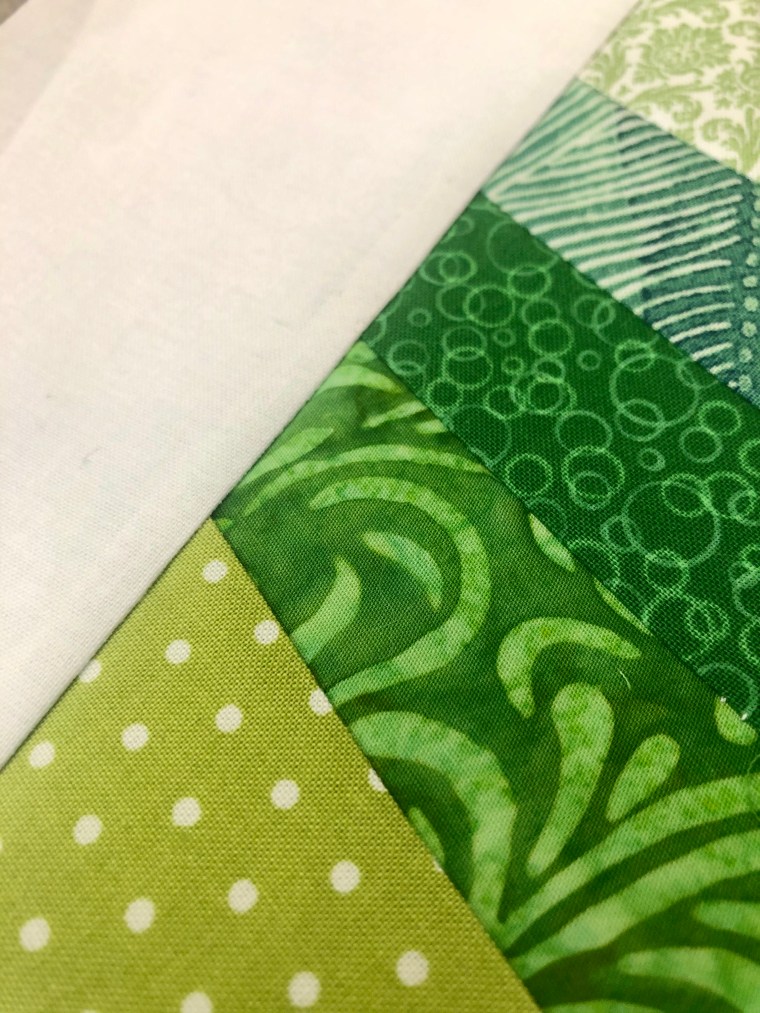
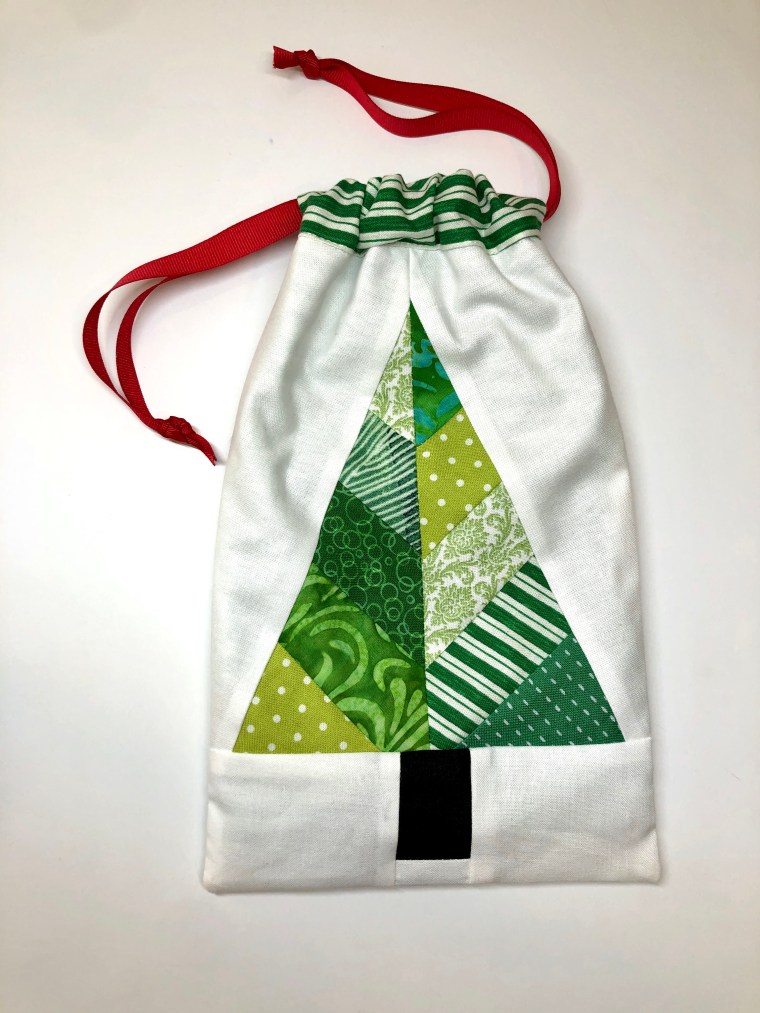
This gift bag is fully lined and uses the red grosgrain ribbon as a drawstring. By adding additional borders, it could be resized to suit your needs to accommodate a different sized gift. I will likely be using this size for smaller gifts and treats this holiday season.
I’m thankful to have worked with Monika again & hope readers will take a minute to browse her Instagram (@pennyspoolquilts) and website, http://www.pennyspoolquilts.com and check into the patterns and tutorials linked there. This particular pattern, Festive Forest, will be released to the public October, 8, 2020.
So tell me, do you sew for the holidays or other gift giving seasons? What’s your favorite thing to make?
