The Night Vision Quilt

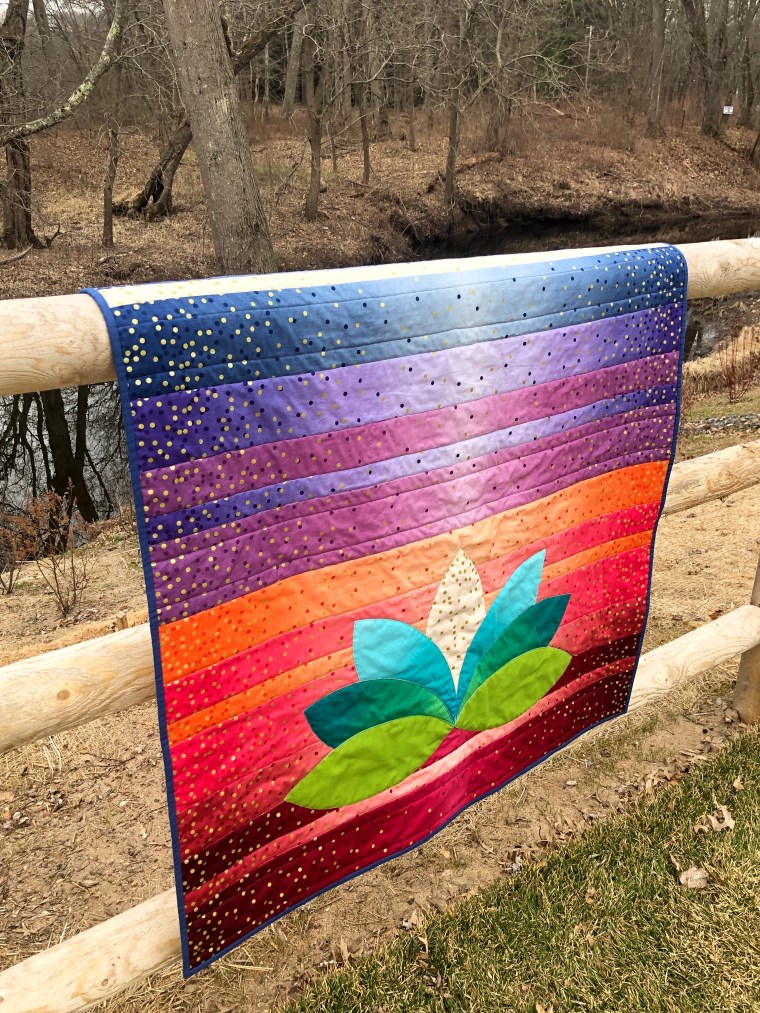
It’s been a LONG time since I’ve shared stories of quilts here. I didn’t realize how long until I started this post, but hello again, I’m glad you’ve joined me. I’ll be catching up with stories and photos of many quilts (some from 2022!) and travels very soon. I hope you’ll come back and visit.

A Pattern Test

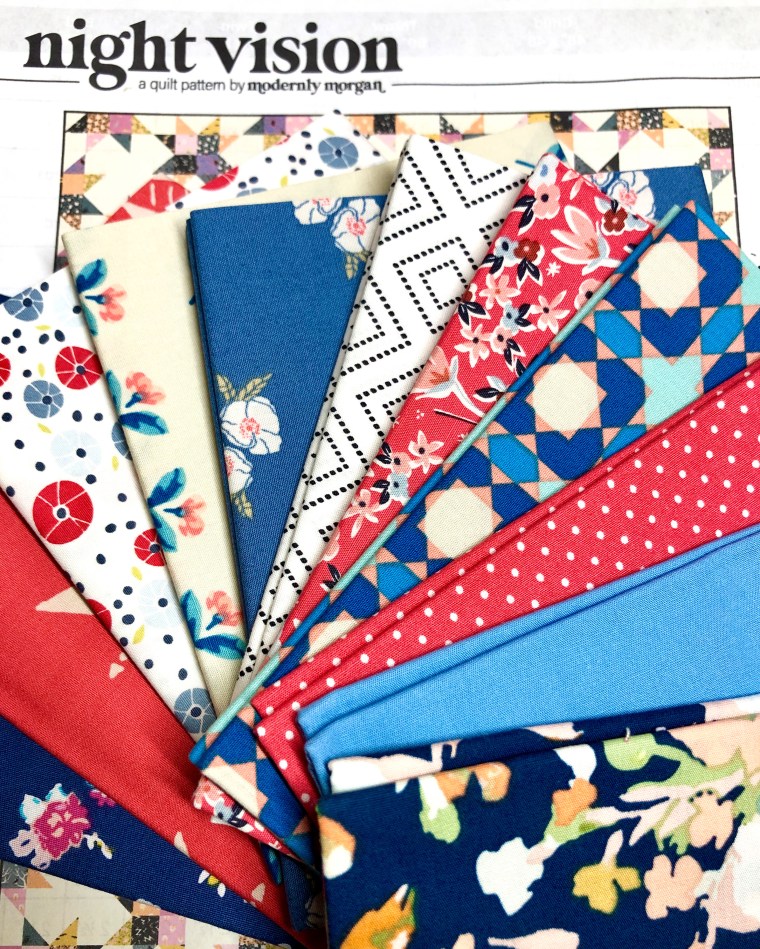
This project was a pattern test for my quilt designer friend, Morgan, of www.modernlymorgan.com. She and I have worked together several times and when she asked me to test / review this pattern, I was happy to do it. Pattern testing gives me a path to keep my editing skills fresh and to work with talented makers, as well as having a sneak peek into yet to be released designs. It’s all good.

The Fabric

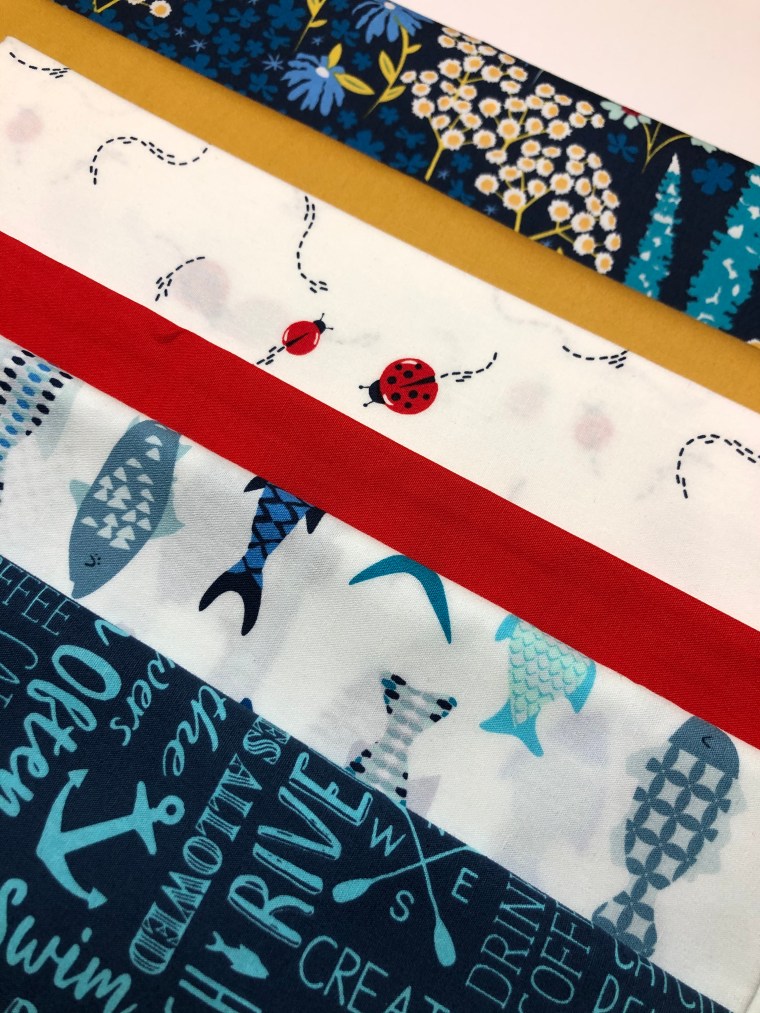
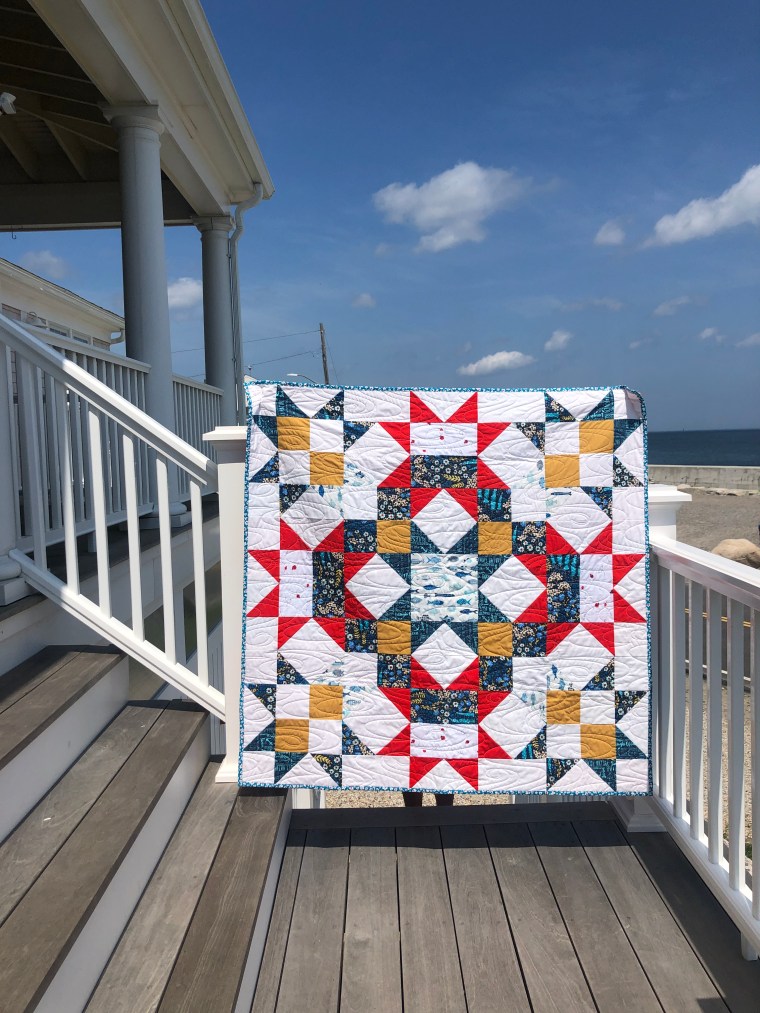
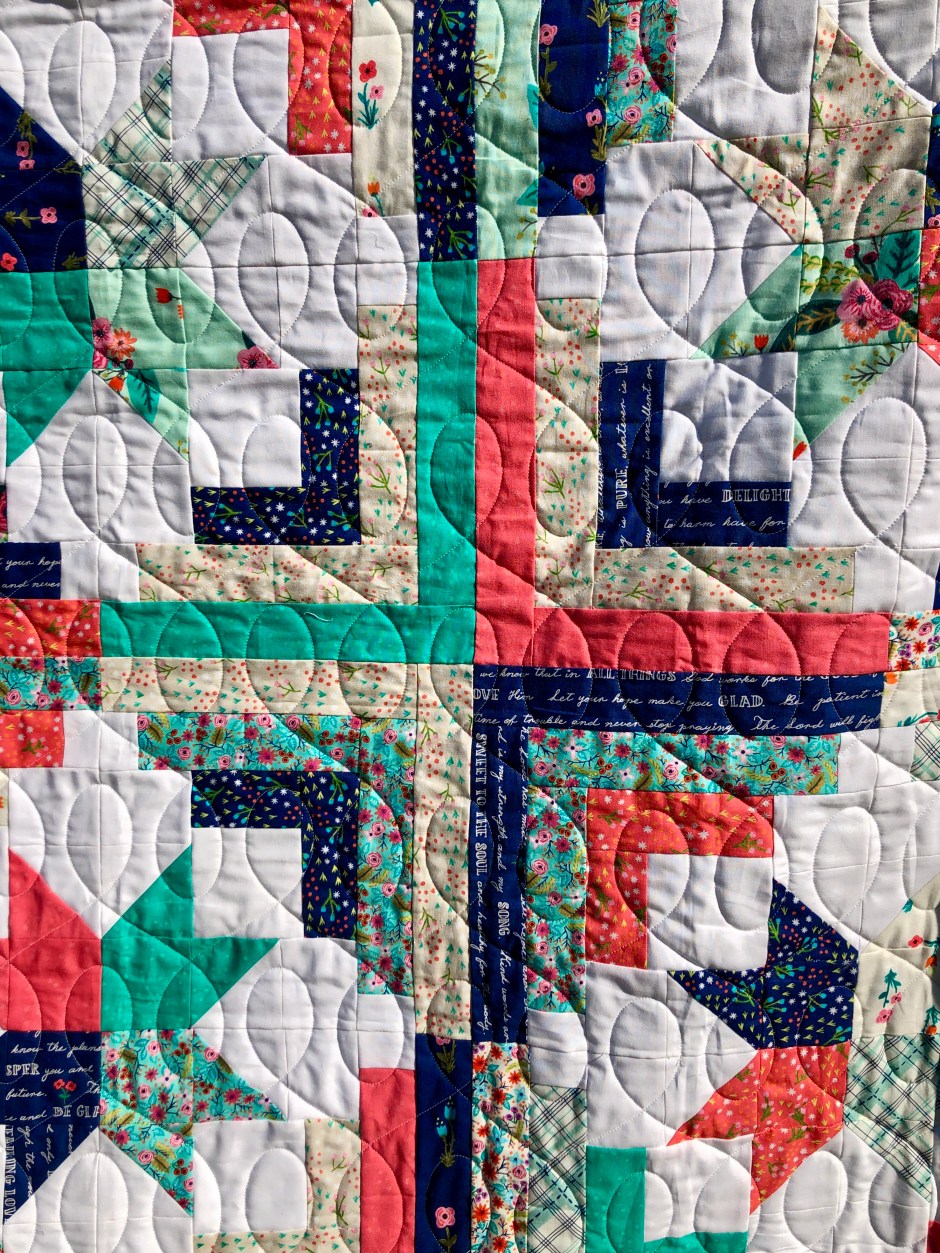
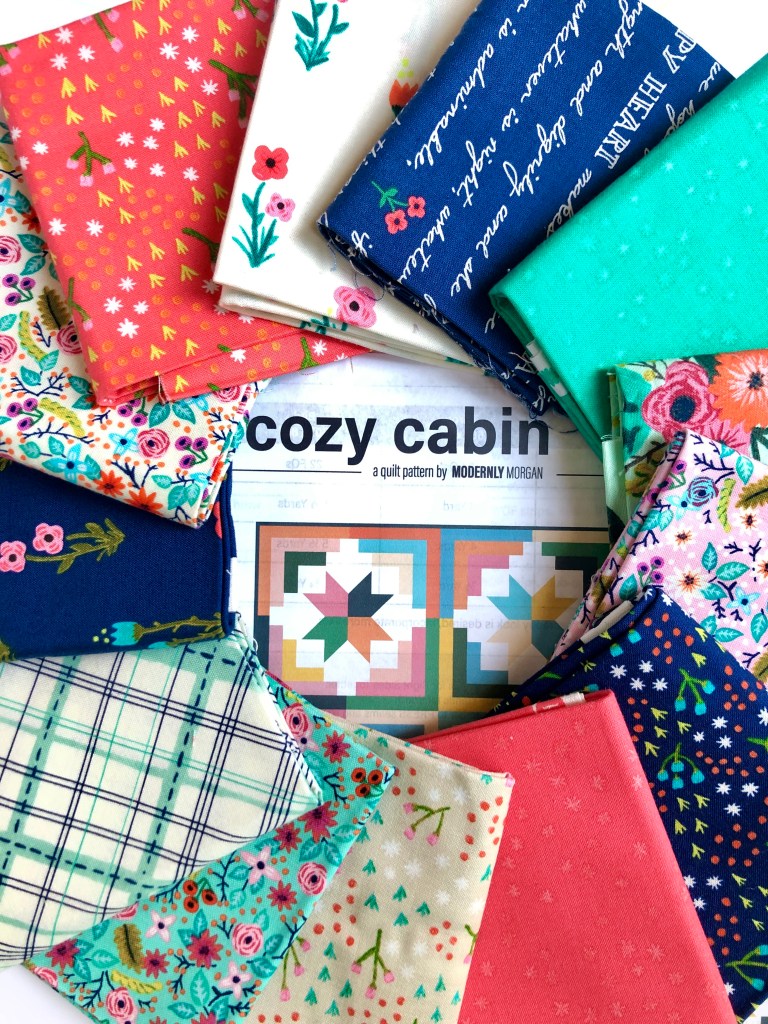
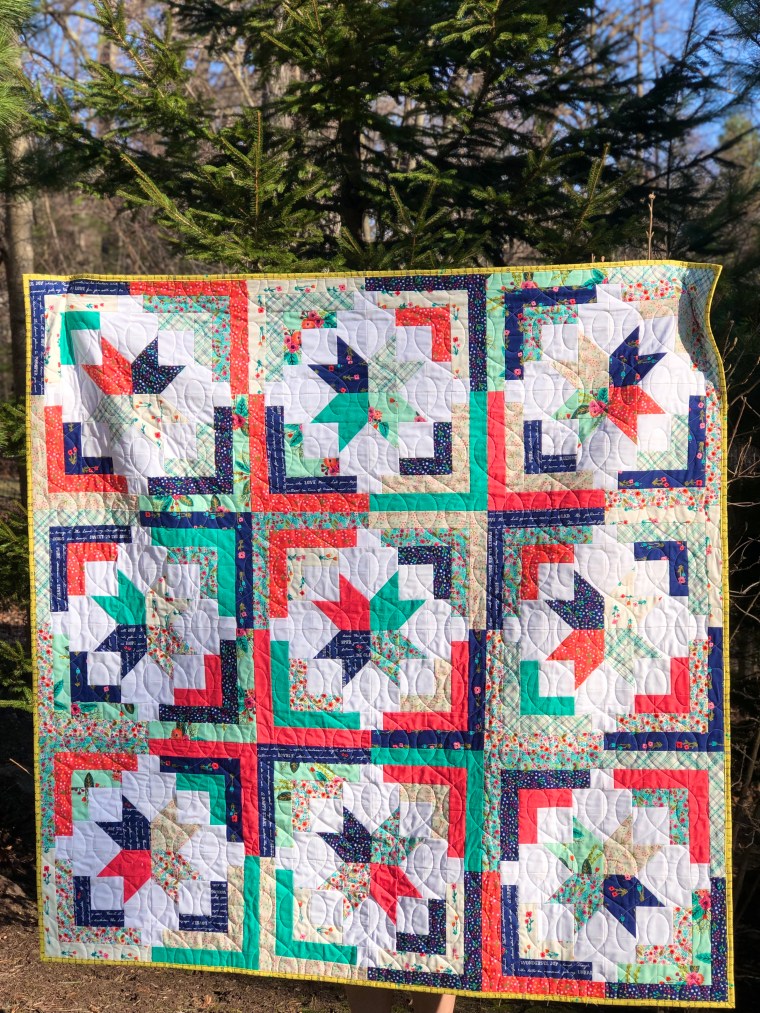
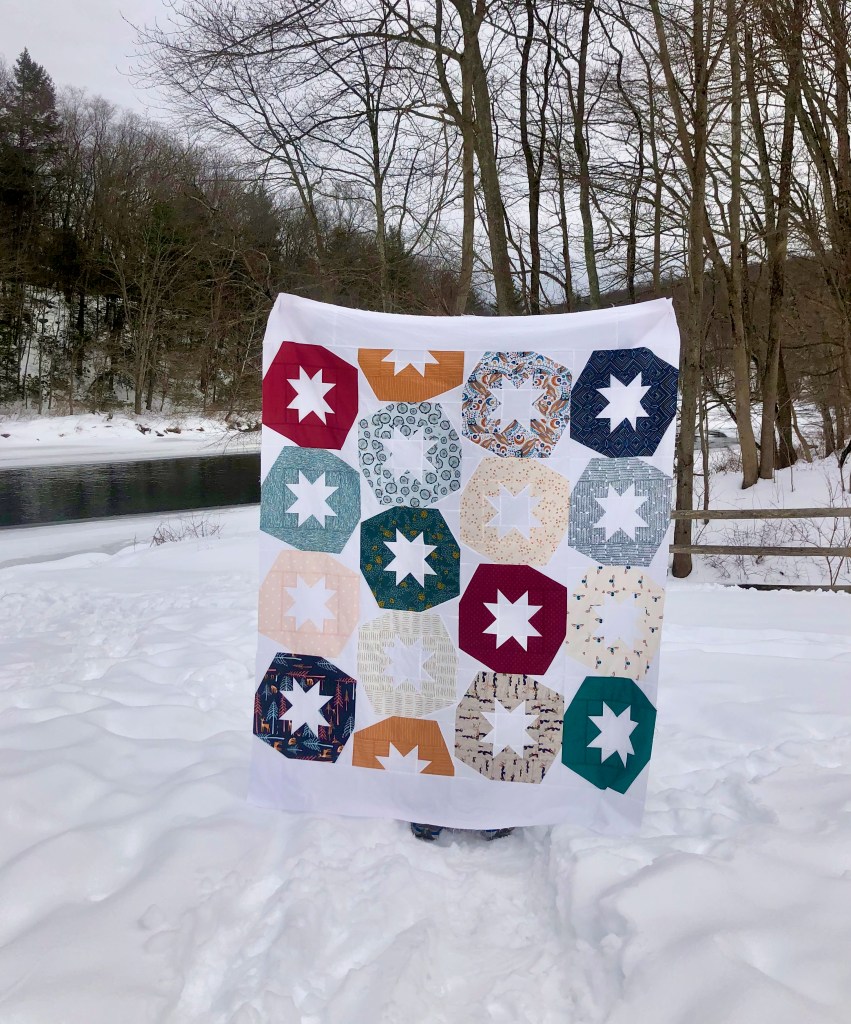
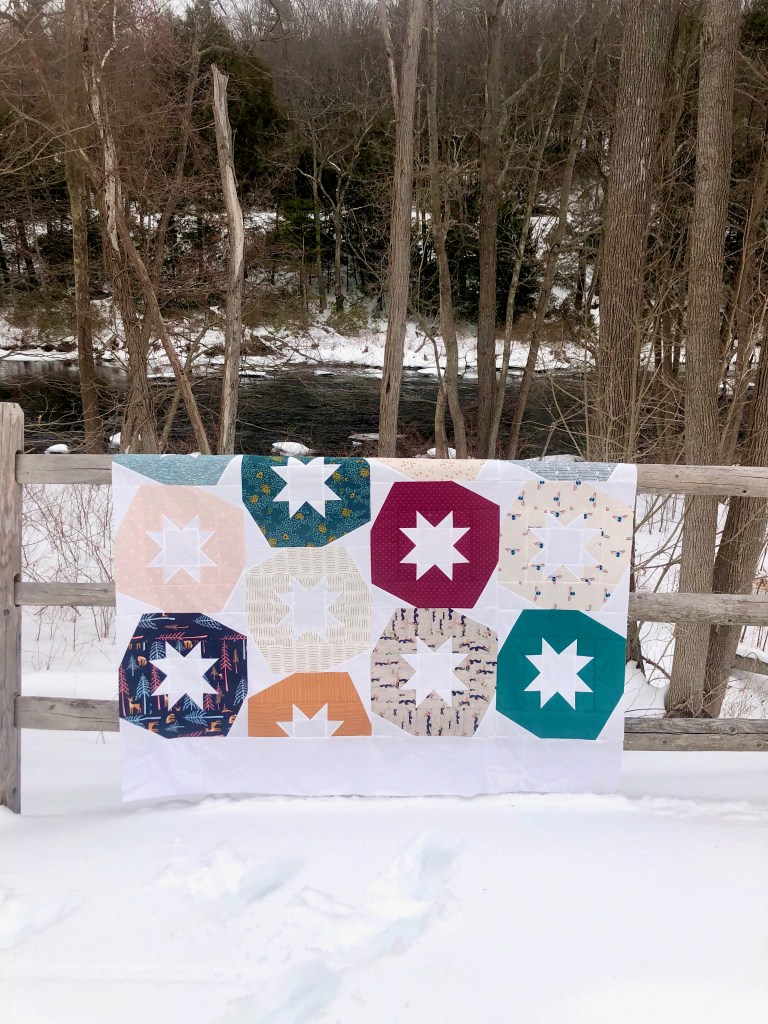
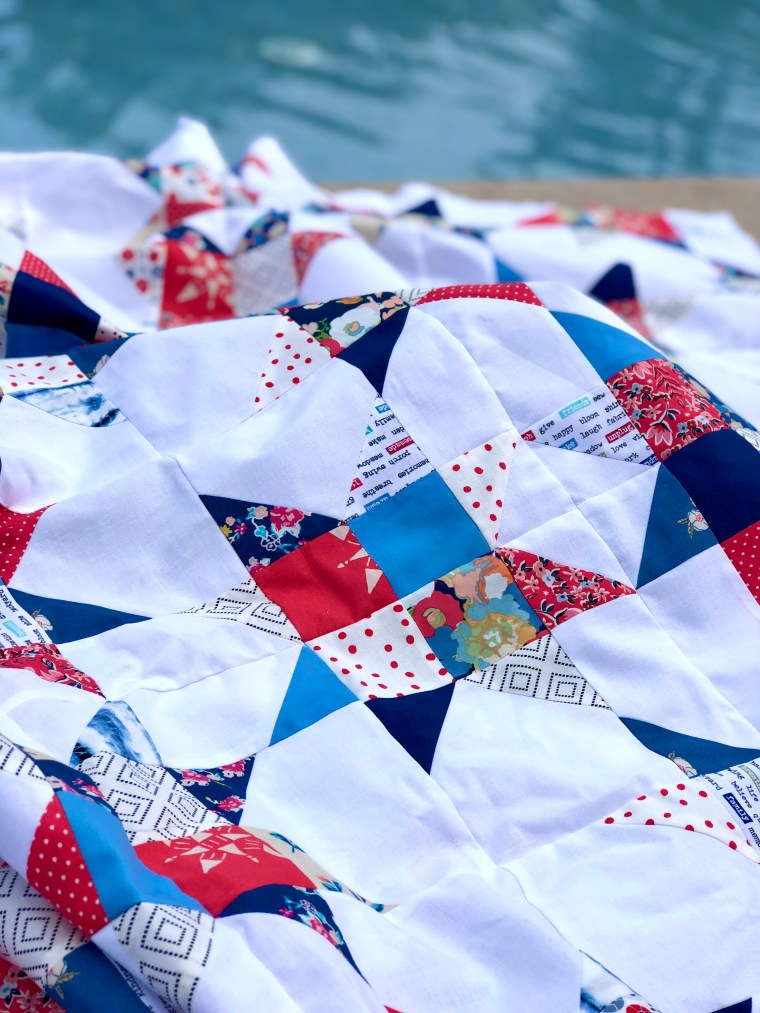
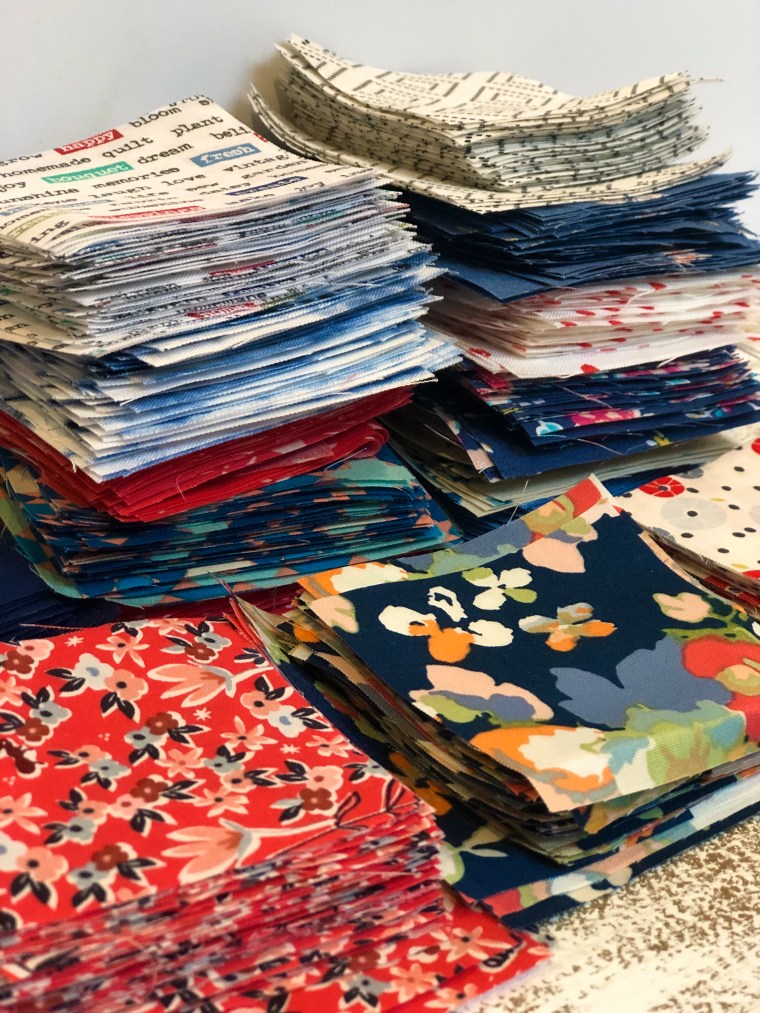
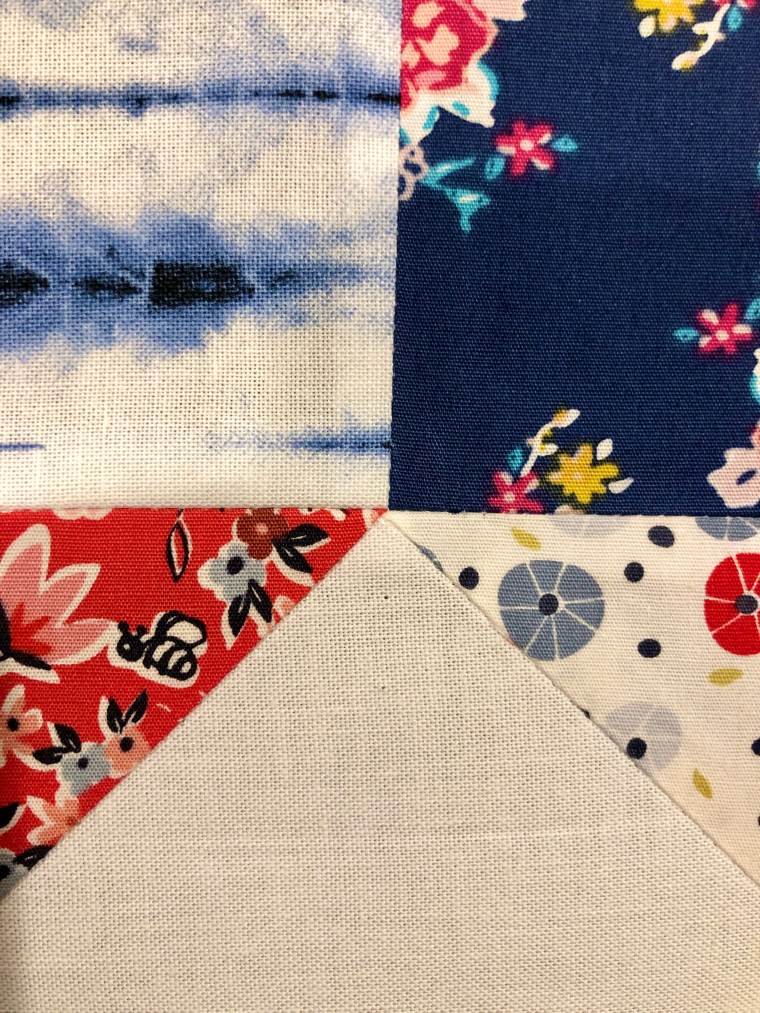
There’s a joke around the internet that buying fabric and quilting are two different hobbies. As a quilter, and fabric enthusiast, I tend to agree. I often buy fabric I love, without a clear-cut plan for it, but I know it will be used one day. Nothing goes to waste in my studio. For this quilt, I pulled a fat quarter bundle from my stash. This particular bundle is called Americana, by Art Gallery Fabrics. While it’s not specifically Stars and Stripes, the color variation is definitely one that evokes patriotic feelings. In a decade of quilting, I’ve not made a patriotic or Independence Day summer quilt, so this seemed the perfect time. I purchased this bundle from another friend, Jen at www.knottedthread.com.

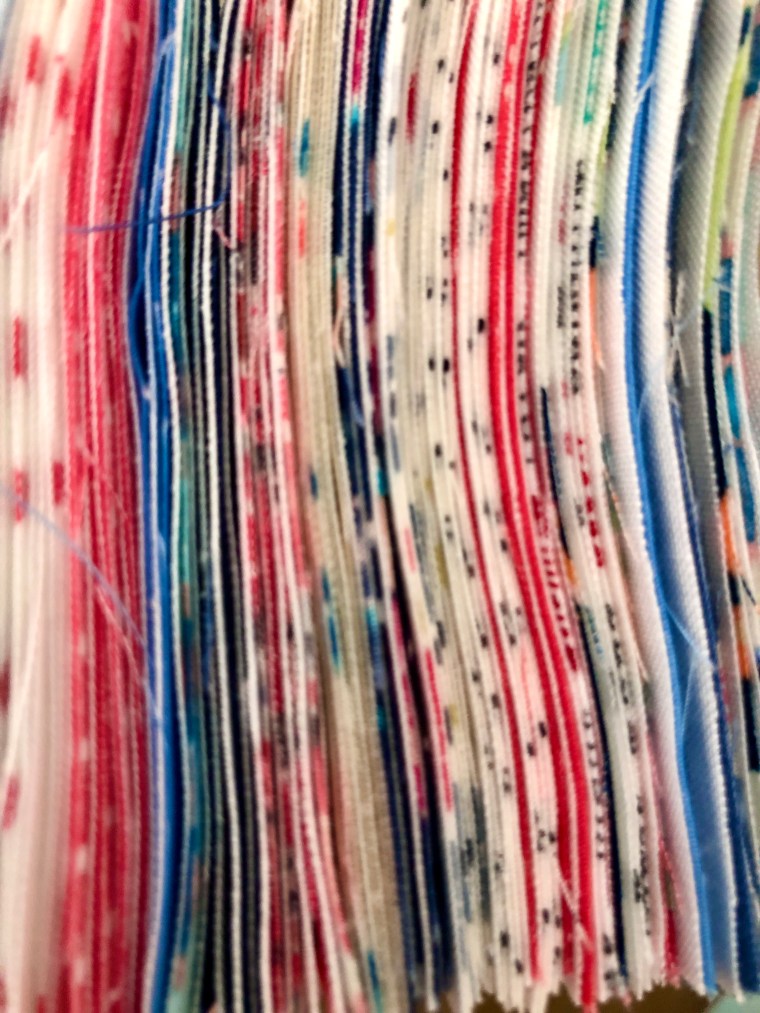
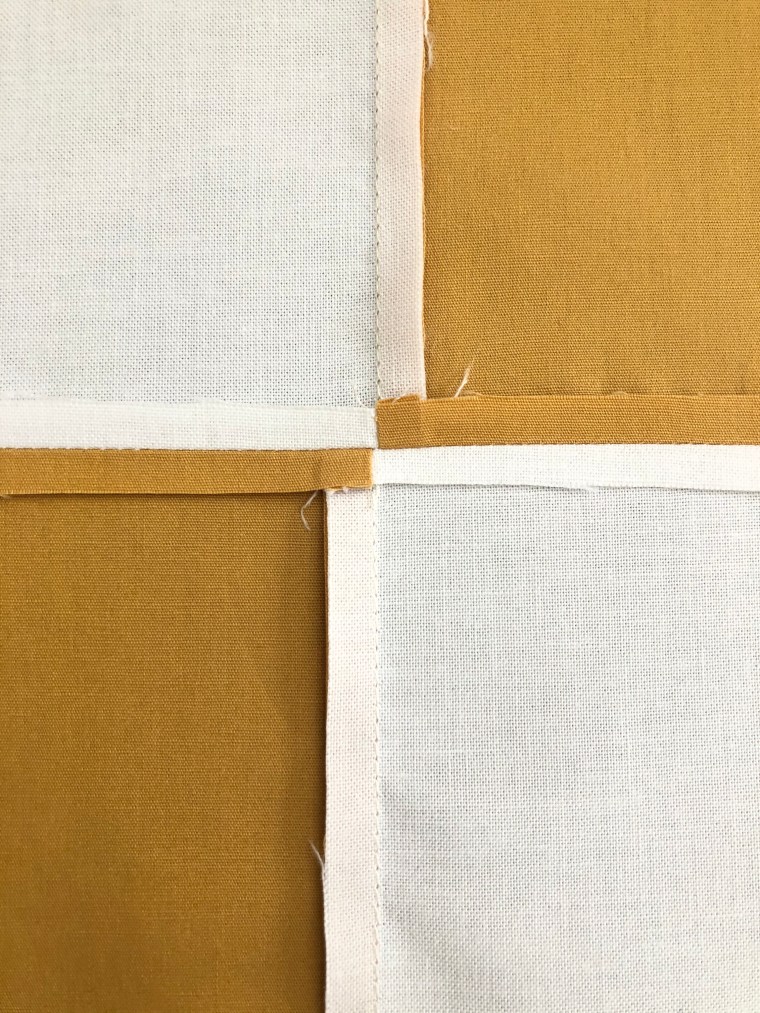
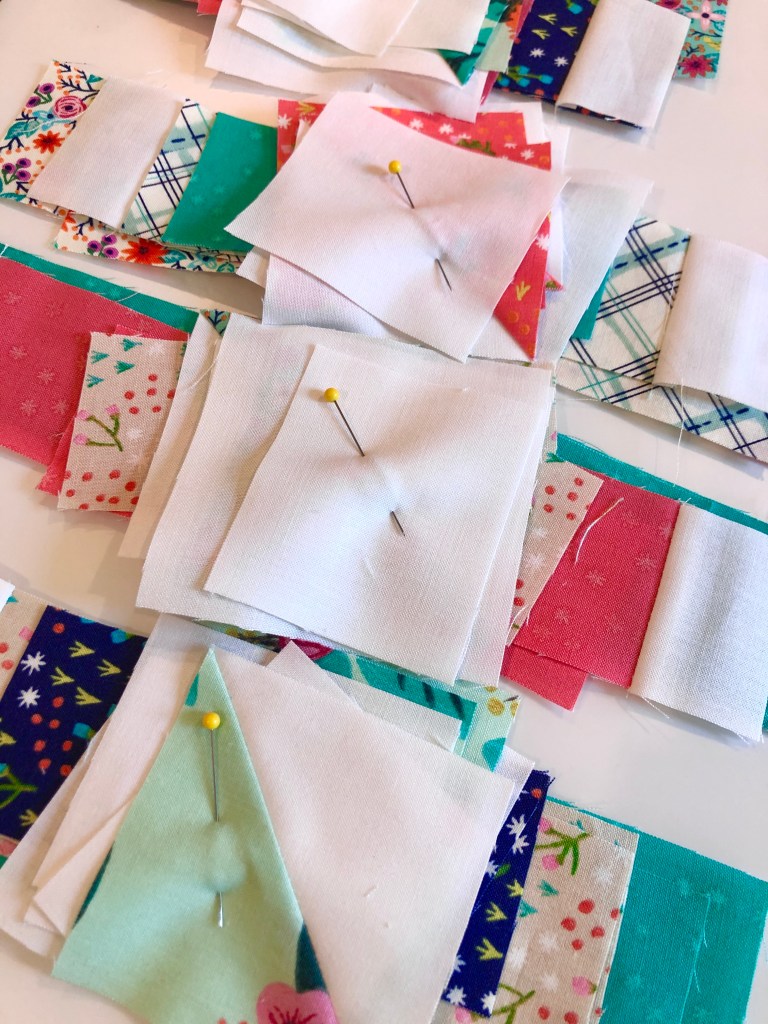
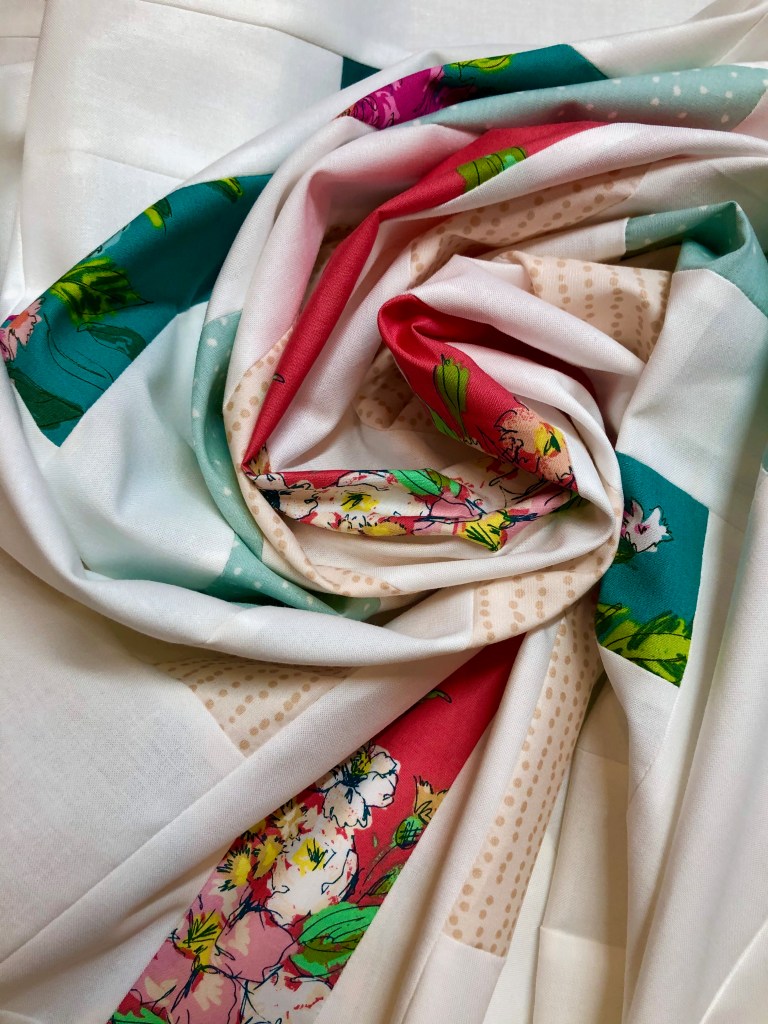
There’s something so beautiful about freshly cut fibers, stacked neatly together. To take yardage, cut it apart and reassemble into something new is a wonderful thing.

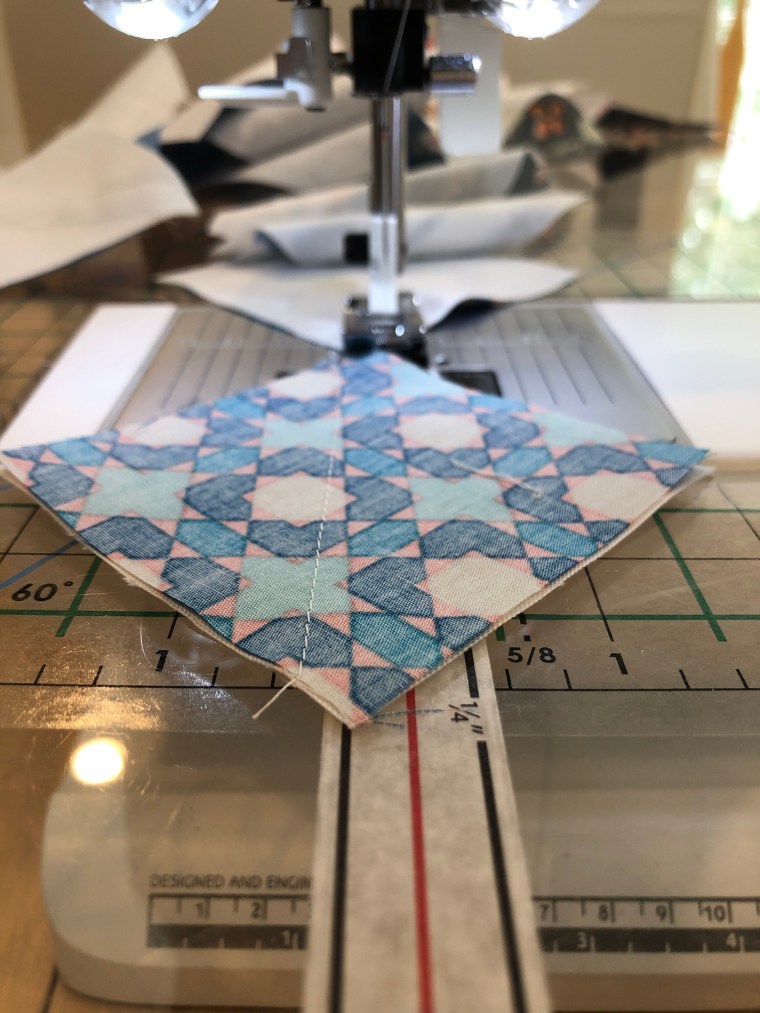
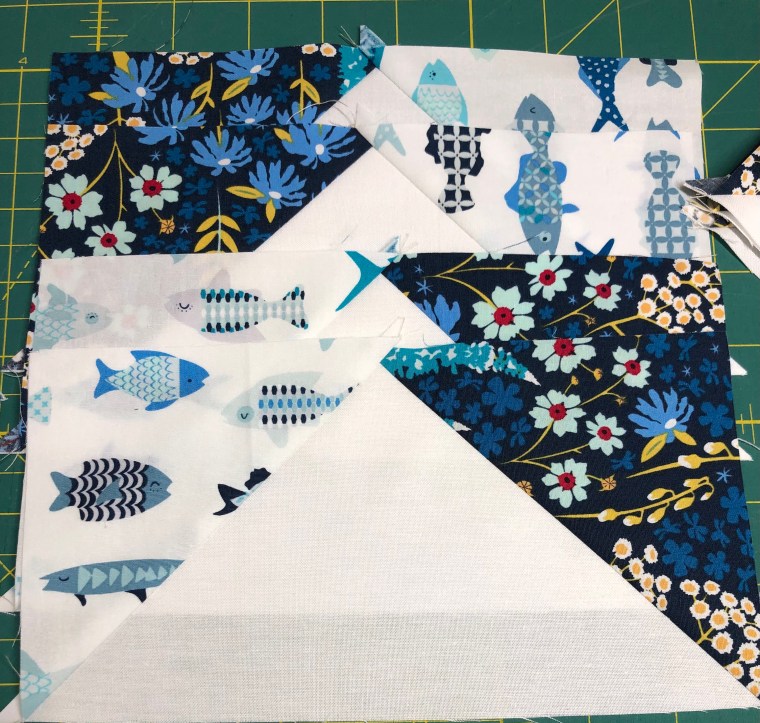
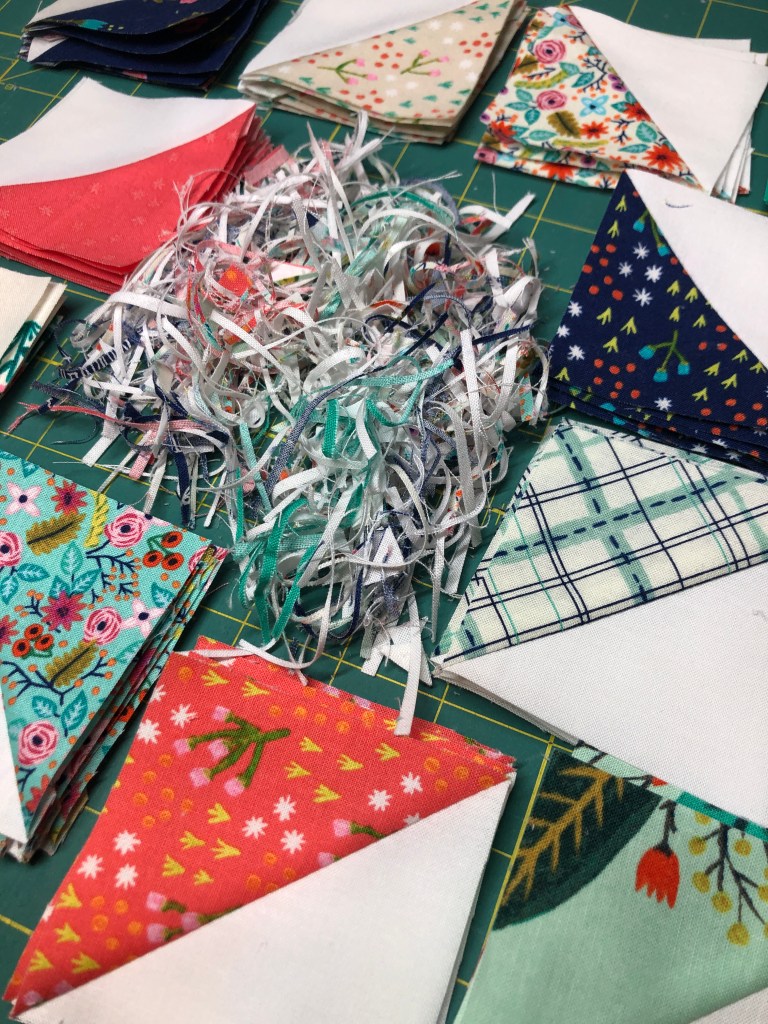
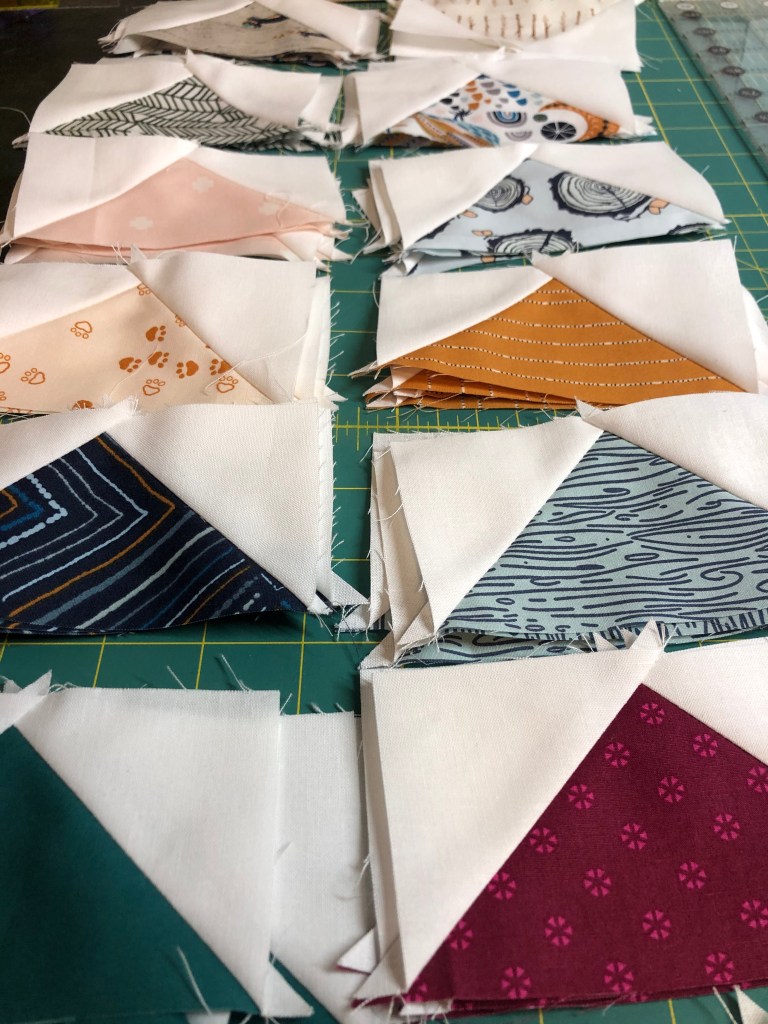
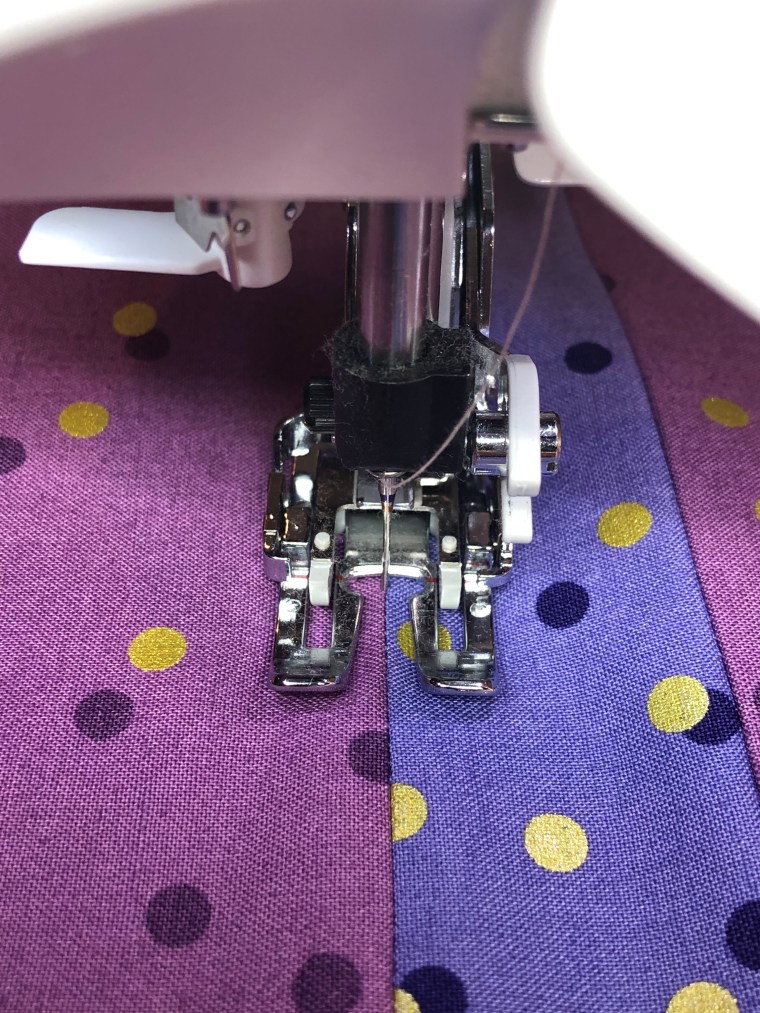
Half-square triangles in the making. I’ve only recently started using Seam Tape when piecing HSTs. It certainly cuts down prep time and results in accurate measurements too.

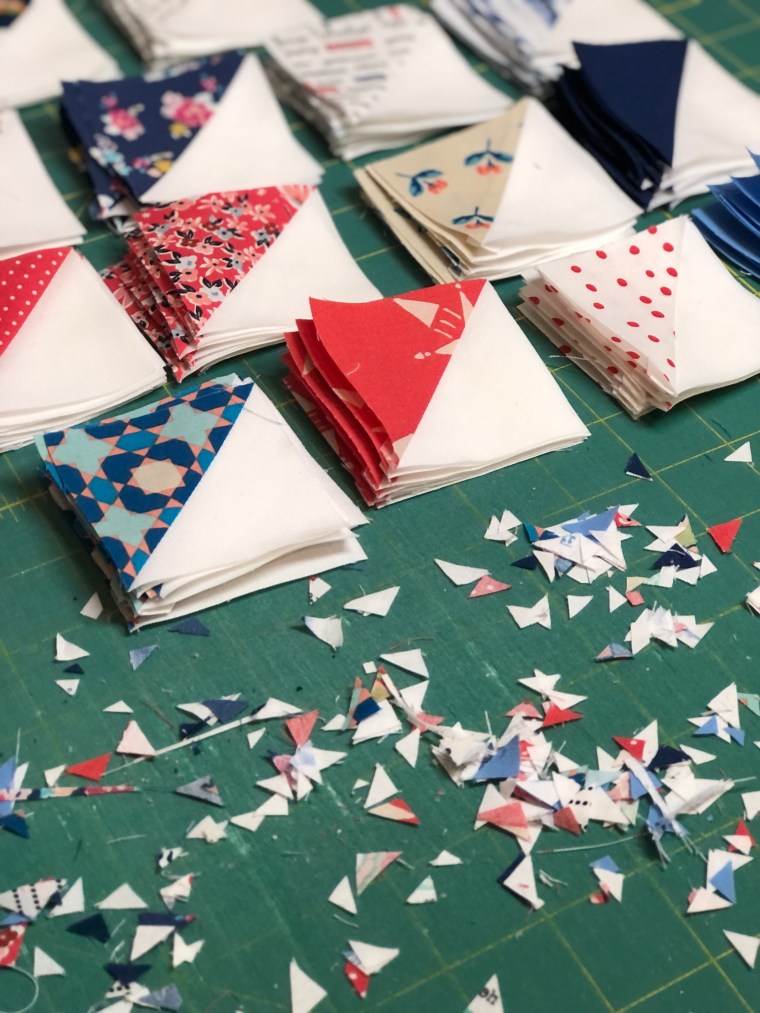
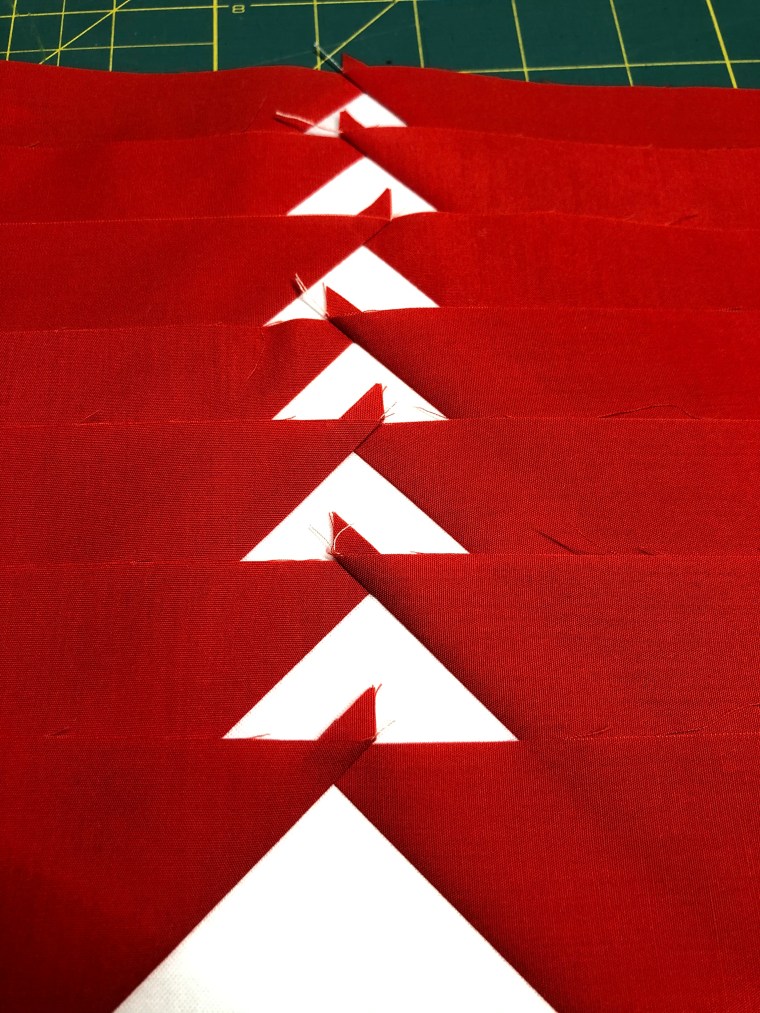
Fabric confetti is an unavoidable “work hazard”! Even these tiny pieces have a purpose. I donate these to a friend who uses them as “stuffing” for bedding for local animal shelters. It makes my heart happy to know that nothing goes to waste and that these trimmings give comfort to an animal in need.

Piecing the Blocks

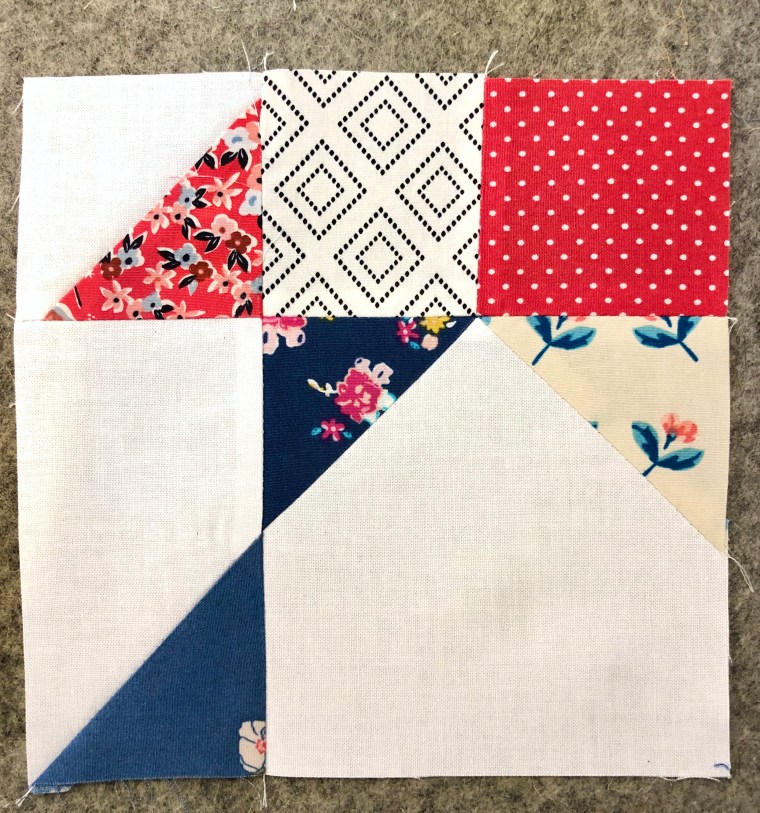
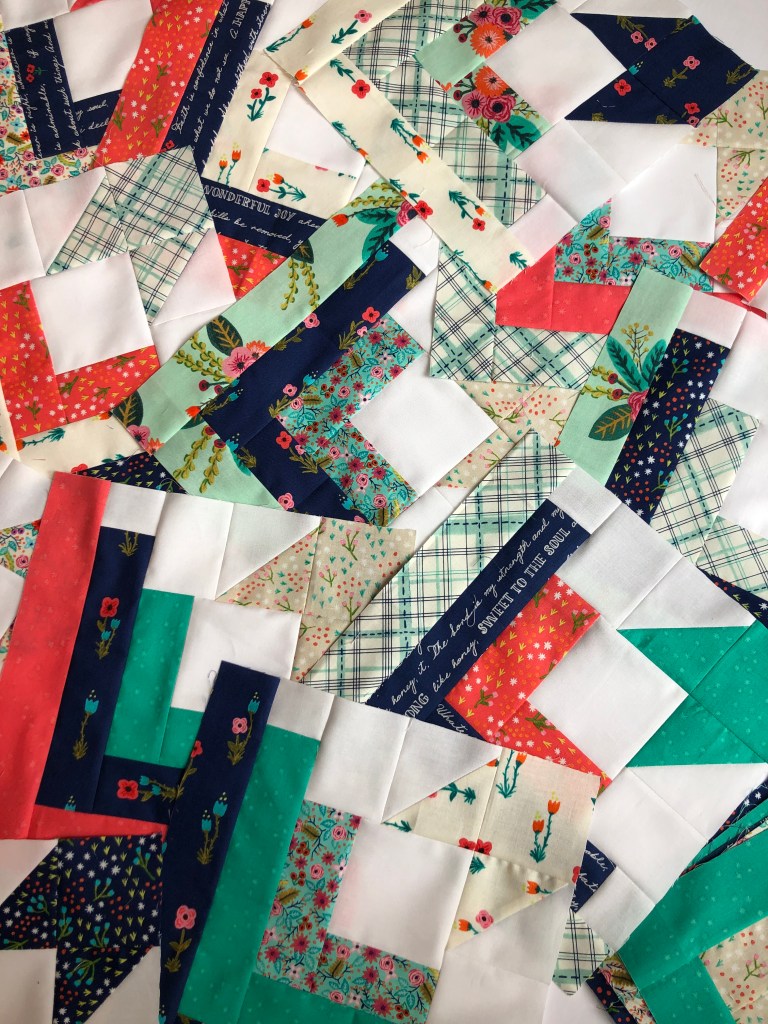
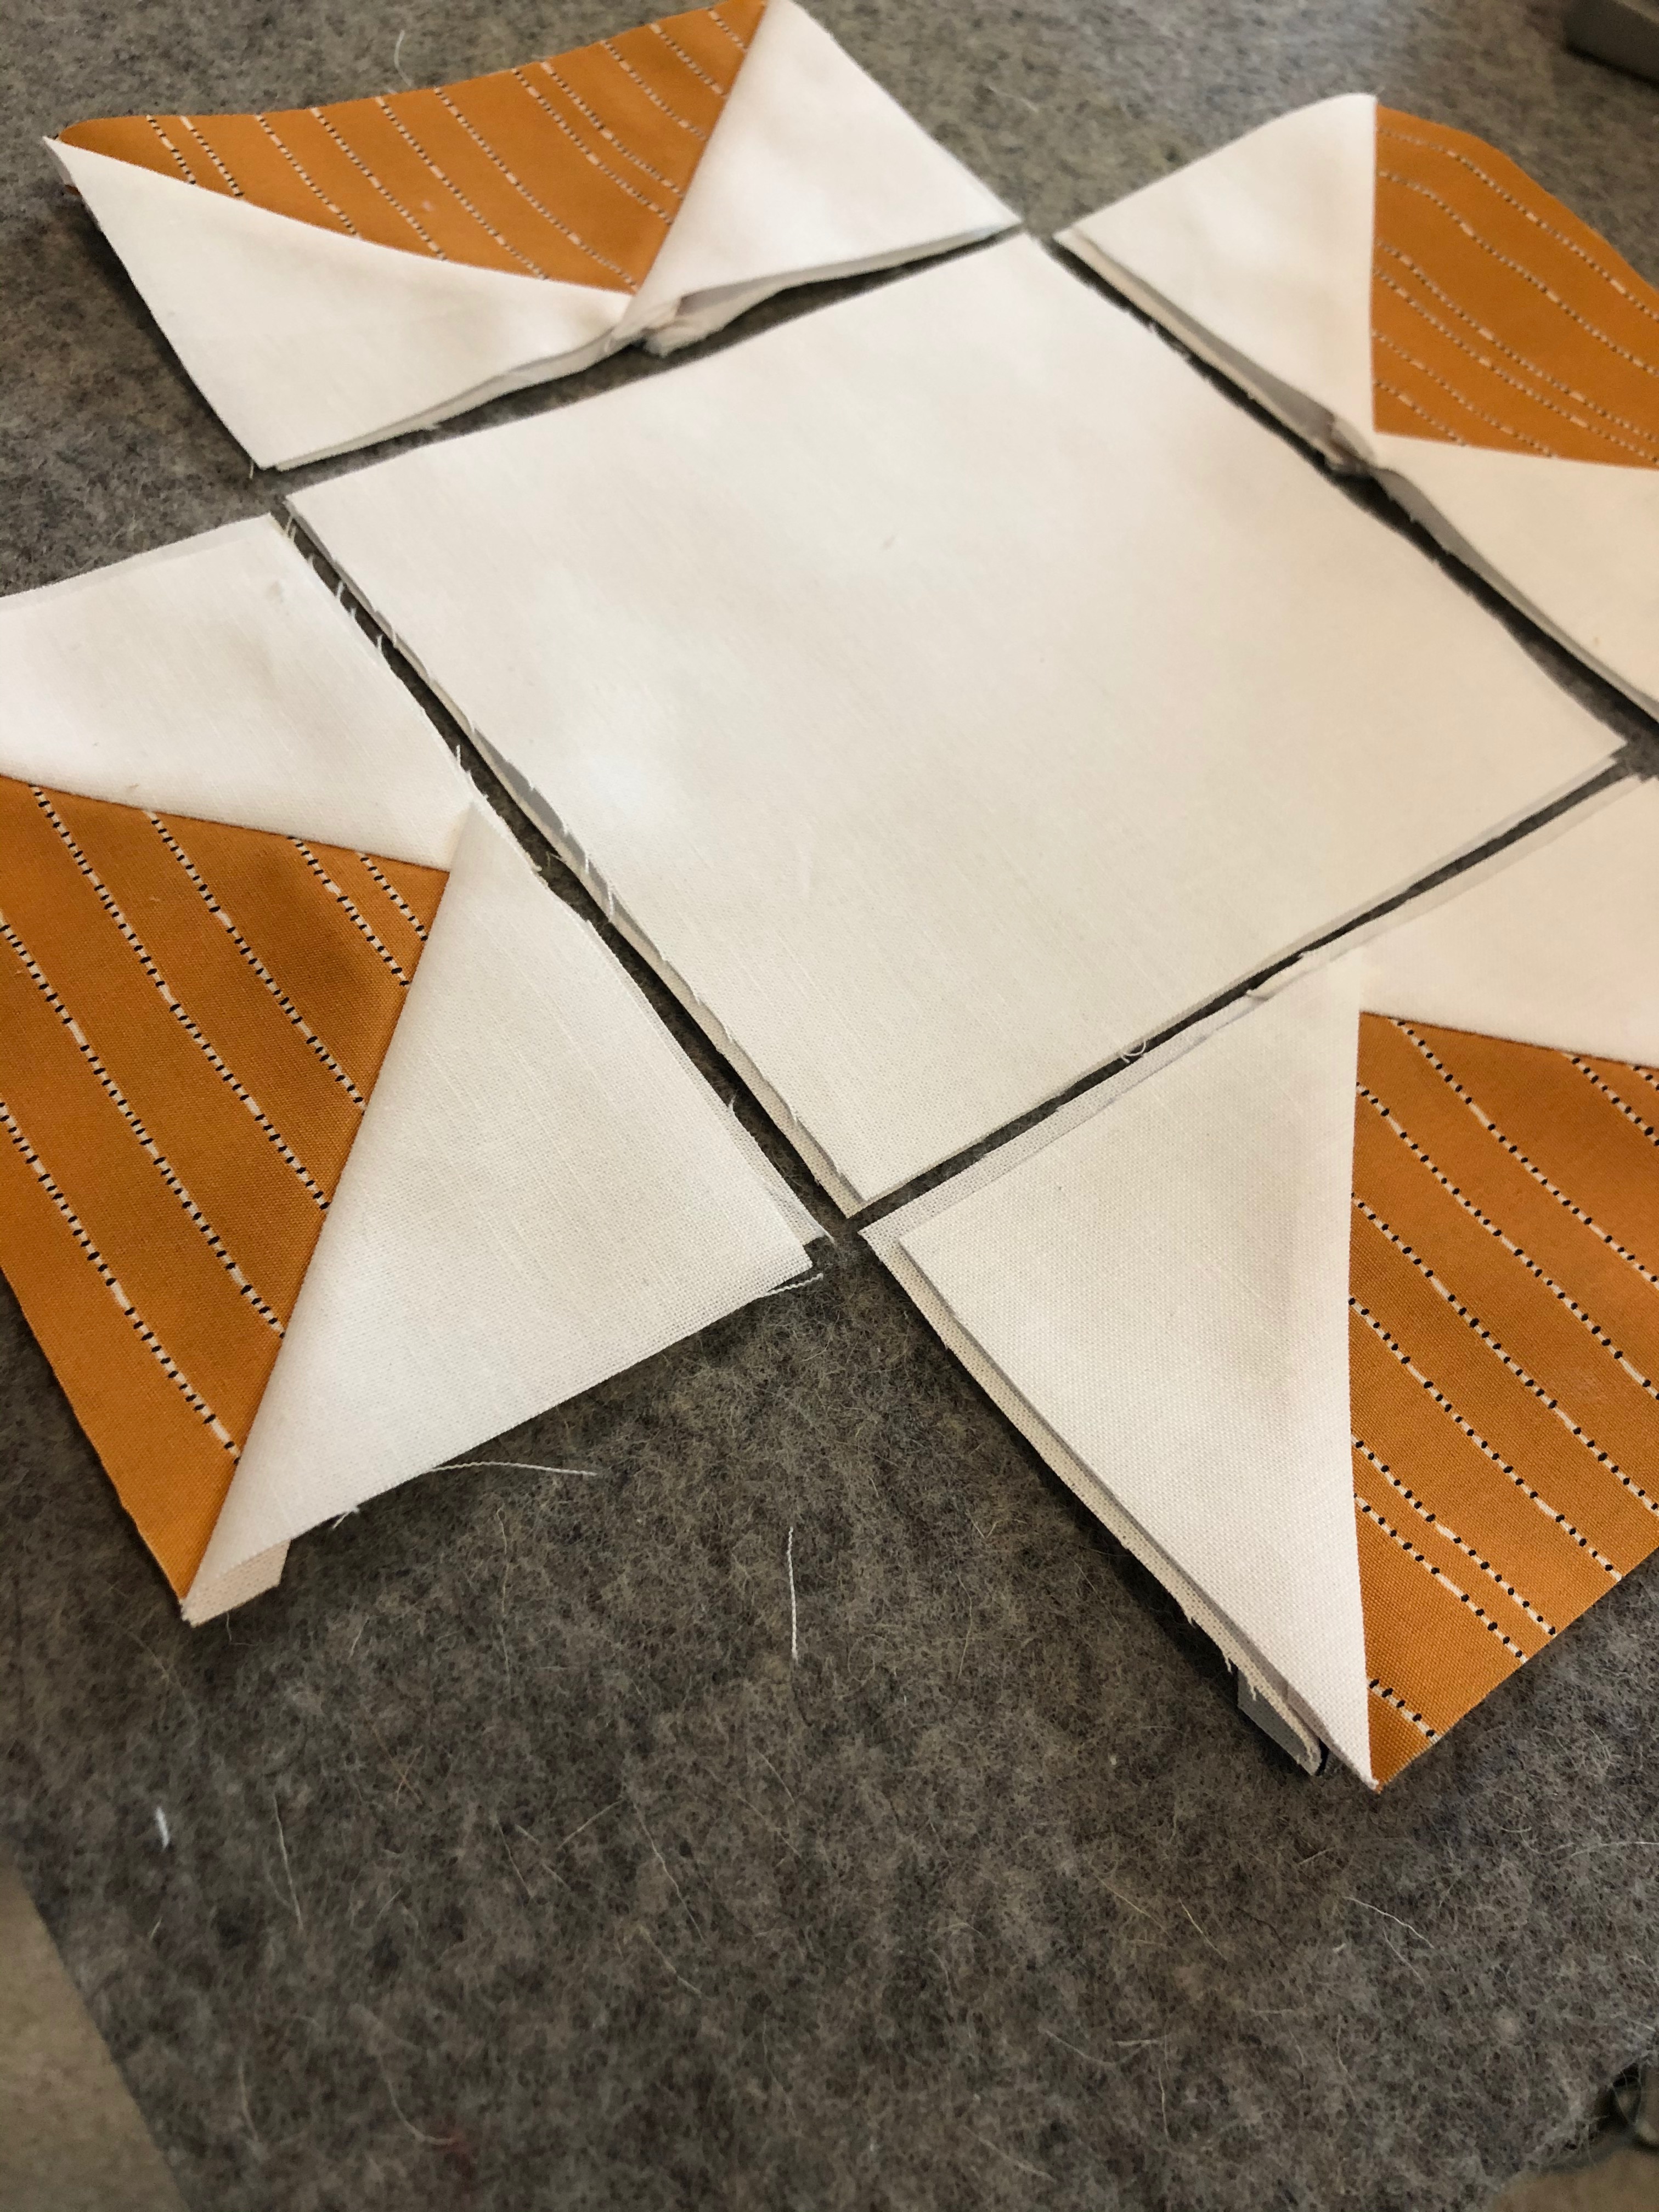
The instructions for this quilt are very straight forward and allow for a lot of chain piecing. I like the repetitive nature of matching blocks and being able to sew several sections all at once and then work on the layout by color value / design. Morgan’s patterns are precise and easy to follow. I never question the math or accuracy, even in the “testing & editing” phase.

Tools

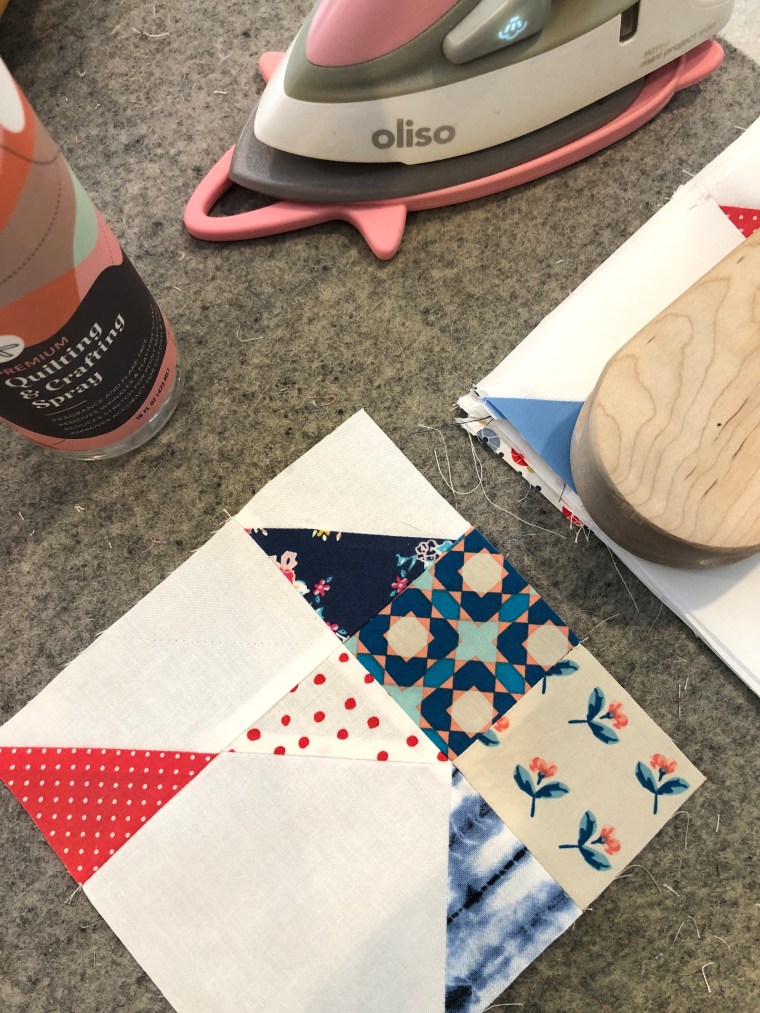
I rely on a few tools in my studio to enhance my quilt blocks. A wool pressing mat, tailors’ clapper, a HOT iron (no steam) and Faultless “magic” spray. This is not a sponsored post (although, I wish it were!), but here’s a glimpse of some of my favorite tools. The combination of these really helps to create flat seams and we all know that flat seams build flat quilts.
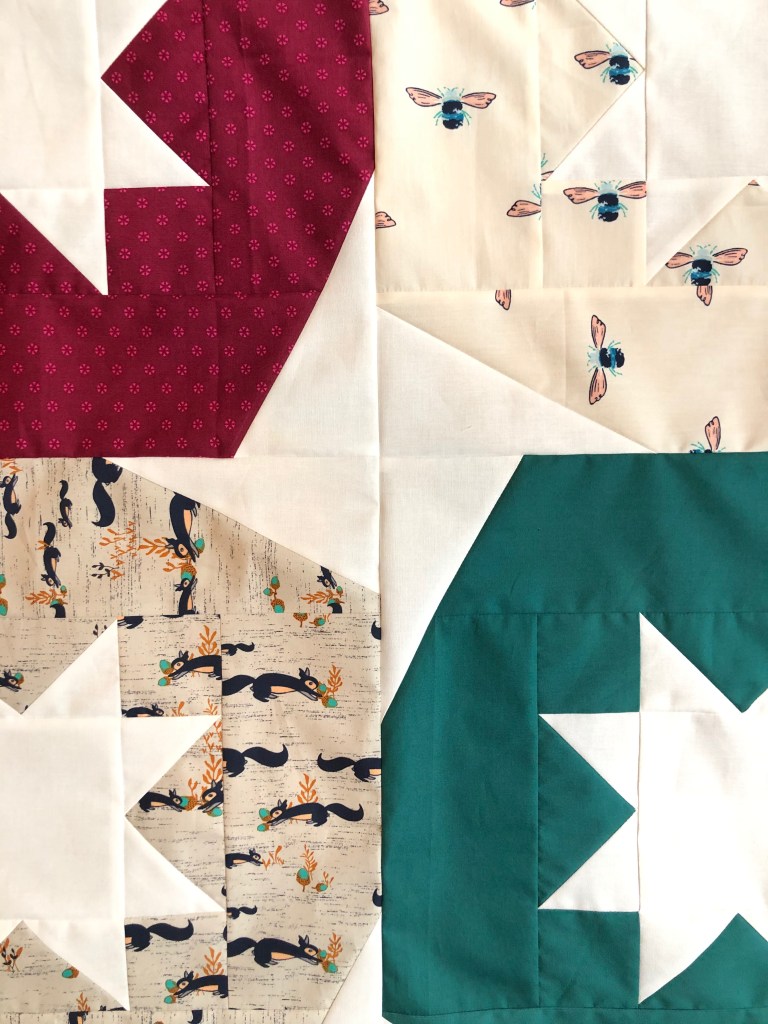
A Stack of Blocks

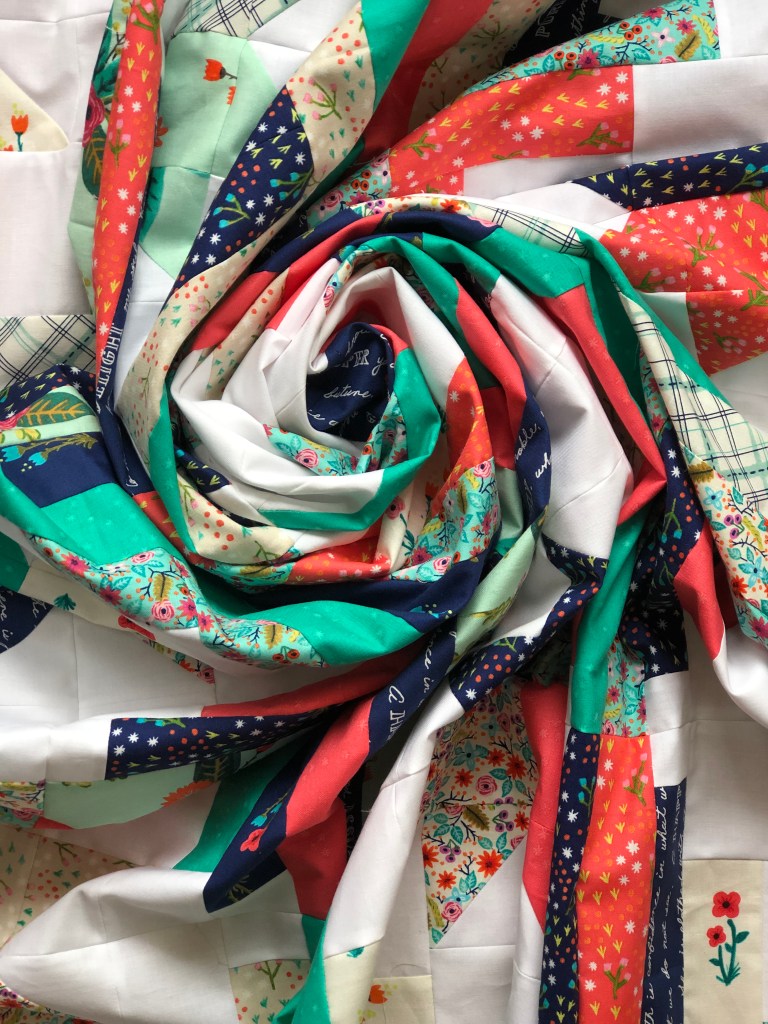
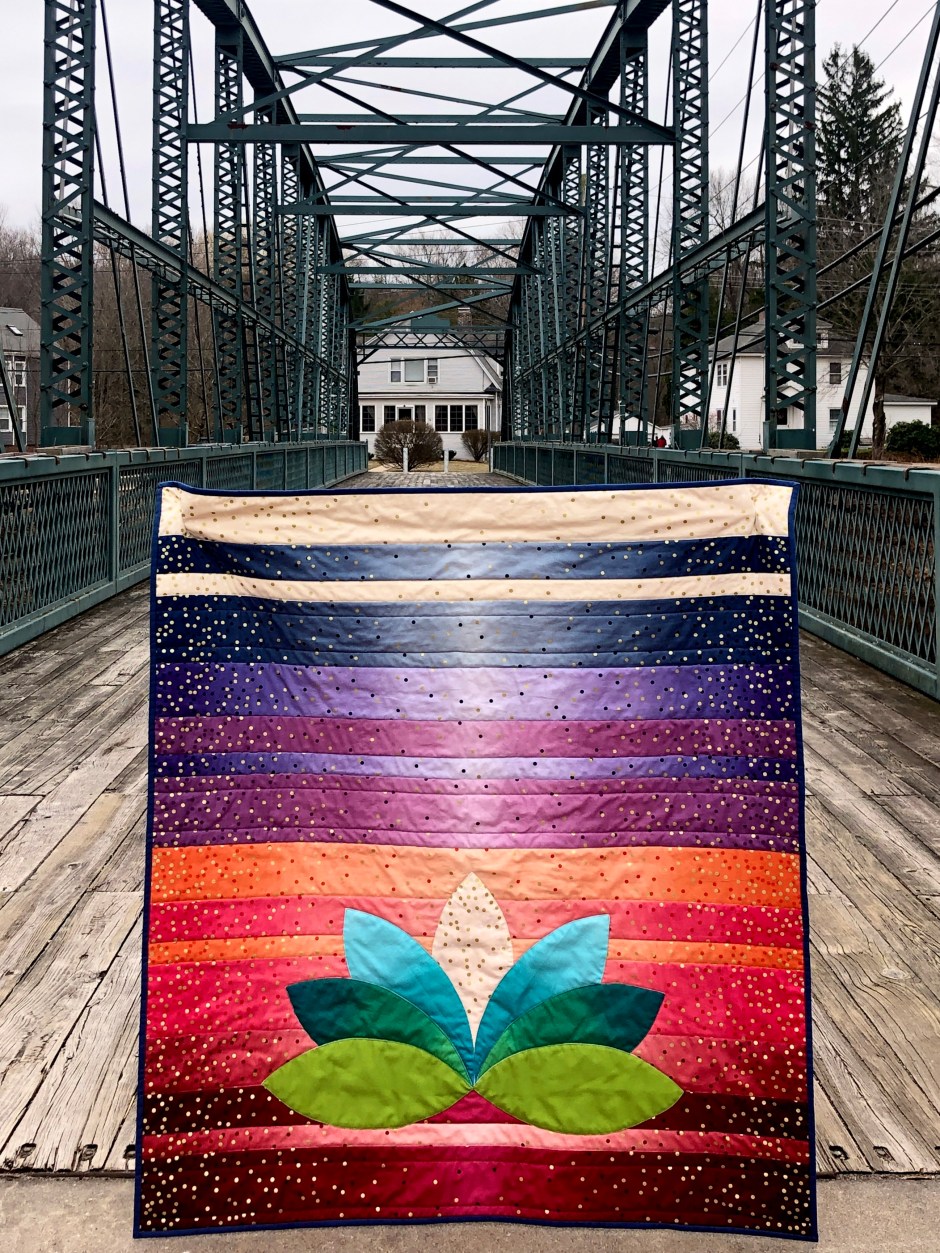
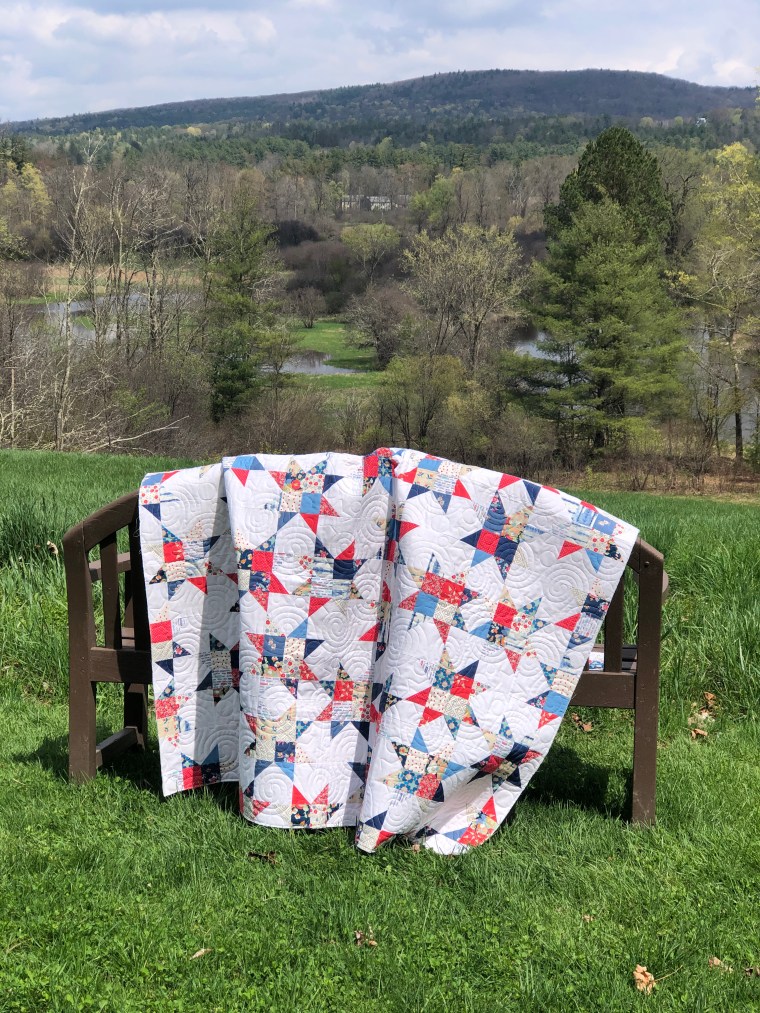
Seeing these photos reminds me, again, how long it’s been since I’ve blogged! I started this quilt while there was still snow on the ground. The colors brightened those winter days and made me look forward to summer picnics and celebrations. This quilt has traveled all around the eastern USA; see the sights below.

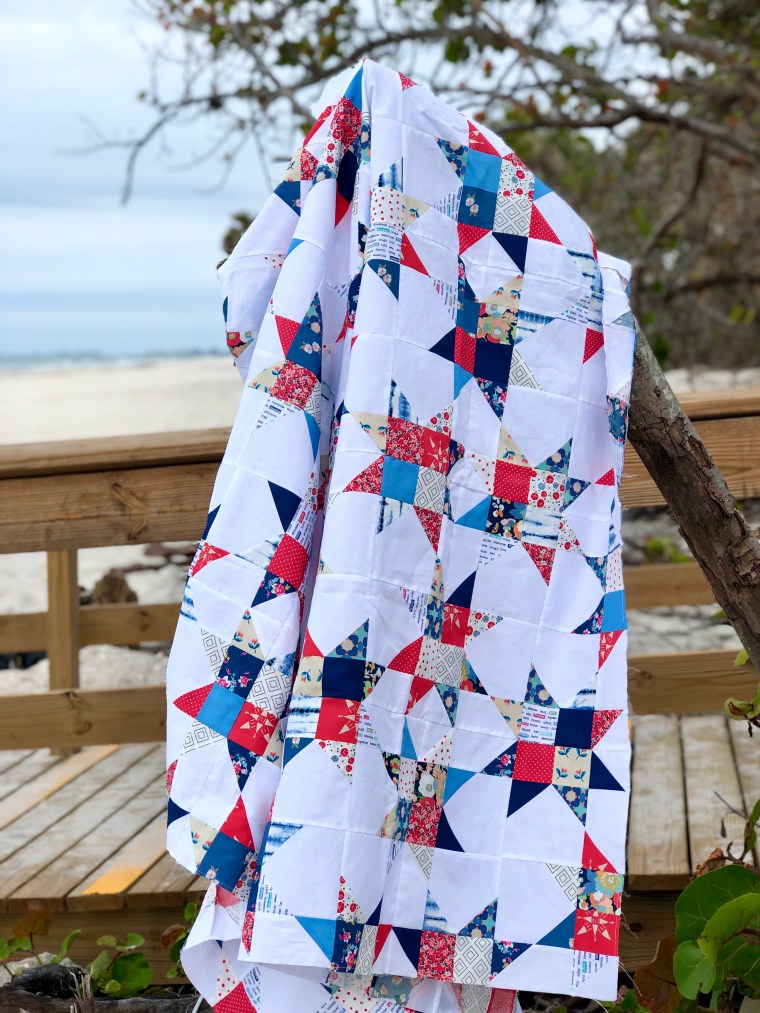
The pieced top, not yet quilted, traveled to Florida. For my family, the beach is among our favorite places to be, so of course, I needed to photograph this here. I do travel with quilt tops; I like the varying scenery for backdrops, but it also blends my hobby/work with family adventures. My husband is my trusted quilt holder & photo assistant, and thank goodness he’s tall and willing to hold these for all the photos! I literally couldn’t do this without him. He’s my biggest cheer squad too.

Night Vision Quilt, in Florida

Quilt Travels Continue

Quilted, not yet bound. Photographed at the Norman Rockwell Museum, MA

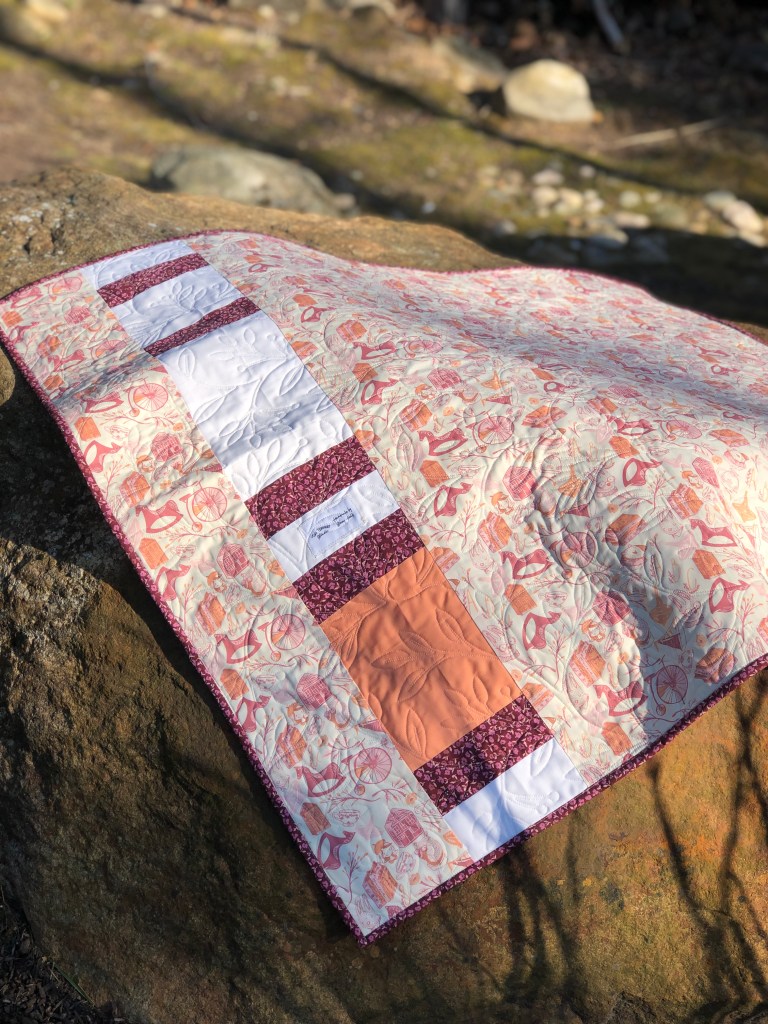
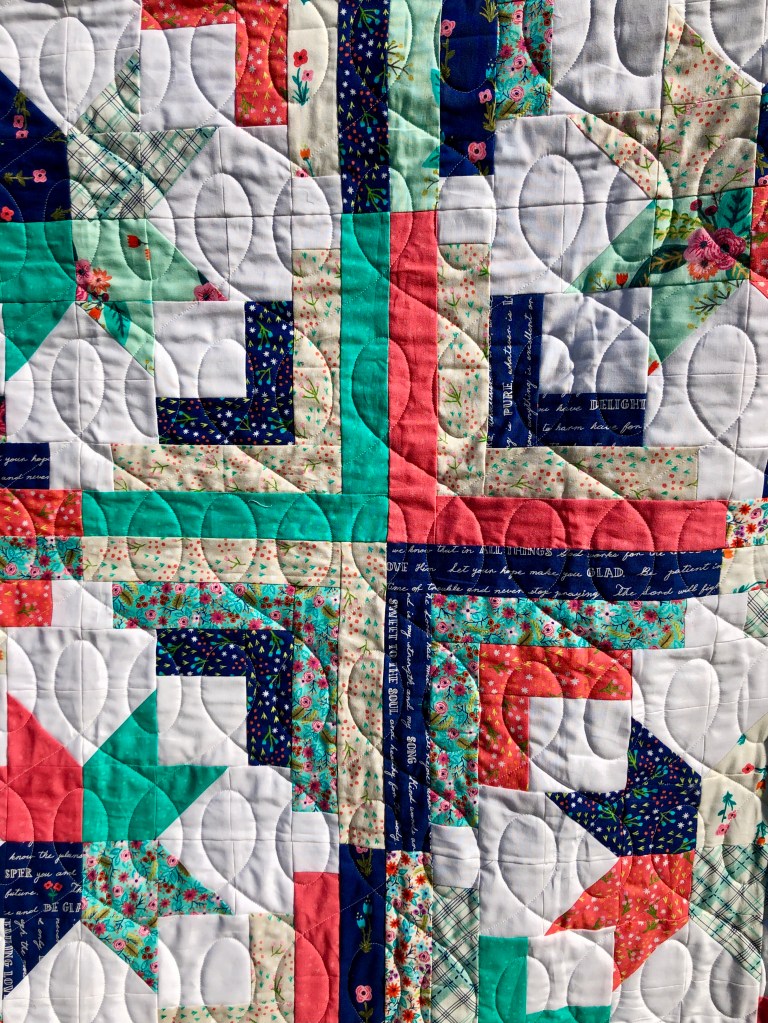
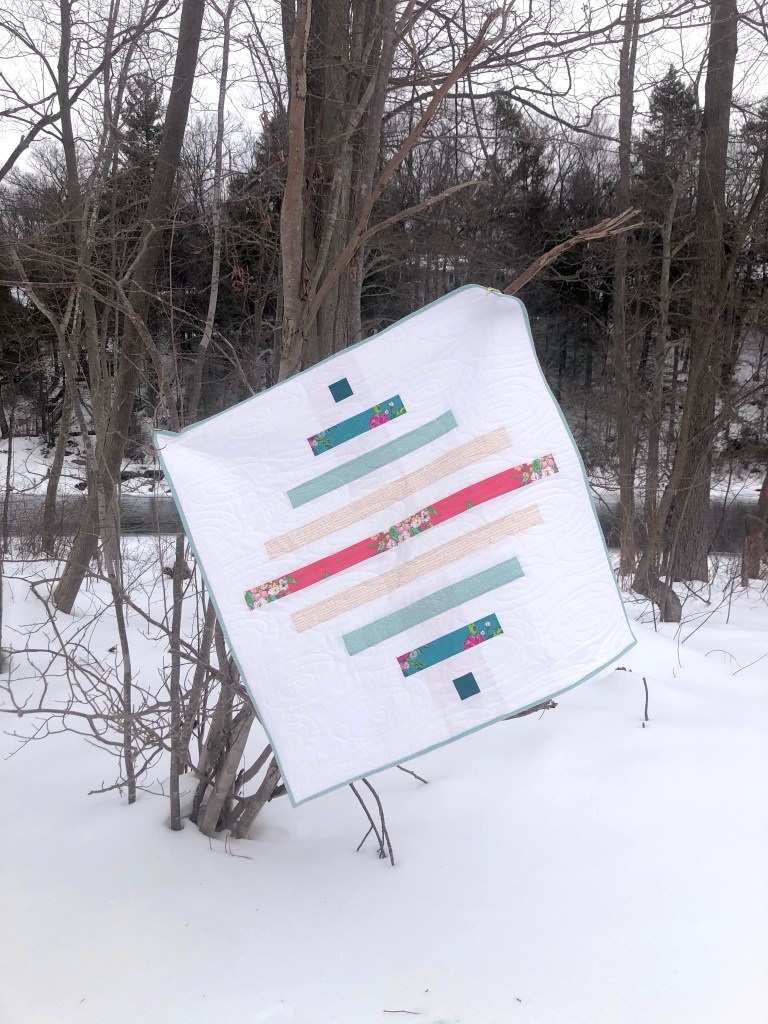
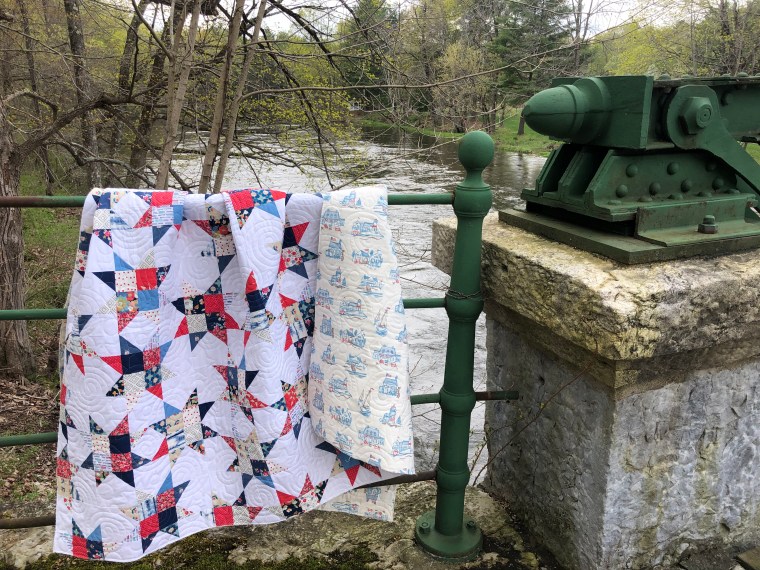
I sent this quilt top to NJ to be longarm quilted by Jen, at Knotted Thread. Her work is the exact finishing needed to bring these to life. I went with a swirl and star motif to balance the squares and to add a flair of celebration, as would be appropriate for Independence Day!

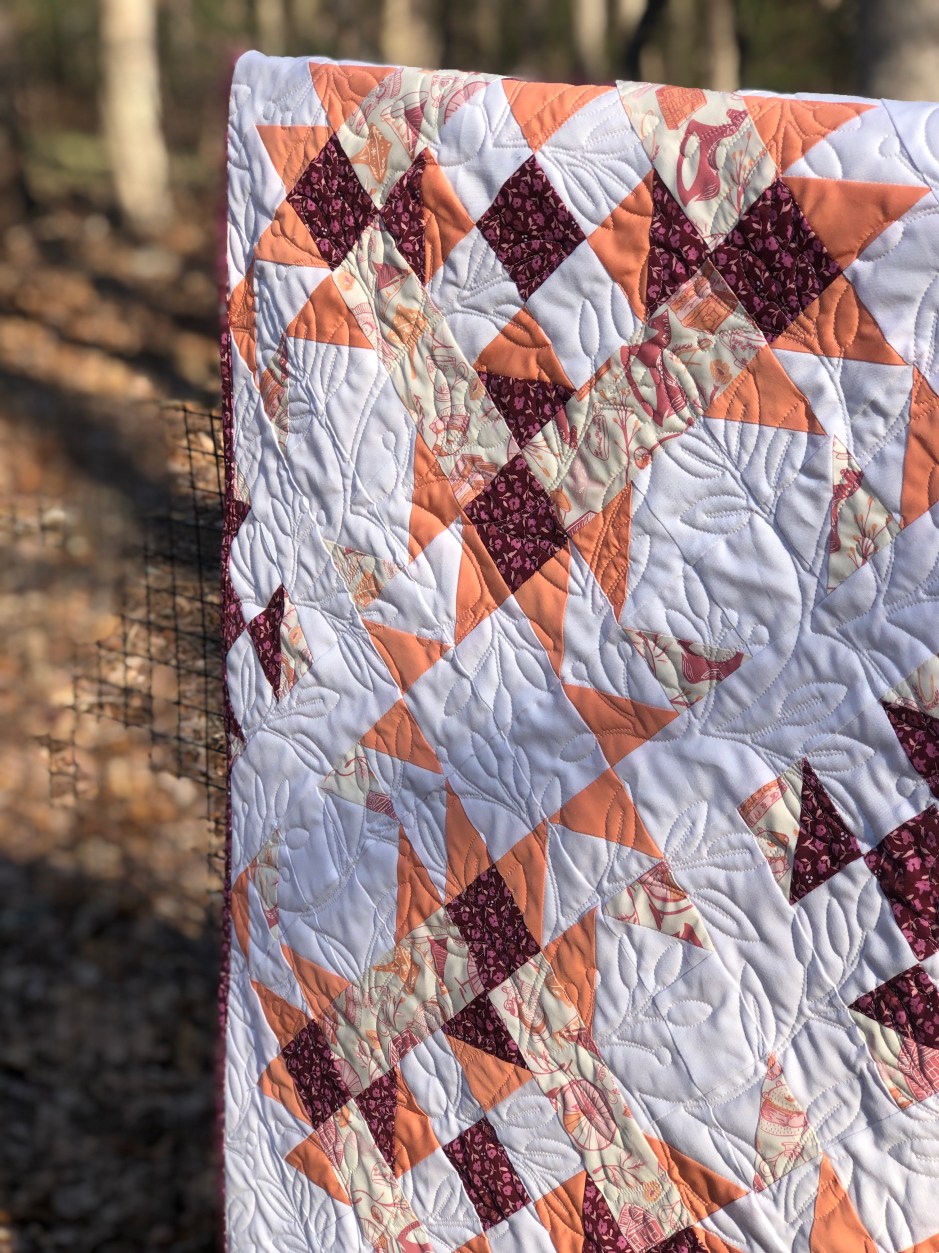
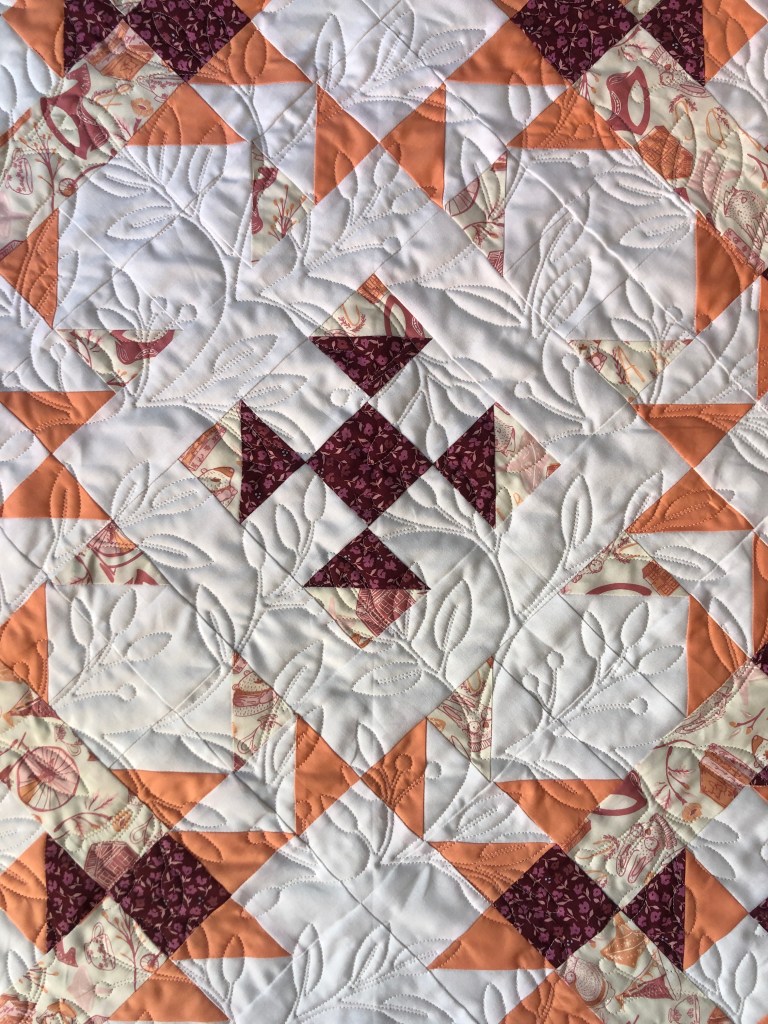
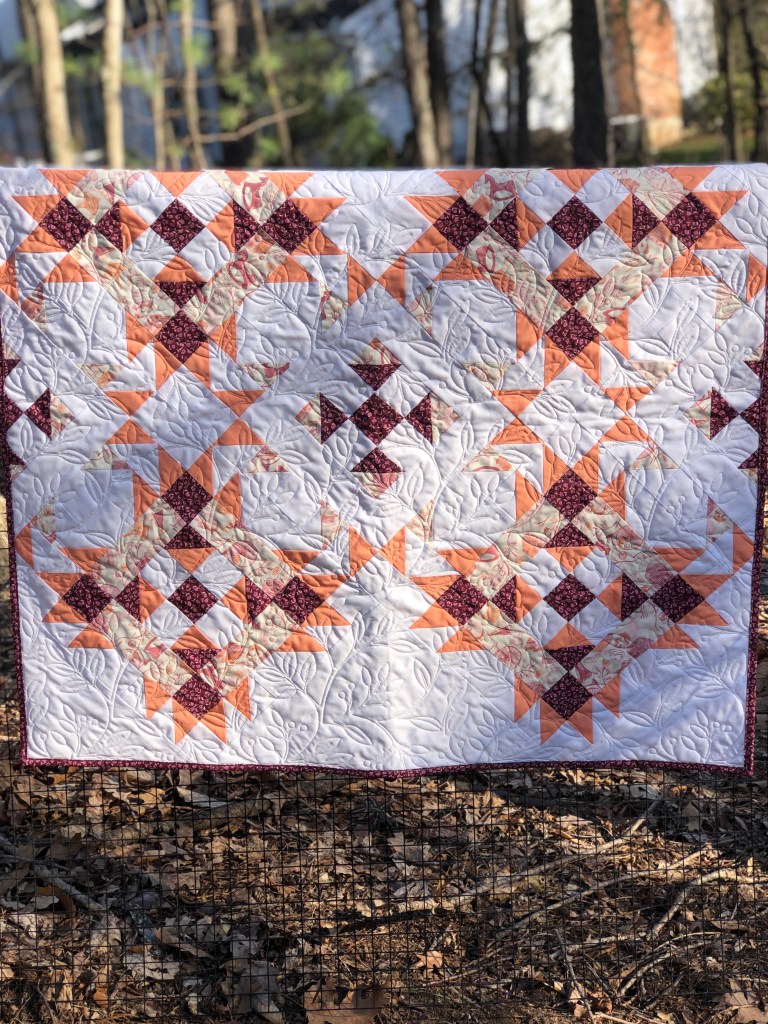
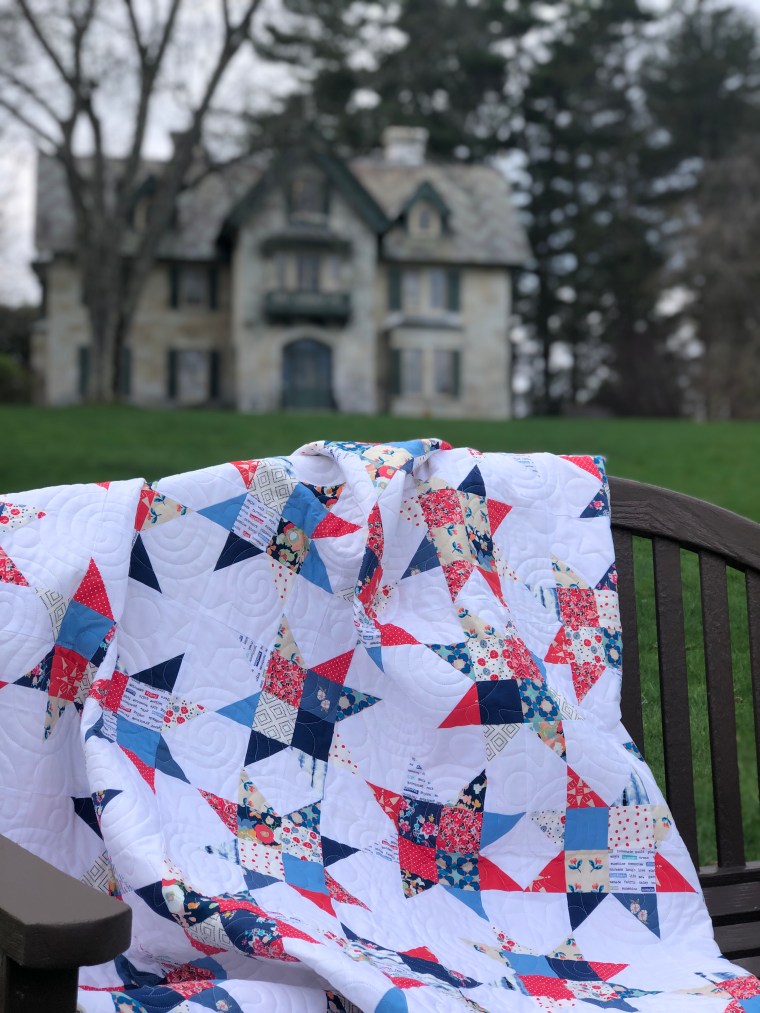
When it was returned to me, I brought it along on a trip to the Norman Rockwell Museum in Stockbridge, MA. Norman Rockwell’s paintings and illustrations tell the story of American life and it was not only a treat to see all his work, but the property is gorgeous too. I thought it was an ideal location to photograph my Americana themed quilt; at the home/studio of a renowned American illustrator. If you ever find yourself in western Massachusetts, stop in and see his work. It’s even better up close. I was in awe of the details – you don’t want to miss it.

Night Vision at the Norman Rockwell Museum, along the footbridge

The Details

This pattern comes with instructions for four sizes: child, throw (as I’ve made), twin & bed. It is fat quarter friendly and would also be great in a scrap-busting finish. You can purchase this & other designs at Morgan’s website as linked above. Check out all the other testers’ versions on Instagram too; so much creativity and inspiration to be found there!

Thanks again to Morgan for including me in the tester group. I end up with so many beautiful projects by doing this work.

All photos and stories property of Two Terriers Studio & not to be duplicated or shared without written consent.

Urban Light Quilt

What’s the saying, “better late than never”? That applies to this post! The timing of my blogpost has nothing to do with my enthusiasm for this pattern or quilt. I finished the quilt top MONTHS ago, but I’m just now getting around to showing the final project.

In the spring of 2021, I was asked by Karen, http://www.bloomingpoppies.net to test this pattern, the Urban Light Quilt. When I saw her mock-ups and how the color choices influenced the overall design, I knew immediately I wanted to make this. Not to mention, just wanting to work with a designer who loves improvisation, like I do.

I pulled from my fabric stash and settled on this Catch & Release collection by Art Gallery Fabrics. More than 2 years ago, I sewed for the AGF Look Book & Blog party, and at the time I was so obsessed with the designs, I purchased several yards of each fabric after the maker projects were done. I’ve hoarded it a bit over the past couple years, but finding ways to incorporate it into new quilts has been nice.

The Urban Light Quilt comes in 5 sizes, I made the large throw. One thing to note about this quilt is that the blocks are large, they repeat and make for a fast finish. The cutting instructions are very easy to follow and if my memory serves me correctly, I was able to put this together in just a couple days. I preface that with the reality that I have few distractions and blocks of time each day to sew. In any case, it’s not a pattern that will take much time given the design and overall block size.

There are traditional elements like flying geese in this design. I love the no-waste approach. I did incorporate text fabric in my quilt and while some of it “reads” correct, directionally, I decided to not be too fussy about the blocks individually. With this particular print, the text is multi-directional on it’s own, so there didn’t seem to be an “up” distinction anyway. Also, with a square quilt, who even knows which direction it will be used on any given day. It all works out; don’t sweat it.

Untrimmed flying geese

Aren’t the fish & florals just a perfect nod to summer? I think they are so sweet. There’s something whimsical about it that made me look forward to summer days.

It’s coming together.

This block, on its own, would make a beautiful pillow cover to accompany this quilt.

More geese…

My favorite color is red and I chose to add a pop of this AGF Pure Elements Solid to the mix. In my opinion, it’s the perfect, clear red. I believe it’s actually called “London Red”. Favorite color and one of my favorite vacation destinations, how could it not work?

Urban Light, the completed top

As I mentioned, this quilt top and the pieced backing were finished in the spring of 2021. Snow was still on the ground in New England, but this bright fabric was calling for summer. I really like the simplicity of the blocks, but each time I look at it, I see another element in the design that pulls my attention.

Fast forward to summer, June 2021 to be more specific, and my Urban Light is back from the longarm quilter. I brought it along on our family vacation, knowing that these water colors, fish, florals, and the patriotic feel would be perfectly photographed at the beach.

I chose an edge to edge pantograph that mimics the ripple of water. Don’t forget that the thread and this quilting is yet another element to be considered. After all the work to piece it together, I have to remind myself that there’s one more decision to be made. No time for snoozing. With so many angles, I like the smooth curves and motion across these blocks. The binding is done in a small floral, framing it all in red, white, and blue.

Urban Light at the MA shore

This is a pattern I would highly recommend and it’s available on the designer’s website mentioned above. Take a peek at her account or follow the hashtag to see the other tester’s variations; it’s interesting how color choice changes the look of this quilt. Seeing my own version, sometimes the center appears to be a floral motif, sometimes I notice the stars, sometimes it’s the POP of red. How fun to have a quilt with such dimension. I love it and hope it brings cozy snuggles to anyone who gets a chance to use it.

I’m appreciative of the opportunity to work with Karen & to have tested this pattern. I’ve worked with her again since making this one & that second quilt will be posted soon!

Happy Quilting…

All photos and content property of Two Terriers Studio; do not replicate or distribute without permission. This is not a sponsored post.

Garden Paths Quilt

It’s now May 2021 and I’m ready to be outside, enjoying all the spring gardens have to offer. Coincidentally, it’s also pattern release day for this latest quilt, designed by Brittany Tunison for White Plains Quilts. Meet the Garden Paths Quilt!

When the opportunity to test this pattern came up, I had zero hesitation. All of Brittany’s patterns are well written and make creating a unique quilt a breeze. I had recently seen a fabric by Art Gallery Fabrics http://www.artgalleryfabrics.com called “Little Clementine” and it was the catalyst for this color scheme. I was drawn in by the whimsical graphics of animals, florals, lettering, bicycles and more. The peach and plum colors are a bit out of the box for me, but I really love this print. I asked Brittany to “kit” fabric for me using this and a floral by Amy Sinibaldi for Art Gallery Fabrics called “promenade plum”. I could not be happier with the outcome.

Trimming

This pattern is heavy on the half-square triangles, probably best suited for an advanced beginner or someone who is interested in mastering their HST skills. I mean, I’ve made hundreds (thousands?), of half-square triangles, but there’s always room for improving those points, right? I think back to the early days of my quilting journey, about a decade ago now, and remember thinking, “Do I need to trim all these dog ears?” The answer is YES. It may not seem like much, but squaring up blocks is important and that little bit of excess over the entire quilt does add up to a lot of inaccuracy. Just take the time to trim your blocks, if you’re not doing it already. Added bonus, look at all that fabric confetti goodness.

Matching points…game on

I like to press my block seams and see all the pieces lined up along the way. Sometimes progress is slow, but having pretty fabric and little piles of finished pieces is motivation for me.

Block Assembly

Two blocks for one quilt

The Garden Paths Quilt is designed around two block structures. You’ll make a different quantity depending on the size of the quilt. In this case, the baby quilt I made was relatively fast to assemble. This pattern comes with instructions for three sizes: Baby, Throw and Twin. I opted for a bleached white background, but now having seen other tester’s quilts, as well as the designer’s quilt in a dark background, all color combinations are stunning.

Long Arm Quilting

I had this quilt professional long-arm quilted by my friend, Deb, of Owl Quilt It. I’ve said it before, but choosing the motif or pantograph at the end of the piecing process, is often the hardest choice for me. This is a baby quilt, but the colors are not specifically “baby”. There are beautiful graphics in the fabrics and I wanted to highlight the theme and name of Garden Paths. When I saw this design, I knew it was right. Notice how the leaves and berries so closely mimic the florals of the Little Clementine fabric? No doubt this was what I was looking for in the quilting. 99% of the time, I opt for a white thread; I want it to blend into the quilt, and not be distracting. This one will get cozier with each wash & tumble dry!

I like dense quilting. Some quilts lend themselves to more open stitching, but I like it when my quilts have a little tighter sizing on the edge to edge quilting.

The Finish

Even my husband noted how much he likes this quilt. He’s my sidekick when it comes to photographing quilts, but also the one cheering me on along the way. He’s seen plenty of bright, bold, graphic prints and colors, so this one really got his attention. He said, “this isn’t usually what you choose, but I really like this one. I wouldn’t have thought I’d like it so much, but I really do.” Go figure….it’s OK to step outside our comfort zone of color!

Garden Paths Quilt featuring Art Gallery Fabrics

Quilt Backs

The Pieced Backing of my Garden Paths Quilt

If you follow me long enough, you’ll see a pattern of pieced quilt backs. I LOVE them. I do think there’s a beauty in a single fabric background, but I see the quilt back as one more chance to make something unique…it’s good “real estate”, if you will. You never know which side will be right side up when getting wrapped or cuddled with a quilt, so I want the back to be interesting too. It’s a good way to use any leftover bits and pieces that indicate what is found on the other side. You can see the Little Clementine fabric here, in all it’s glory. How sweet is that? It makes me smile. Oh, don’t forget to label your quilts! Artists sign their work; quilters should too.

All done…

The Details

This pattern is available beginning today, May 4, 2021 from http://www.whiteplainsquilts.com. All orders placed there today will be entered for a drawing to win $20.00 in shop credit. Patterns from this site will be discounted 20% until May 7, 2021. Brittany will also have limited quantities in quilt kits available, so shop early if you’re interested. This is not a sponsored post; I’m sharing these details so that you, too, can make this beautiful quilt pattern.

As I mentioned, I’ve used fabrics from Art Gallery Fabrics in prints and pure solids. This is also not sponsored by AGF (but I secretly, not so secretly, wish it were!). The feel of their fabric is delightful. The drape is something you just need to feel.

Thanks, Brittany, for including me once again in your team of pattern testers. I enjoyed it & I’m so happy with this fabric pull and finished quilt. I’m adding it to my collection of favorites!

All photos and content are property of Two Terriers Studio and not to be copied or distributed without written permission. This is not a sponsored post.

Cozy Cabin Quilt

I’ve often admired quilt patterns by designer, Modernly Morgan, (www.modernlymorgan.com) so when she asked if I’d test this latest design, it was an easy “YES” from me. Morgan and I both have a love of scrappy quilts, so I was excited about the opportunity to work together. This pattern comes with instructions for three sizes – Baby, Throw and Bed. I made the 60″ square throw size.

Let’s just say, this pattern is a keeper.

The Making of a Quilt

Cozy Cabin is a modern twist on the traditional log cabin quilt block. The scrappy element is just a bonus, in my opinion. For my version of this quilt, I pulled a fat quarter bundle by Windham Fabrics www.windhamfabrics.com, designed by Amy Gibson, called Meriwether. The variety of florals, plaid, text, and blenders seemed the perfect foundation for this project. It’s bright and has a spring-like feel; just what I needed after a long winter.

I wouldn’t call a fat quarter bundle, “scrap”, in this case, it was “stash”. I purchased this collection a while back and saved it, knowing the right pattern would come along. Enter Cozy Cabin! When I first purchased this bundle, I didn’t have a pattern in mind, so I hadn’t accounted for the backing or binding. I consider myself very lucky that my local quilt shop had bolts of yardage, in stock, when it came time for me to finish the quilt. With the variety of colors and prints, I could have found a different fabric or collection to coordinate, but I’m thankful to have been able to keep the entire quilt in the Meriwether collection.

Half Square Triangles

Squaring up half-square triangles is an act of patience and accuracy. I actually prefer when a pattern has a little “wiggle room” in the measurements so that I can square-up to a perfect size, but I also like not having a lot of waste. This pattern calls for scant 1/4″ seams and as you can see, produces blocks with little waste.

Building the Blocks

Once the HSTs were made, I organized my remaining pieces into sets that would become one quadrant of each block. This step made it easy for me to pick up a set and sew as time permitted, even if I only had a few minutes between other obligations. The accuracy of the pattern made testing it a breeze. I was able to move through the sewing without issue.

This quilt came together so quickly. It’s a combination of the same block, repeated and rotated, throughout the layout. Once the pieces are cut and the HST trimmed, it was a lot of chain piecing for efficiency. I don’t tend to overthink blocks if I’m creating a scrappy look. Loving all the prints and knowing they work together certainly takes some of the worry out of the process for me. I had no doubt it would be cohesive.

I like the rotation of the blocks as it allowed me to think about the placement of pieces with text/font and how it would “read” once completely assembled. Additionally, if this were being made with a truly scrappy style, you could make each block independently with small pieces of fabric and make quite a dent in your scrap stash.

The top is pieced & swirled. This is the kind of cinnamon roll-like swirl that is calorie free! Look at all those delightful colors coming together.

The Finished Top/Front

There is always something fun for me in photographing a completed quilt top. My husband helps me every single time & thankfully, he’s tall and can keep them off the ground. To stand back, and see my effort and time spent creating a quilt, is gratifying. I think about the pattern, the designer, the fabric choice and how it tells a story. Seeing it from a distance also shows the secondary pattern; do you see it? Not just the stars, but the bands, joining the blocks. In our home, quilts are made to be used and loved. Seeing my favorite people enjoying something I’ve made makes it even more special.

Longarm Quilting and Binding

With this being a larger, 60″ square quilt, I opted to have it professionally quilted. When I make baby quilts, I feel more confident quilting them on my domestic machine, but I opt for straight lines and nothing too fancy. There are so many edge to edge designs available and I think this decision is one of the hardest for me to make in the entire process. Once it’s quilted, it is what it is and all the layers and seams are connected. It has to be right. I never want to get this close to the finish line and wing it. I used a 2.5″ straight cut binding and finished it by machine. Lately, I’ve been doing more binding by machine than by hand, because it takes practice and I’m comfortable practicing on quilts I know I intend to keep. Quilts I gift, those are mostly done with hand-stitched binding.

Here’s a closer look at the quilting pantograph. It’s an edge to edge design called Modern Twist.

Fabrics with text, fonts or inspirational messages are among my favorites. I wanted to include a large section of this yellow fabric in the quilt back, as well as using it for the binding. The evenly spaced rows of words almost give the binding a subtle stripe.

I enjoyed making this quilt & 100% plan to keep this one for myself! It’s a pattern I’d recommend and I think when you see the designer’s version and the other sizes and fabrics chosen by the team of testers, you’ll see that it works well in all colors and themes. Take a minute to visit Modernly Morgan on Instagram (@modernlymorgan) or her website, shown above, to purchase your own copy of this pattern. It is being released April 14, 2021.

Enjoy and happy quilting!

All photos and content property of Two Terriers Studio; not to be duplicated or shared without consent. This is not a sponsored post.

Sawtooth Shine Quilt

My fabric pull for the Sawtooth Shine Quilt pattern test

I’m often asked if I buy fabric with a specific quilt in mind. Sometimes, yes; most of the time, no. As I’ve mentioned previously, creativity comes to me by way of “the story”. If a fabric quickly reminds me of someone, a special location, or an event, I’m easily hooked. This collection by Art Gallery Fabrics (artgalleryfabrics.com) is called Little Forester Fusion. The moment I saw it, I added to my cart! No hesitation. (Thank you, Victoria, @midnightquilter!). I live in a very wooded, full of creatures, kind of neighborhood. We have more squirrels and chipmunks than I can count; deer tracks criss-cross our snowy lawn, not to mention the bears, bobcats, owl and red fox. Yes, bears. Our home is surrounded by woods & over the years we’ve lost a dozen trees to ice storms and planted more in their place. ALL the nature I see at home, I see in this collection. Even the marshmallows on a stick. We have so many family memories of making s’mores around the fire pit. I had no doubt this collection would one day be a perfect quilt for my family.

Almost simultaneous to buying this fabric, I was asked to test a pattern, the Sawtooth Shine Quilt, designed by Brittany Tunison of White Plains Quilts (whiteplainsquilts.com). It was actually more of a discussion about which of TWO patterns I’d like to make, as she was planning a double pattern release for February! TWO. Can you imagine? We’ve worked together on several other pattern tests and they have all been great experiences for me. She is talented; such an eye for detail and precision. I appreciate that she’s likely made several versions of a pattern before even considering sending it to testers. I enjoy the collaboration; seeing if I understand the instructions as she intended and if there is occasionally something in my experience that may be helpful to her in the written portion. It’s a really cool process, I think.

Fabric confetti

In this pattern release, there is the Sawtooth Shine Quilt (as I’ve made) and Sawtooth Sparkle Quilt. Each pattern has three different size options: baby, throw and twin. Additionally, both quilts will have two different layout options. It’s truly like having access to six quilt designs with each title. There is room for unique personalization. Yes, at first glance they may look similar, but there are subtle differences between the designs, and therefore also in the method of cutting and piecing. The blocks finish at a size that could potentially be a pillow cover, mini-quilt/wall art. The limits are only in the maker’s imagination.

As they say, measure twice, cut once. So much accuracy in a quilt is found in the initial cutting. Pressing. Pressing, not ironing. Who knew this was a thing before they became a quilter? One more thing I have to consciously remind myself to do; pause, press, not iron.

Untrimmed flying geese; seeing the colors coming together

I like to stack my quilt block pieces as they should appear, just to double check seam allowances and directions of prints. It’s easier to move things at this stage than after it’s all been sewn. For this particular fabric, I wanted the print to be in a top to bottom linear format. On the more bold prints, as shown below, there would be some pieces turned on their side.

Coincidentally, as I was sewing this block with an owl print, designed by Jessica Swift, I could hear the faint “hoot” of an owl in a tree outside. I hadn’t heard it much before & now it seems more of a regular occurrence. One more element of the story built into this quilt. There truly is beauty all around if we stop, look and listen. Having lived in a city, with all of its bustling street noises, adjusting to the “woods” was a learning curve for me. I’d miss these critters, sounds and clear night skies if we ever moved elsewhere. The crescent moon reminds me of my youngest and the rainbows – ALWAYS the sign of a promise.

As I make each block, it is my new favorite. Until the next one is made, then IT is my new favorite. Thankfully, I didn’t have any that I didn’t like in this quilt! Does that happen to anyone else?

Secondary patterns emerge as the blocks are joined. The boldness of the stars is echoed in this secondary element, almost like a pinwheel. Look at those bees, and the squirrels gathering acorns. How cute are they?

When the blocks are complete and the quilt top gets that ‘held from the corners, whip into a full length view’, it’s the moment of truth. This page of the story is the culmination of the designer’s idea, the interpretation of the instruction, fabric selection and layout of color. Did it work? Yes, I think so!! I’m so happy with this result, even with one more chapter, the quilting and binding yet to be completed.

My Sawtooth Shine Quilt on the river bank

Just as each new block becomes my “favorite”, trying to choose a backing and binding fabric turns into a question of which fabric do I like best? Which of course, isn’t fair, because I like them all. I’m still uncertain which to use or whether I may make a pieced backing. For now, I’m happy with this top and I’m taking time to decide the last steps of the process. It’s going to be a quilt that will surround my family in handmade love for many years to come, so I’m not rushing it.

Quilts are like hugs on winter days

In celebration of her double pattern release day on February 19, Brittany will be offering a 20% discount on patterns in her shop through Sunday, 2/21/21. For those who can’t pick a favorite, or for anyone who loves a deal, a bundle option will also be available. Shop: whiteplainsquilts.com

I’m so thankful for the opportunity to work as a pattern tester. It improves my skills and results in quilts I can keep for my family or gift to other friends & loved ones. I take my role in reviewing text, layout, instructional details, as well as sewing, seriously. It’s creative & fun, yes, but it’s also a collaborative effort to put out the best finished product possible. While it is most obvious that a tester works to assist the designer, I have to say that designers assist me too. I learn something new with each test. I’ve built relationships and made friends I would not have had without these projects. It’s a blessing. It’s a part of the story I did not anticipate when I started sewing as a hobby all those years ago.

Make something beautiful…

This is a non-sponsored post; all comments and photos property of Two Terriers Studio and not to be copied or distributed without written consent.

Spinning Top Quilt

Meet the Spinning Top Quilt, a pattern I tested in February 2021 for Monika Henry of Penny Spool Quilts (pennyspoolquilts.com). I’ve worked with Monika before this project & always find her patterns to be well-written, which also results in a lovely finish. This one is no different & I might add, I was able to finish piecing it in one, uninterrupted day. Yes, one day. The linear design & mirror image layout speeds up the process without sacrificing interesting design.

Art Gallery Fabrics

I used a couple of collections from Art Gallery Fabrics (artgalleryfabrics.com) for my baby sized version of this quilt. The florals are called Extempore Fancy and Extempore Celebration, designed by Sharon Holland (sharonhollanddesigns.com). I added pieces from both Art Gallery Fabrics “Fusion” Collections, Serenity & Ballerina, and a touch of Pure Solids. While I really like the softness of these colors together against the bleached white background, I think a bold or dark background fabric is equally pretty.

Binding strips ready to go, once the quilting is complete

Add-on pattern features

This pattern features cutting instructions for three sizes, pillow, baby & throw. As a consumer, I like having more than one size option for a specific design, but the add-on of the pillow size is really nice. While I could most likely adapt the pattern & calculate it to suit my needs, having the pillow dimensions already available is a nice touch.

For my pillow, I recreated the front of the quilt and kept the quilting simple with a few straight lines. The back of the pillow is a single panel and I opted to add my zipper to the bottom edge. I like this placement because when I sit it on a bed or chair, I orient the zipper to the bottom and it’s virtually invisible. It also keeps the back panel as one continuous piece.

Longarm Quilting

I sent this quilt to be professionally quilted on a long-arm machine. Some of my projects, I quilt myself, others, I leave to the pros! More specifically, if I have an intricate design in mind, or if the quilt is large, I send it out. This quilt is called Spinning Top. It’s a very linear design & initially I thought concentric circles would bring an illusion of “movement” but also break up the bands of horizontal color. When I shared my ideas with the pattern designer, she was already quilting her personal quilt with concentric circles! We laughed, realizing that we had the same idea. I then saw this edge to edge pattern and it immediately represented the mark a spinning top would leave, as it moved across the floor. Done. This is my choice. When I create, I’ve found the best results come when it all ties together for me into a story. The name, the fabrics, the feeling, the design. Granted, not all projects have that need or nuance, but when they do, I really like it and feel more connected to it from start to finish.

Spinning Top on a snowy day

I underestimated how tricky it might be to get good lighting and photos of a quilt with a white background on a snowy, February day. Luckily, my husband is more than willing to drive around with me until we find the right location! I could not do this without his help.

Spinning Top, a quilt in the wild…sewn by Two Terriers Studio

I had someone in mind as the recipient for this, but guess what? That someone is now “my collection”. Maybe there will be a duplicate in the future, but I’m not ready to let it go. Oh man, are we all singing that song, in our minds now?

Monika is offering 15% off the pattern price, in her shop, until February 21, 2021. No code will be needed at checkout, and the pattern will be available for purchase after that date as well.

Happy Quilting….

This post and project are not sponsored; all comments and photos property of Two Terriers Studio; not to be duplicated or shared without permission.

The Lotus Blossom Quilt

One thing I love about quilting is the community of makers. While it may seem like a solitary craft, a quiet escape for someone who likes to create, for themselves or others, there really are so many additional layers and elements that make it all happen. There are fabric designers who create gorgeous art which then moves to fabric by a host of manufacturers; the pattern designers who create new layouts or reinvent traditional shapes or encourage improvisation. There’s thread, batting, sewing machines, brick and mortar shops and online venues. There’s also the “tester” or “editor”. That’s where I came in on this project. I’m so thankful to have crossed paths with Tara Curtis, creator of @weftyneedle. You may know Tara by way of the Wefty Needle or Wefty Miter and her beautifully woven fabric designs. If not, go check out her work; I suspect you’ll want to be weaving by nightfall. Tara gave me the opportunity to test her pattern, the Lotus Blossom Quilt, before it became available to the public and I’ve been hinting at it’s release on Instagram for a few weeks now.

As a pattern tester, I get to mesh my passion for words and fabric. Something you might not know about me is that my education and professional background is in writing, editing and publishing. When I’ve been invited or signed up to test a new pattern, I rarely know what it looks like or whether it falls into my sewing skill set, but I am usually confident that I can at least assist with the written words of the pattern. It’s even better if the pattern contains elements out of my comfort zone. That’s where we grow & learn.

Lotus Blossom Applique

The lesson for me with this pattern was in appliqué and slowing down. It seems I have a habit of fast sewing with one bare foot. Not so great for curved appliqué. I had to temper myself and take my time.

Slow down…

This pattern comes in two sizes, crib and queen. I opted to make the crib size as my goal was to machine quilt it myself and I have not quilted a queen size project on my domestic machine (yet). I also wanted to use fabric I already owned. I had just recently returned from Missouri Star Quilt Co., where I purchased a bundle of the V & Co., metallic ombre dots. If you love the look of these ombre fabrics, seen in a “sample”, they are even better in full-size, real life. It wasn’t until I had laid it all out that I noticed the glow that came from the ombre effect. It was even better than I expected and perfect for this design. I also used V & Co. ombre solids for the blossom petals, except that one, center bloom.

A pop of color on a winter day

When quilting this, I used straight line, “in the ditch” stitching and added a few additional lines in the wider bands of fabric, stopping at the edges of the petals, which were each outlined. I’m hoping to learn more about free-motion quilting, but until then, it’s straight lines and hiring my friends with long-arm quilting expertise!

The Lotus Blossom Quilt by Two Terriers Studio

I’ve mentioned this before, but it bears repeating, especially with this photo. My husband cheers me on in my quilting endeavors and he also willingly travels around with me as I look for perfect settings and photo opportunities. For those who know him, you know he’s tall. TALL. He’s in this photo. Do you see him? No. He has mastered hunkering down, (keep in mind this is a crib size quilt), as well as having perfected the “fabric pinch” so that we don’t see his hands creeping around the bound corners. Together, we get it done. What I’m curious about is what this must have looked like from the perspective of the house across the bridge. Maybe next time. That could be an interesting shot.

Tara released this pattern today, April 15th, and it is available on her website weftyneedle.com by PDF download. Do yourself a favor, and check it out. She has highlighted other makers who tested this for her and I think it’s terrific that given the same instructions, we each made something unique. She also explains her inspiration for this design, which is even more fitting today than it may have been months ago as we saw this pattern for the first time. It’s worth reading about, please take a look. As we all move through this period of uncertainty with Covid-19, new boundaries, staying home and attempting a new normal, there can be something calming in creativity. I am so thankful for my sewing community, and for Tara giving me this opportunity.

-Stacey