
I’ve often admired quilt patterns by designer, Modernly Morgan, (www.modernlymorgan.com) so when she asked if I’d test this latest design, it was an easy “YES” from me. Morgan and I both have a love of scrappy quilts, so I was excited about the opportunity to work together. This pattern comes with instructions for three sizes – Baby, Throw and Bed. I made the 60″ square throw size.
Let’s just say, this pattern is a keeper.
The Making of a Quilt
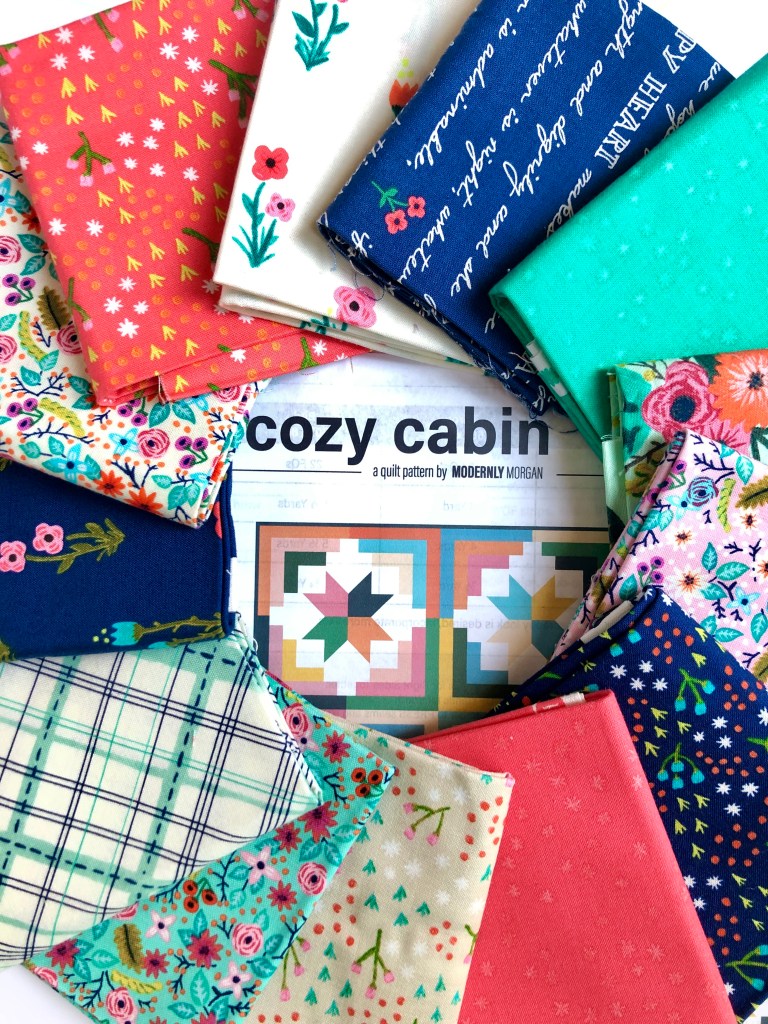
Cozy Cabin is a modern twist on the traditional log cabin quilt block. The scrappy element is just a bonus, in my opinion. For my version of this quilt, I pulled a fat quarter bundle by Windham Fabrics www.windhamfabrics.com, designed by Amy Gibson, called Meriwether. The variety of florals, plaid, text, and blenders seemed the perfect foundation for this project. It’s bright and has a spring-like feel; just what I needed after a long winter.
I wouldn’t call a fat quarter bundle, “scrap”, in this case, it was “stash”. I purchased this collection a while back and saved it, knowing the right pattern would come along. Enter Cozy Cabin! When I first purchased this bundle, I didn’t have a pattern in mind, so I hadn’t accounted for the backing or binding. I consider myself very lucky that my local quilt shop had bolts of yardage, in stock, when it came time for me to finish the quilt. With the variety of colors and prints, I could have found a different fabric or collection to coordinate, but I’m thankful to have been able to keep the entire quilt in the Meriwether collection.
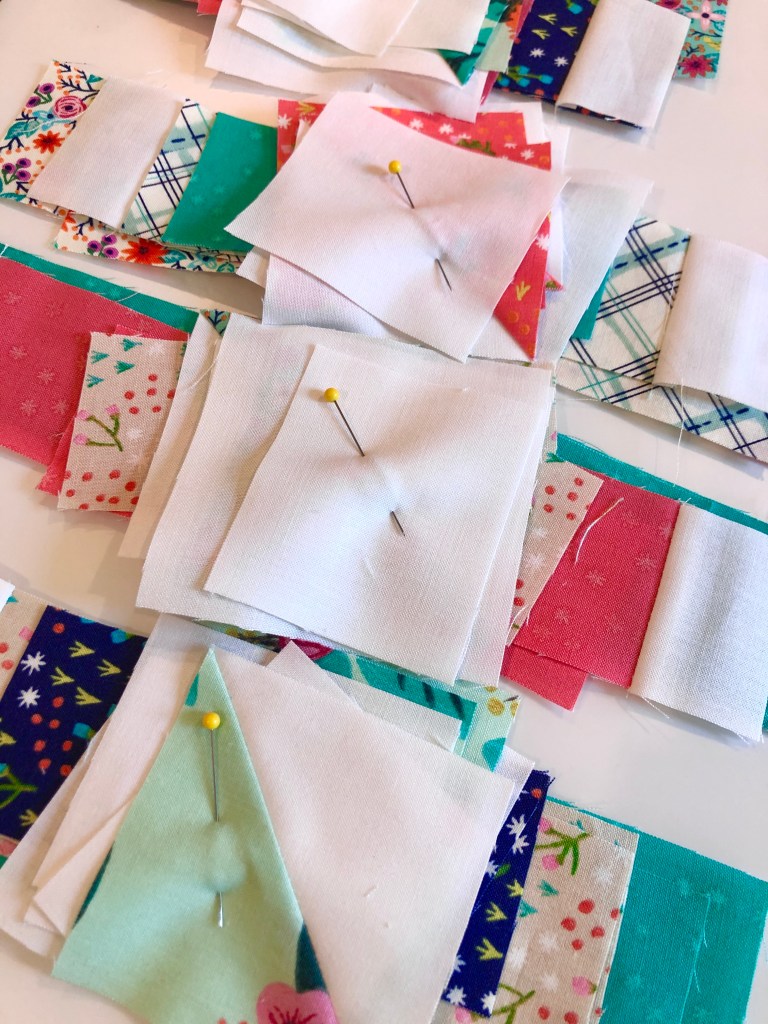
Half Square Triangles
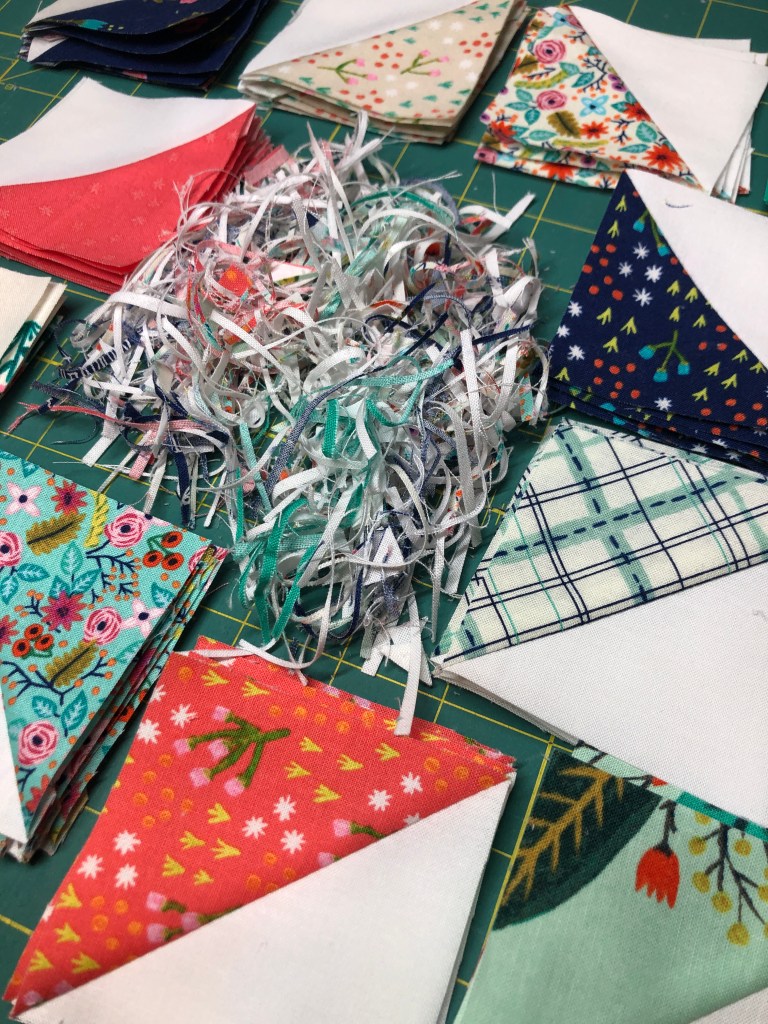
Squaring up half-square triangles is an act of patience and accuracy. I actually prefer when a pattern has a little “wiggle room” in the measurements so that I can square-up to a perfect size, but I also like not having a lot of waste. This pattern calls for scant 1/4″ seams and as you can see, produces blocks with little waste.
Building the Blocks
Once the HSTs were made, I organized my remaining pieces into sets that would become one quadrant of each block. This step made it easy for me to pick up a set and sew as time permitted, even if I only had a few minutes between other obligations. The accuracy of the pattern made testing it a breeze. I was able to move through the sewing without issue.
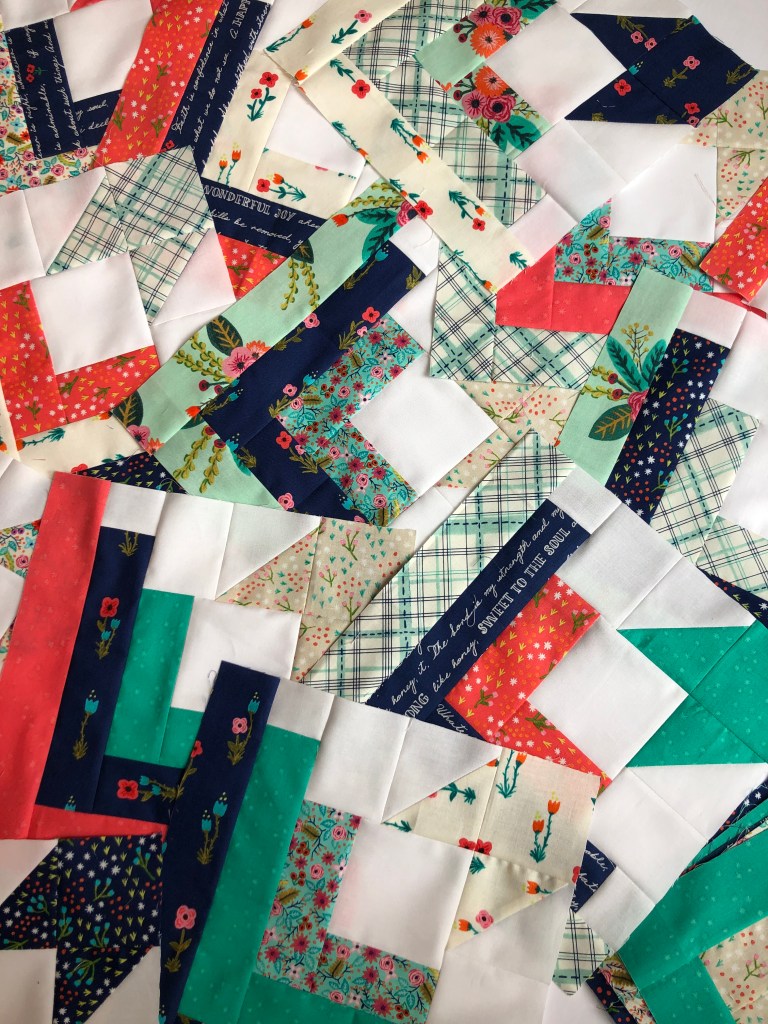
This quilt came together so quickly. It’s a combination of the same block, repeated and rotated, throughout the layout. Once the pieces are cut and the HST trimmed, it was a lot of chain piecing for efficiency. I don’t tend to overthink blocks if I’m creating a scrappy look. Loving all the prints and knowing they work together certainly takes some of the worry out of the process for me. I had no doubt it would be cohesive.

I like the rotation of the blocks as it allowed me to think about the placement of pieces with text/font and how it would “read” once completely assembled. Additionally, if this were being made with a truly scrappy style, you could make each block independently with small pieces of fabric and make quite a dent in your scrap stash.
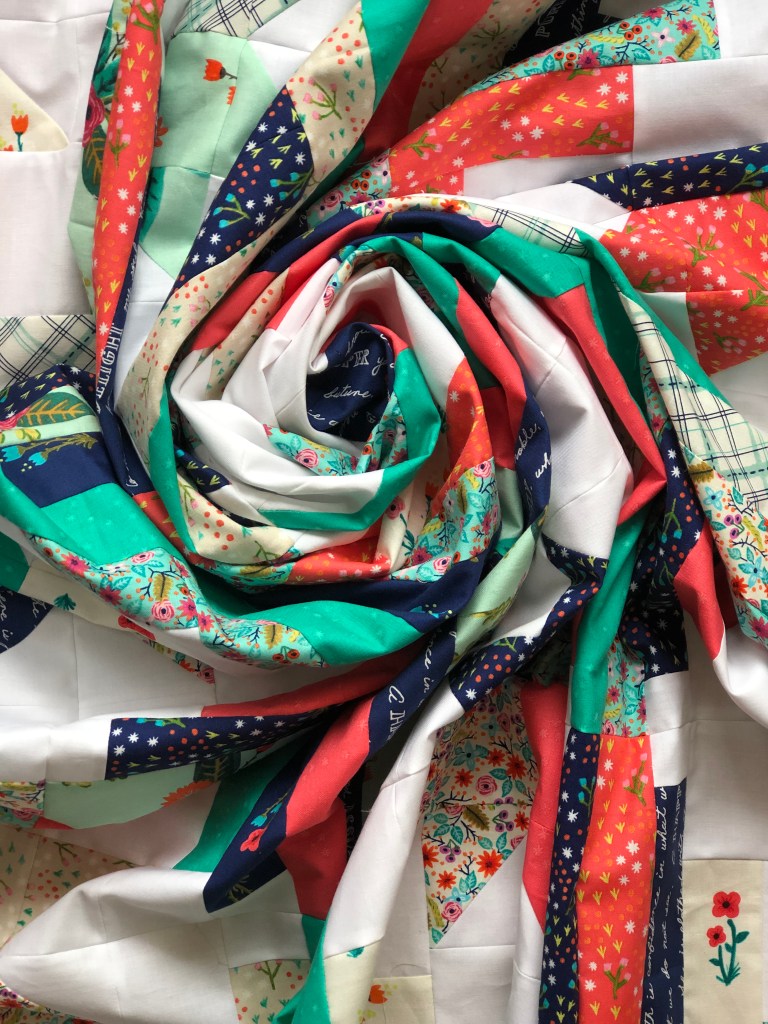
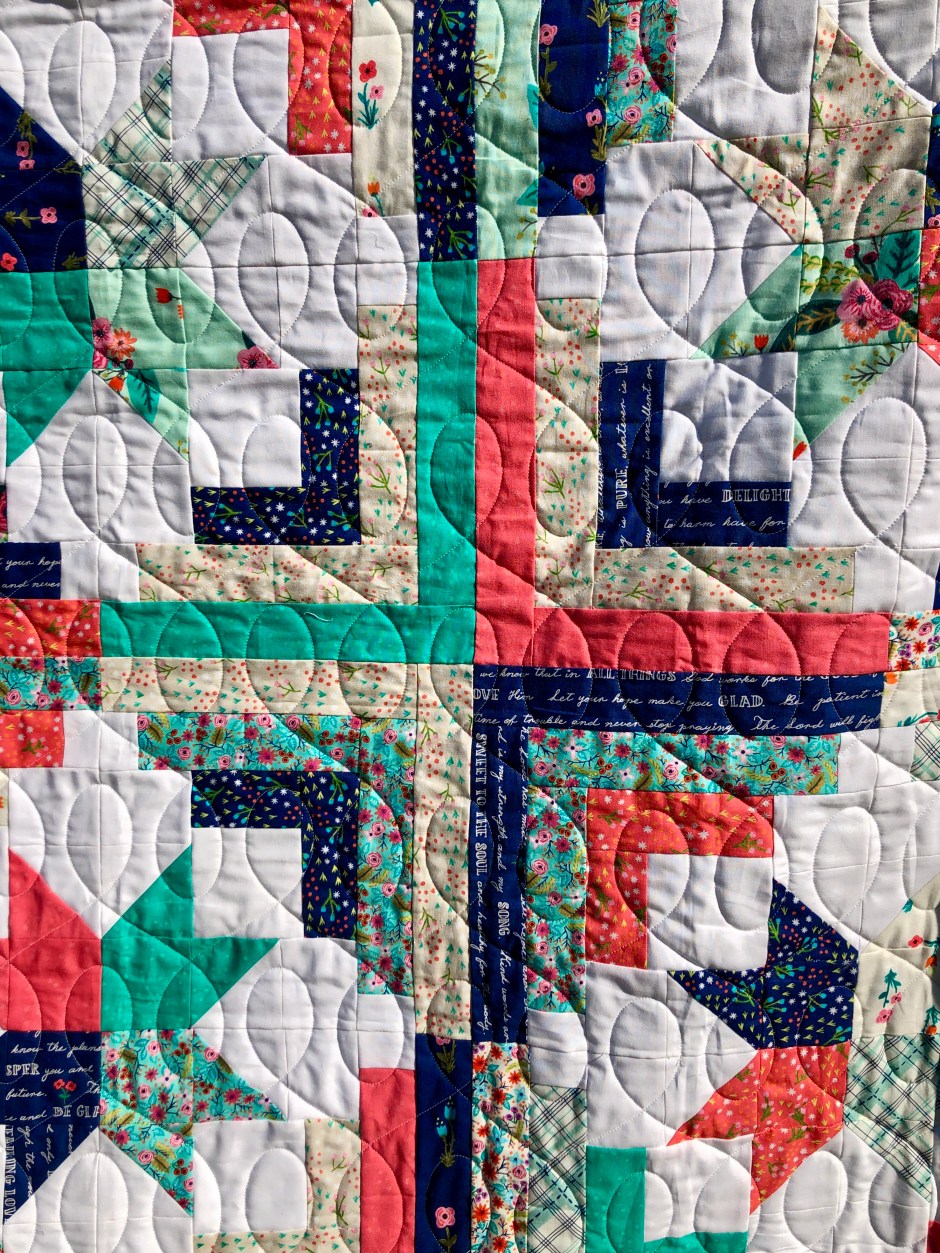
The top is pieced & swirled. This is the kind of cinnamon roll-like swirl that is calorie free! Look at all those delightful colors coming together.
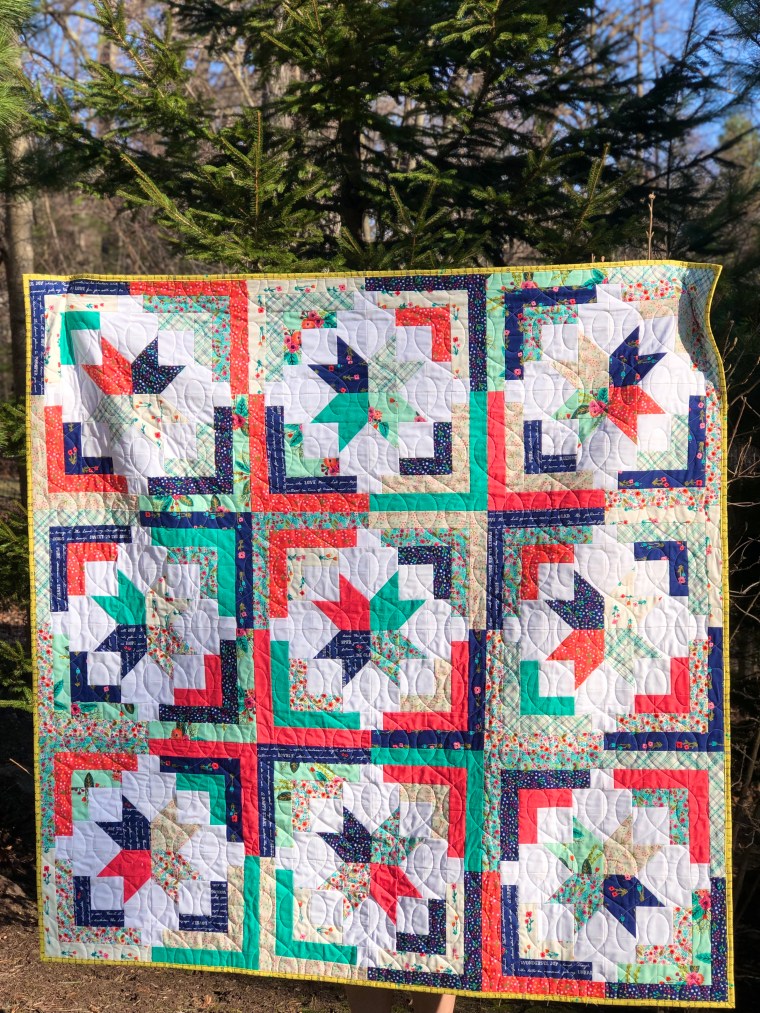
The Finished Top/Front

There is always something fun for me in photographing a completed quilt top. My husband helps me every single time & thankfully, he’s tall and can keep them off the ground. To stand back, and see my effort and time spent creating a quilt, is gratifying. I think about the pattern, the designer, the fabric choice and how it tells a story. Seeing it from a distance also shows the secondary pattern; do you see it? Not just the stars, but the bands, joining the blocks. In our home, quilts are made to be used and loved. Seeing my favorite people enjoying something I’ve made makes it even more special.
Longarm Quilting and Binding

With this being a larger, 60″ square quilt, I opted to have it professionally quilted. When I make baby quilts, I feel more confident quilting them on my domestic machine, but I opt for straight lines and nothing too fancy. There are so many edge to edge designs available and I think this decision is one of the hardest for me to make in the entire process. Once it’s quilted, it is what it is and all the layers and seams are connected. It has to be right. I never want to get this close to the finish line and wing it. I used a 2.5″ straight cut binding and finished it by machine. Lately, I’ve been doing more binding by machine than by hand, because it takes practice and I’m comfortable practicing on quilts I know I intend to keep. Quilts I gift, those are mostly done with hand-stitched binding.
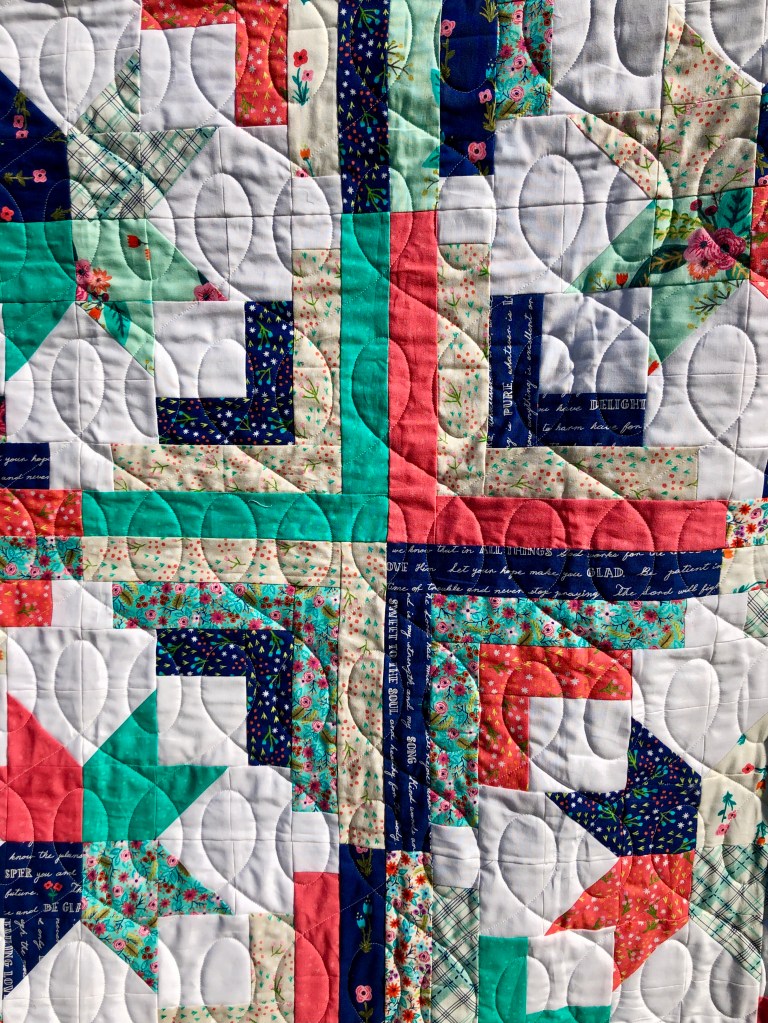
Here’s a closer look at the quilting pantograph. It’s an edge to edge design called Modern Twist.
Fabrics with text, fonts or inspirational messages are among my favorites. I wanted to include a large section of this yellow fabric in the quilt back, as well as using it for the binding. The evenly spaced rows of words almost give the binding a subtle stripe.

I enjoyed making this quilt & 100% plan to keep this one for myself! It’s a pattern I’d recommend and I think when you see the designer’s version and the other sizes and fabrics chosen by the team of testers, you’ll see that it works well in all colors and themes. Take a minute to visit Modernly Morgan on Instagram (@modernlymorgan) or her website, shown above, to purchase your own copy of this pattern. It is being released April 14, 2021.
Enjoy and happy quilting!
All photos and content property of Two Terriers Studio; not to be duplicated or shared without consent. This is not a sponsored post.
