


This is the latest scrap busting quilt I’ve made and I love it. Every quilt comes with a story; how it began, who it is for, the process, the fabric, the quilting and boy, does this one have a story. It’s one that I’m glad I trusted the process and continued sewing, even amidst the doubt and layout fatigue. What started as a project to use scraps and have some “mindless” patchwork sewing, quickly became anything but mindless. It’s more of a study of value and every block is placed with intention. Such intention isn’t usually found in scrappy or improvisation quilts I’ve made in the past. This one took time.
Sorting Scraps
I tend to be frugal with my scraps; almost to a fault. I’ve now been quilting for just over a decade and while I buy a lot of fabric, I use and keep almost every little bit until it’s a size that I can no longer find a use for. After each project, I’ve cut leftover fabric into 5″, 3.5″, and 2.5″ squares and store them together for future patchwork. The bigger pieces are sorted and stored by color and become zipper pouches or something like that. I’ve made so many “scrap busting” quilts and will be sharing them here soon. I’m a couple days late for Earth Day celebrations, but I always feel that using every little bit and not dumping it into a landfill is a responsible way to move through this process. My goal here was to not purchase a single piece of fabric to make this giant quilt and in that, I succeeded.
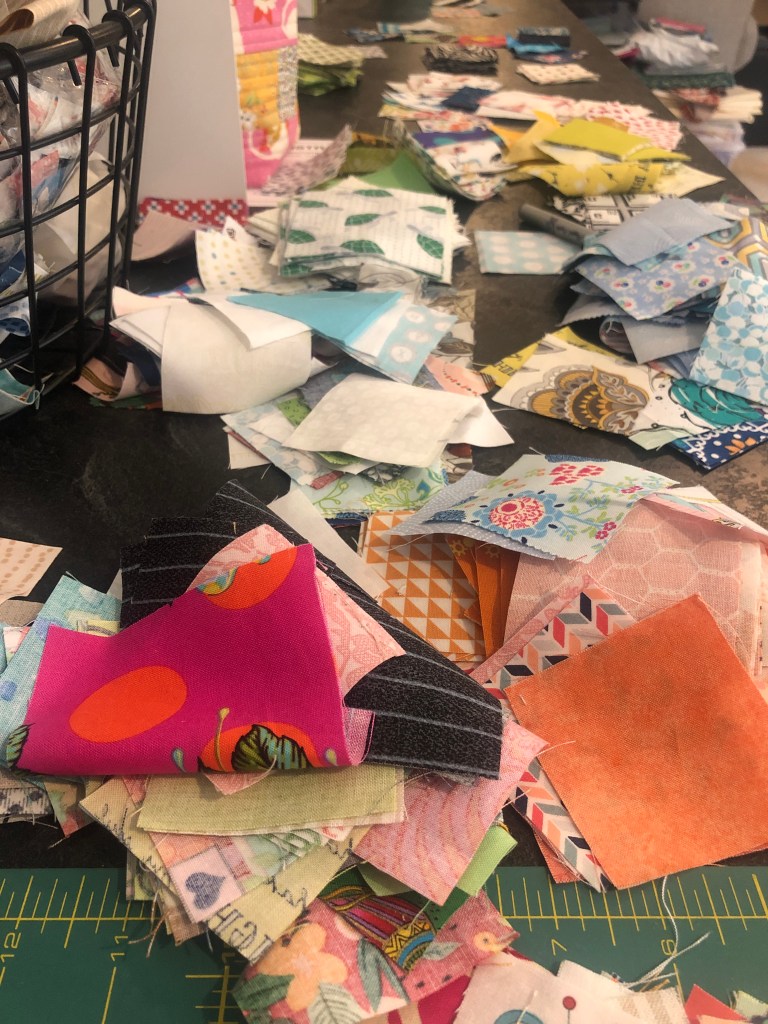
When I decided to make this Pixelated Quilt, I pulled all my 2.5″ squares and just dropped them on my cutting table. That’s the mess above. I don’t sort my squares by color, but by size. It seemed to make sense until this quilt assembly.
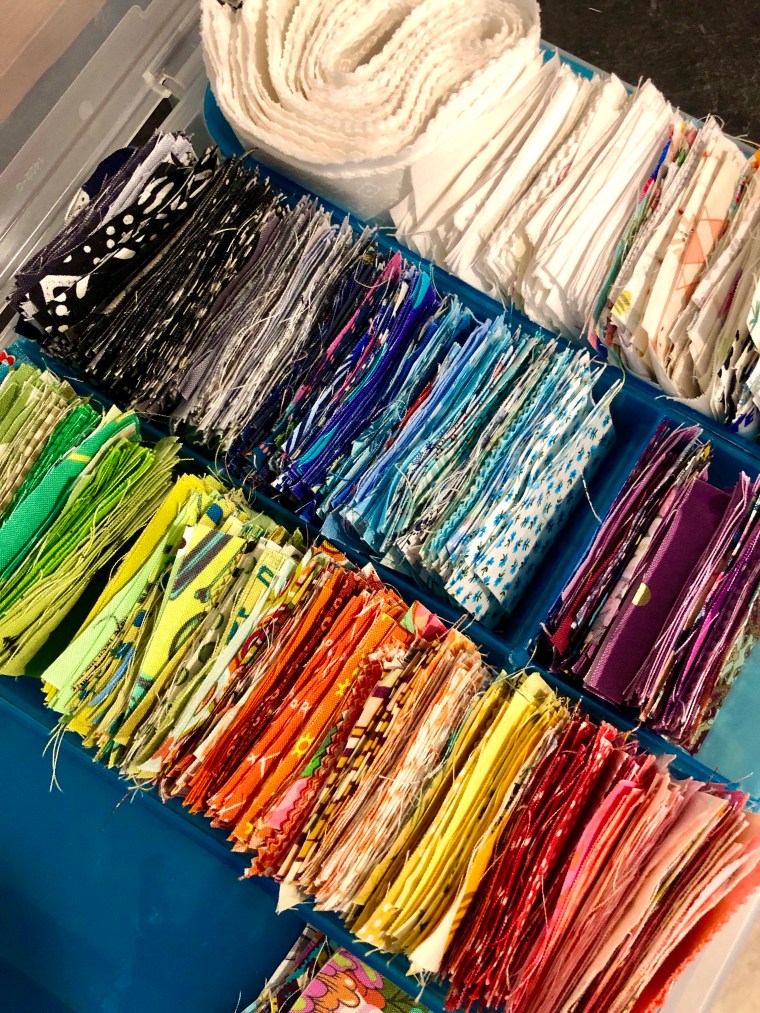
After a few days of sorting through all those little random pieces, I spent time sorting by color into a storage box. I don’t work well in chaos, so while I like all the fabric, the lack of order was making it a challenge to get things done. I was reminded that I have very little orange, yellow, or purple fabric in my collection. I needed to cut into some other larger pieces to develop the right amount of color gradient.
It was at about this time that I wasn’t sure I wanted to make this a large quilt. I started questioning what minimum size would still show the pattern, but allow for a quick finish. It was taking more time than I had anticipated (or wanted to spend) and rather than using the 2.5″ squares I’d already cut, I was having to cut into more fabric I already owned. I said to my husband, “I thought this was a good idea, now I’m not sure. Maybe it can be a baby quilt? I’m actually not loving it; is the value gradient actually showing yet?” He will say that the story went something like, “I have an idea; I love it; I think I’m OVER IT; insert mild curse words; I’m SO OVER it; a few more curse words; Ok, I really do love it!” Ha.
The Layout
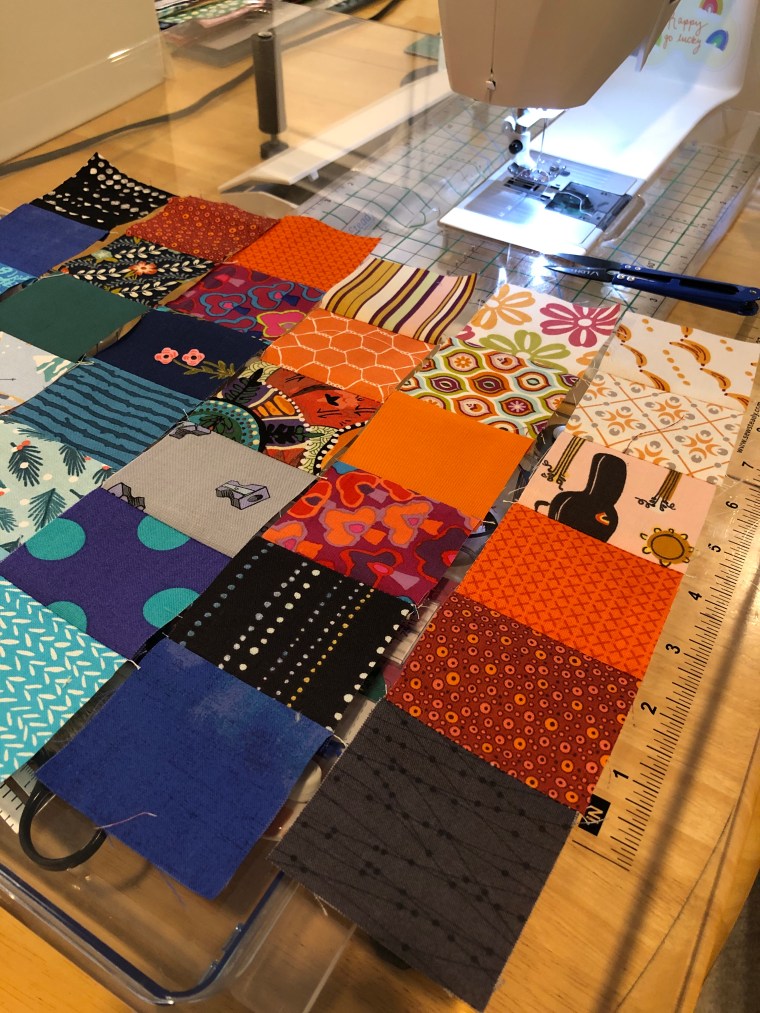
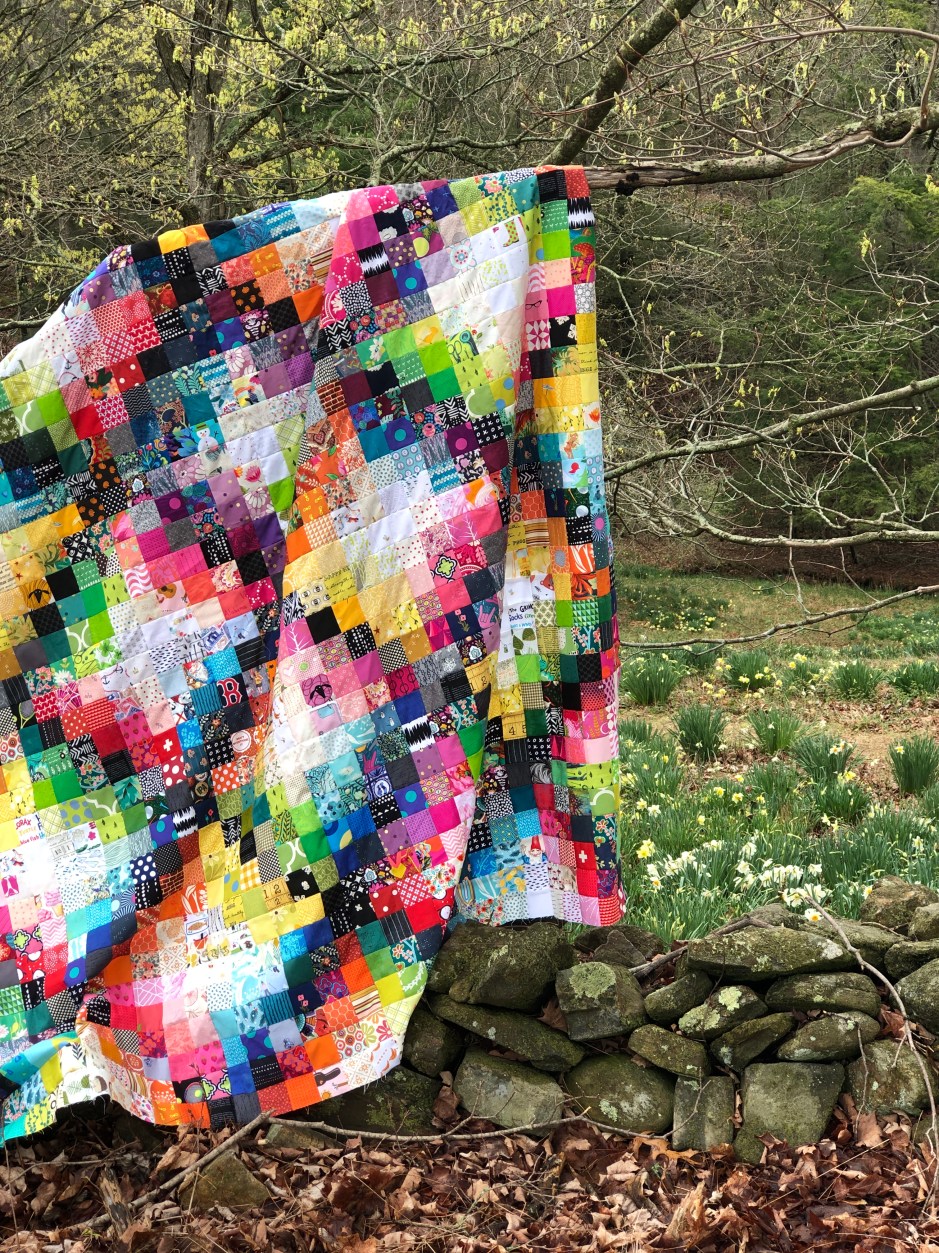
My block layout is a 6×6 pattern with the darkest line on the center diagonal. I also wanted the graphic images to be oriented top to bottom; the quilt front would have an obvious “top”. This was one more place where the intentional layout became time consuming. In addition to the gradient, I wanted the orientation to be consistent. Sometimes, I don’t worry about that. This time, I was trying to get each piece correct. With a quilt measuring 68″ x 80″, that meant 1,512 pieces…all measuring 2.5″ unfinished, 2″ finished.
Quilt in the Wild

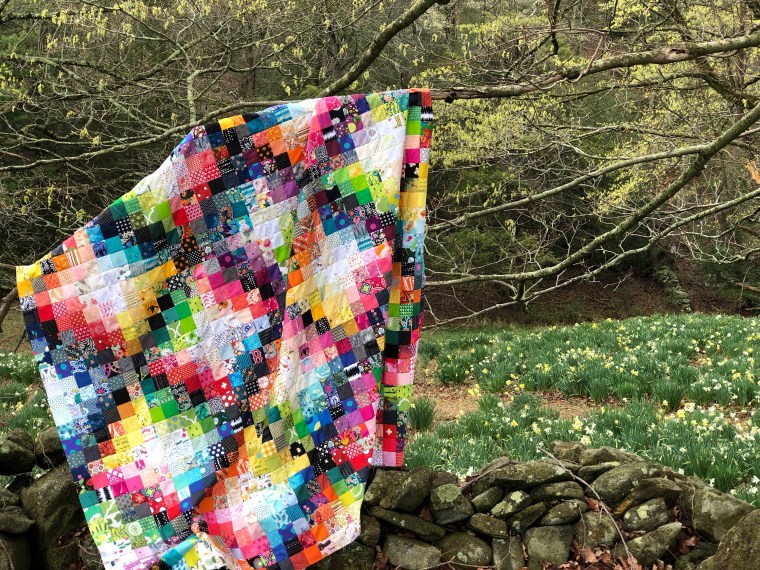
I like to photograph my quilt tops before they are quilted and bound for a few reasons. When I finally get the top finished, the first photos feel like a bit of a celebration. It’s also easier to travel with quilts of this size before they are quilted and bound, because the weight of something 68×80″ is heavy. My husband always helps me with the full size photos, so it’s also good that he’s not standing there, arms completely outstretched, trying not to let a heavy quilt hit the ground. I think it’s fun to see my work out of the studio, so “Quilts in the Wild” is top of my photo list.

These photos were taken at the Northfield Daffodil Farm in Litchfield, CT. It’s a magical place with rolling hills and so many beautiful flowers. This is was the second time (and second quilt of mine) photographed here.

Longarm Quilting

I sent this to be professionally longarm quilted by Jen, http://www.knottedthread.com. I chose a continuous Baptist Fan pantograph and I think she did a wonderful job.

The backing is of sea turtles and the binding is a Moda Fabrics grunge. I like how the binding matched the sea turtles, but also framed this span of so many colors.

Finished

Quilted and bound, I took it to Massachusetts for one more photo. It was just the burst of color needed by the sidewalk on this cloudy, spring day. If you look closely, you can see those turtles peaking out at the upper right corner.
While there is truth to the way my husband would relay the story of this quilt’s making, I look at it finished and I’m thankful I continued on. Isn’t that the way with most things in life? It’s the mentality to keep going that will get us where we need to be. Within these one thousand five hundred and twelve squares are fabrics from my very first quilt, made over a decade ago, as well as pieces from almost every one in between. I’m definitely seeing repeats and I notice the gaps in my own stash. This one will be staying at home with us. I made a considerable dent in my scrap squares and celebrated using every little bit.
It’s just a fun, cozy, colorful quilt, made with love.
All photos and content property of Two Terriers Studio and not to be copied or distributed without written consent.
