Eastern to Mountain, Part 3

Well, this post was a long time coming to press! Goodness gracious. The second post in this 3-part series was written five months ago, but this particular quilt has been finished for a year. I’ve clearly not kept up with the blog or the chronology of my projects this year.

Time. It’s fleeting.

Let’s just get to it…meet the quilt lovingly called “The Beast”. The third in a 3 part series.

The Beast

Why “The Beast”? First and probably singularly named because it’s huge. Huge by the standards I’d set for some of my quilts when this was finished in the summer of 2022. With this being an improv style, there wasn’t a pattern or an end size in mind when I started. It was finished when I was finished and that took months (years?). It’s perfectly suited to keep my tall husband cozy on movie nights, so all’s well that ends well.

Strings

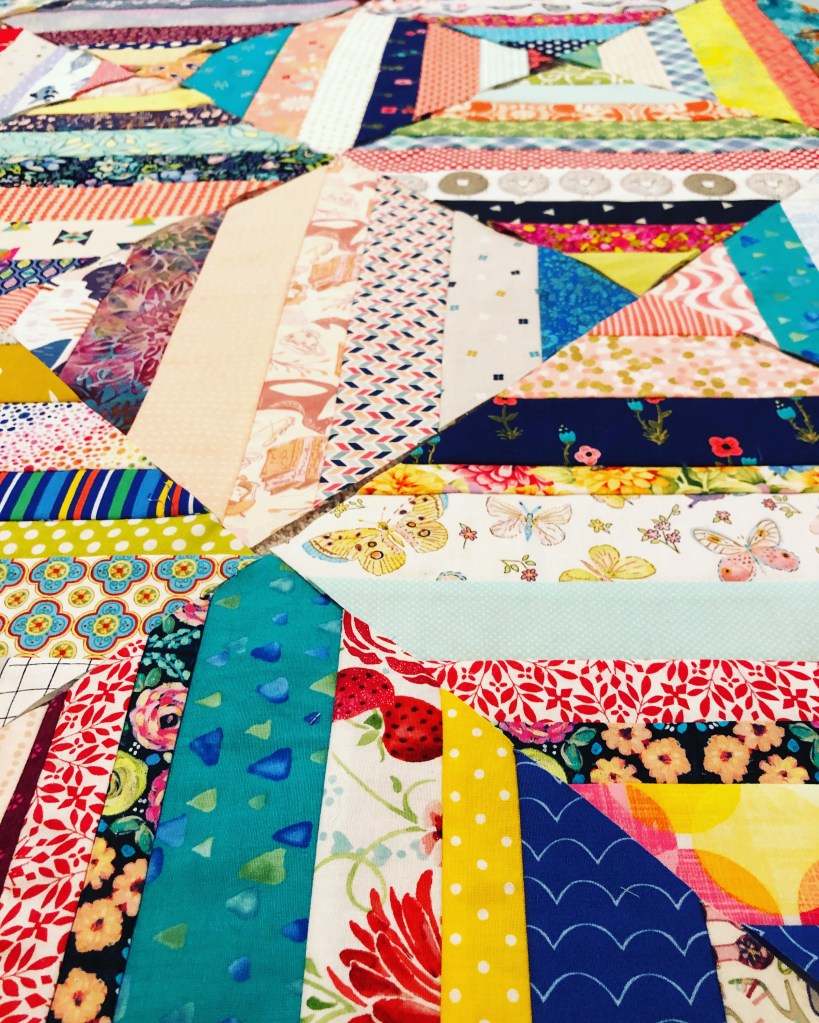
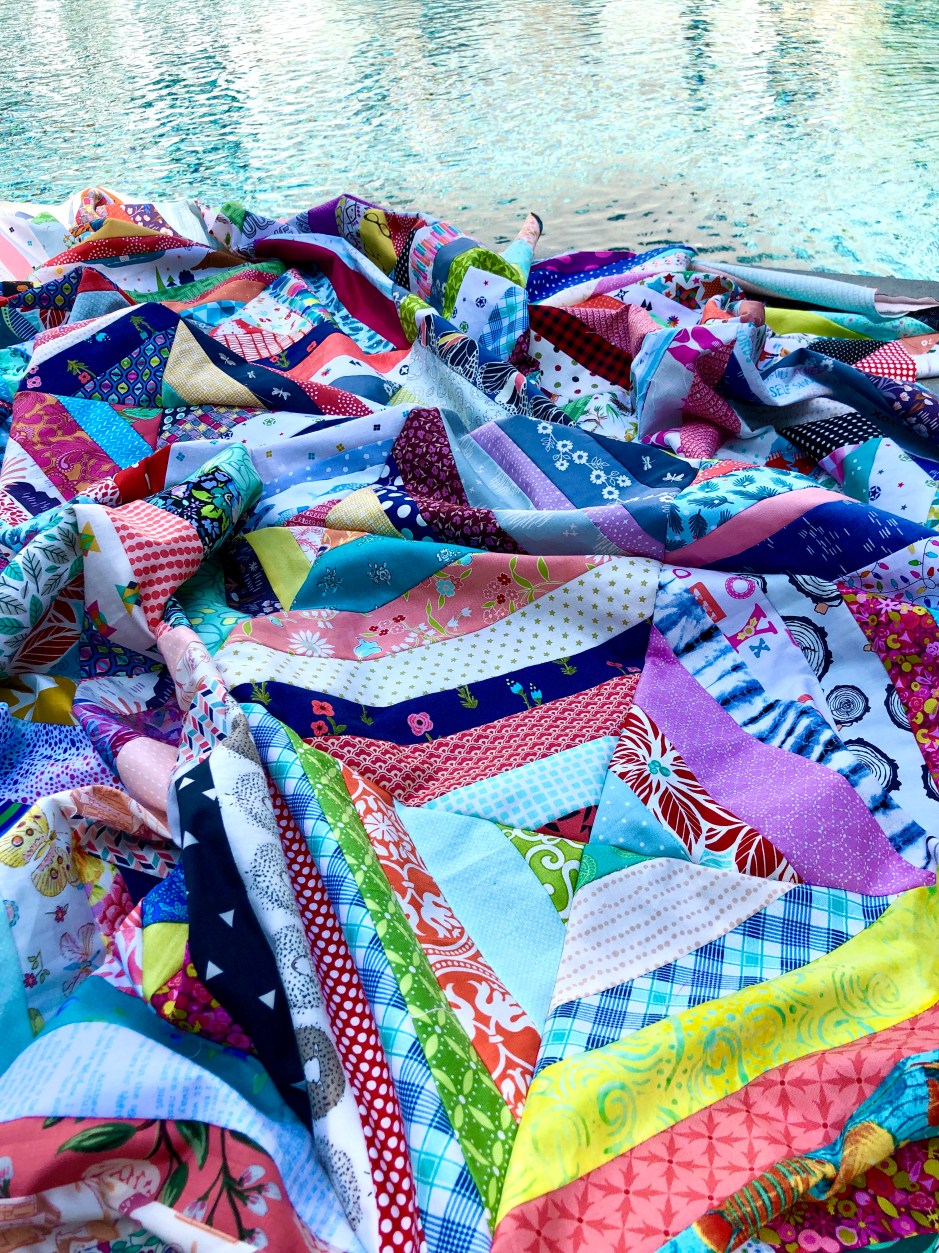
There’s no surprise this is another scrappy quilt. I never tire of seeing a decade of fabric bits thrown together into something useful. Thrown together may be a stretch, but I can say without hesitation that I don’t spend much time thinking about which fabrics are pulled from my overflowing bin. I’ve purchased all these pieces because I like them individually, so my thought is that collectively, it will work out. This quilt represents years of previous projects. I love it.

Like most quilters, I have a multiple scrap bins. Some sorted by color, some by designer, some by size. The pieces of this quilt came from the “strings & strips” bin. With the completion of each project, I sort scraps into the appropriate bin and anything more than an inch wide, but in a long strip, goes into this one space. When it hits overflowing, it’s time to piece them together.

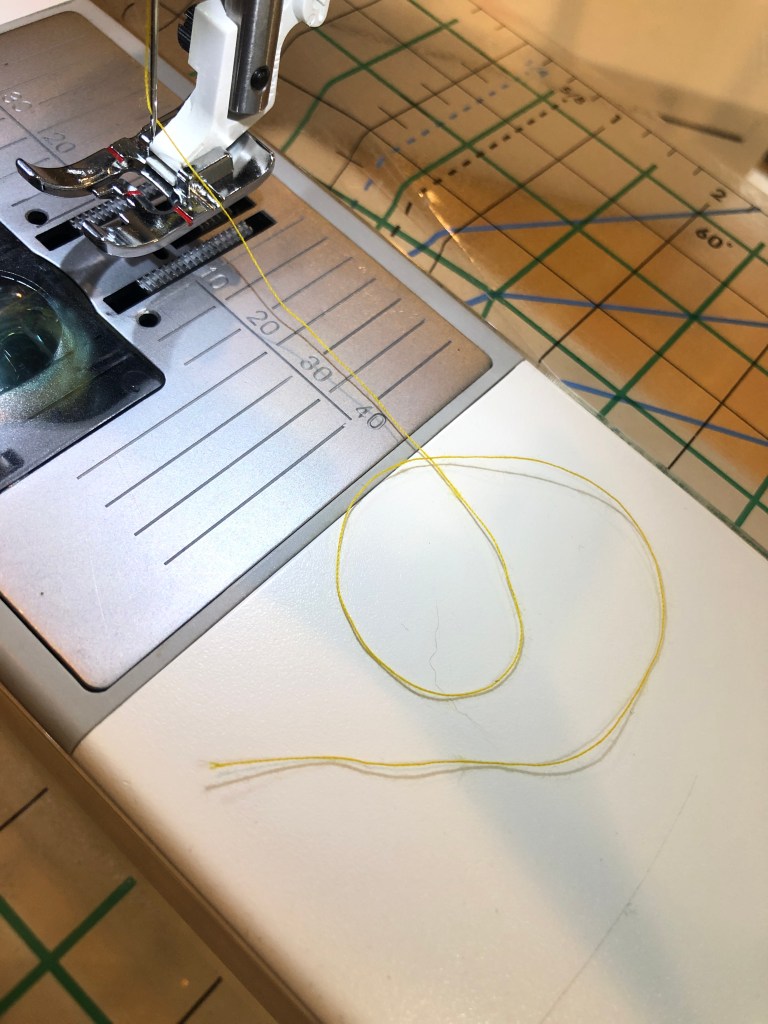
Foundation Paper Piecing

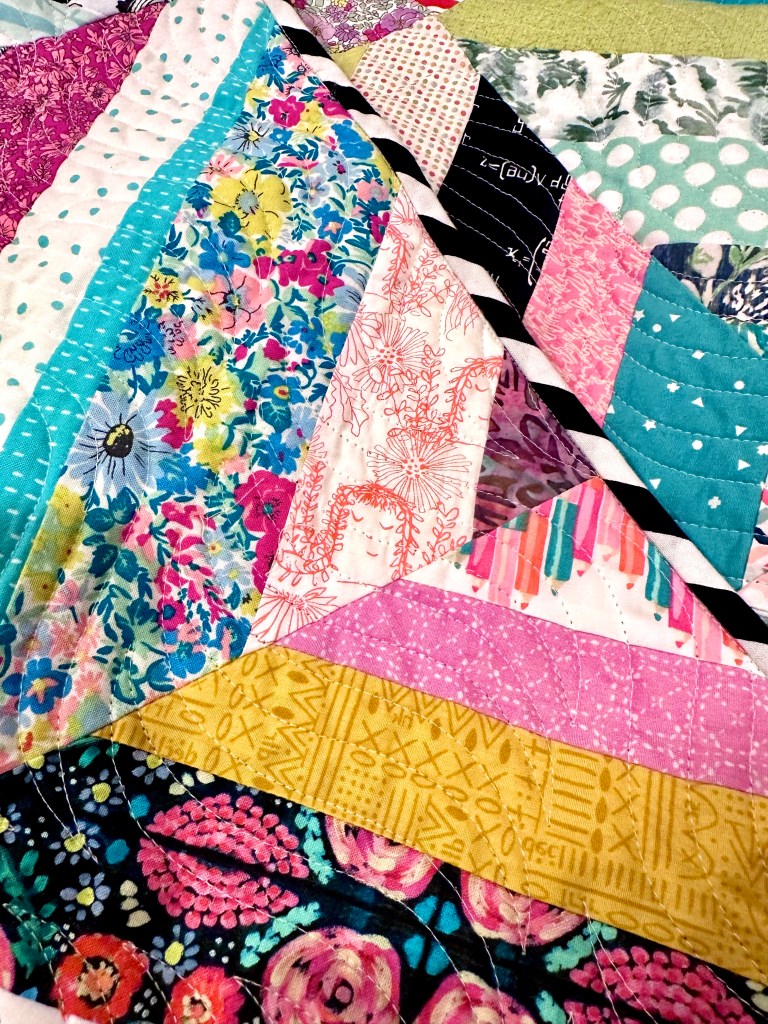
I started these blocks with ten inch foundation paper piecing squares from http://www.missouriquiltco.com. The lightweight and easily torn-away foundation papers made these blocks a breeze. I constructed this like a “string quilt”, with a fabric strip placed face-up, diagonally across the center and then worked in each consecutive strip to one side until the foundation was covered. I flipped the square around and repeated on the other half of the square. Everything was given a good press, trimmed and set aside. Over and over and over!

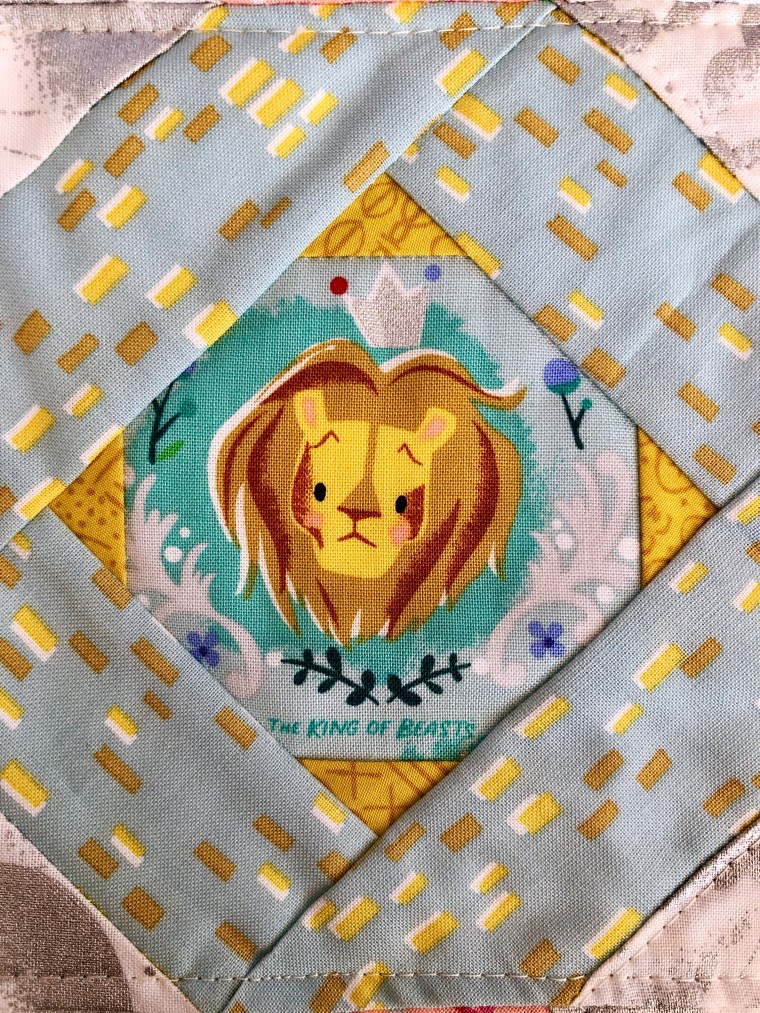
As you can see, there isn’t a theme. The strips vary in color, width, designer and style. It seems to me that in scrappy quilts, the more fabrics, the more it makes sense. It’s not like trying to stay in a zone and missing it…the more the better. At least to my eye.
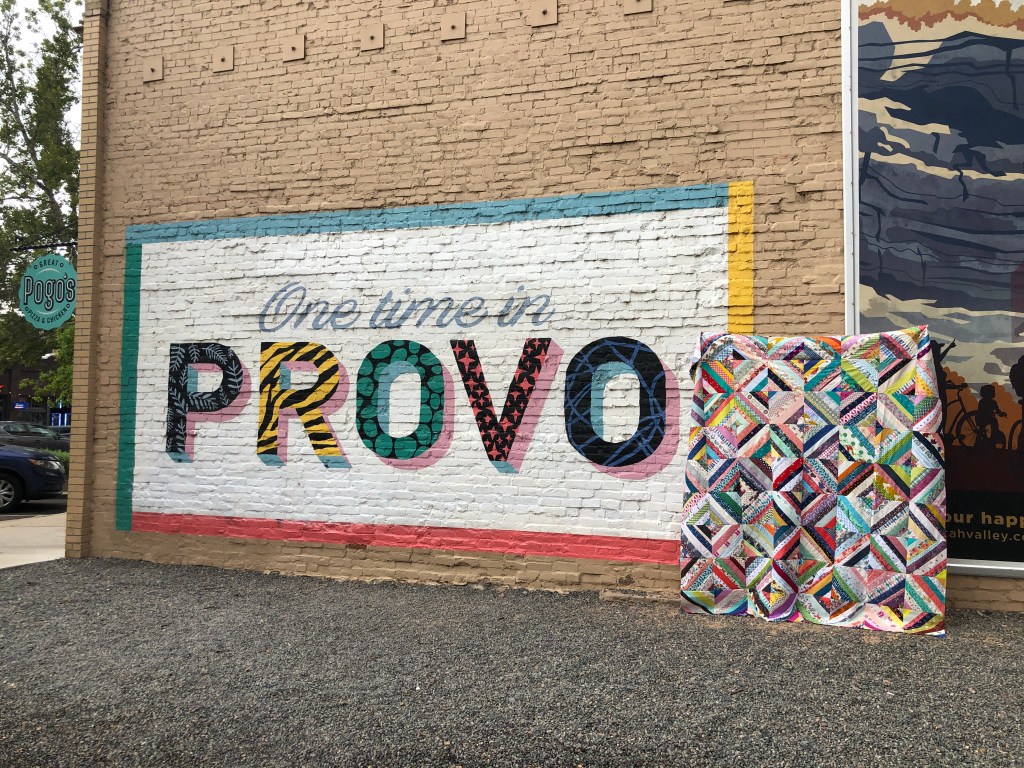
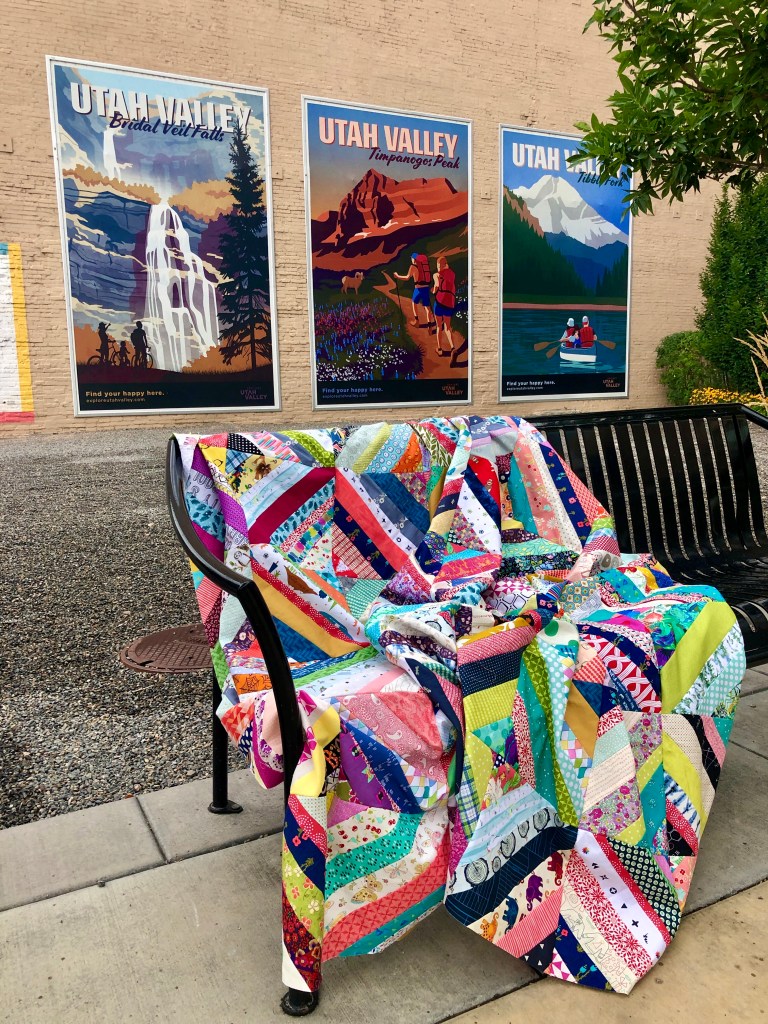
A Traveling Top

From New England to Utah, this quilt saw some mileage. In the summer of 2022, my husband & I were in Provo, Utah as well as Sundance. The scenery is incredible; perfect for quilt photos. We hopped around town, a bag of quilt tops in tow, and then headed into the mountains. I’m so lucky to have a husband who will carry quilts up steep terrain and then also hold them off the ground while I try to capture good angles. He’s the best. We’ve learned that photos of large quilts in the wild are easier when they are just pieced tops. These babies get heavy!

Stewart’s Cascade Trail

Into the mountains we go. These photos were taken along Stewart’s Cascade Trail, a 1.9 mile hike from the south side of Mount Timpanogos. The trail traverses through thick fir trees, oak, maple, aspens, and an avalanche path. It is stunning. The aspens were spectacular and when the sun shines just right, everything is more beautiful. The elevation is significantly higher than what we are used to at home, but it was manageable. The snakes, not my thing. I kept a good watch after the first one crossed my path.

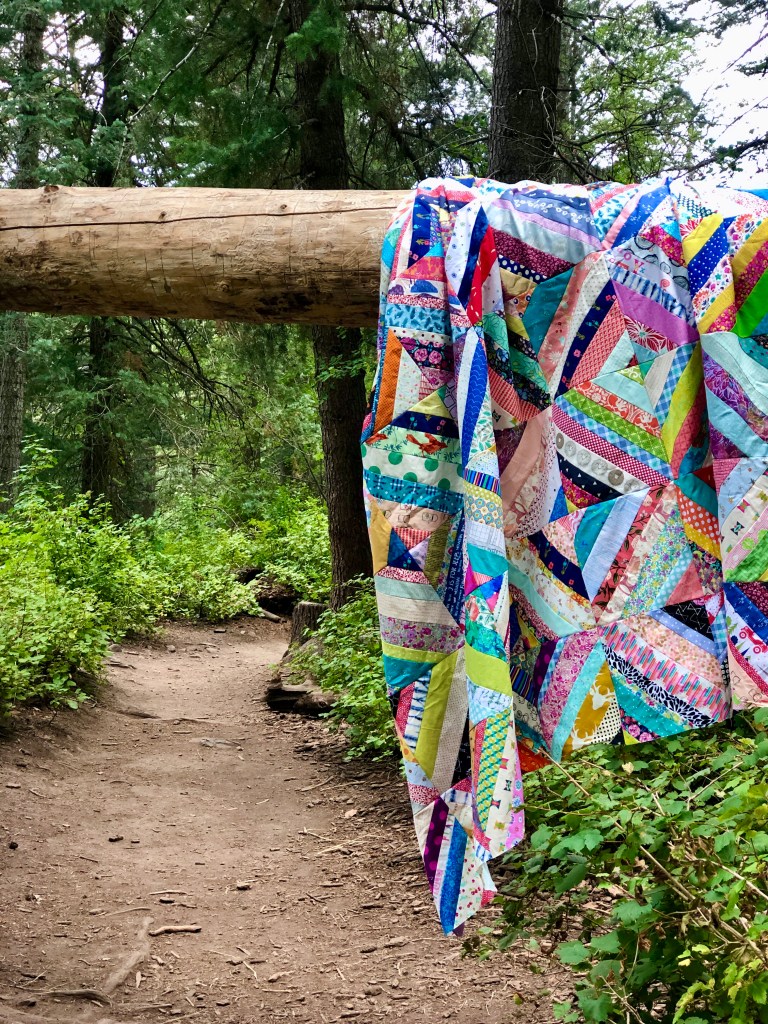
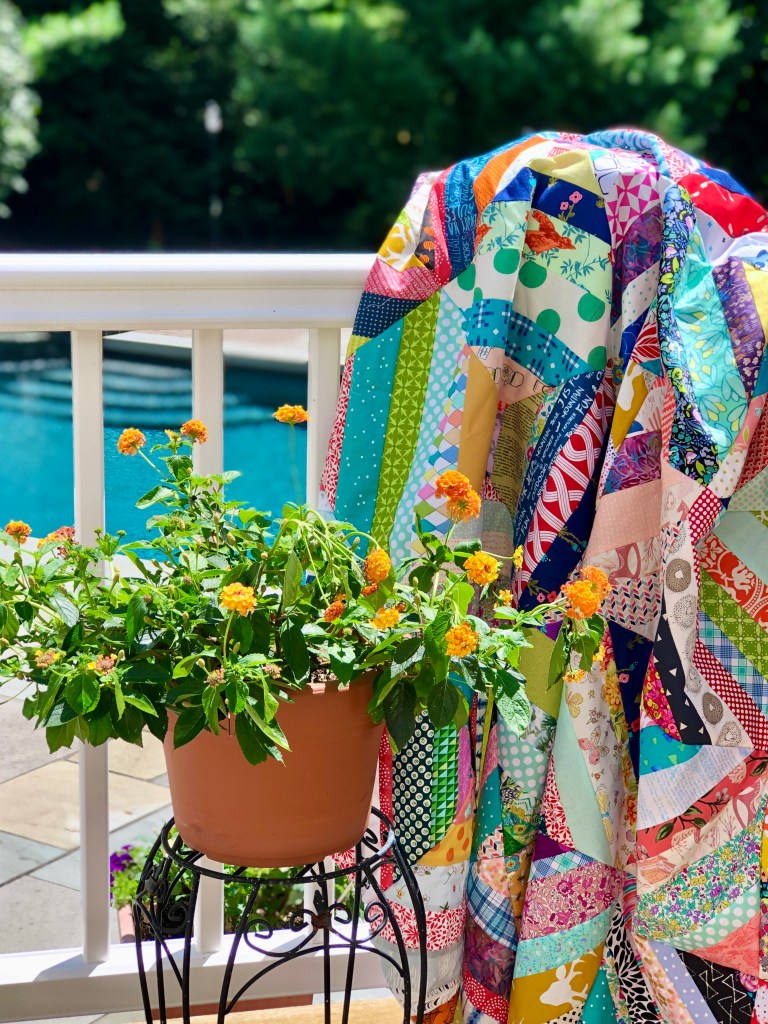
Anyone else love to see quilts in the wild or in the wind? I love the burst of color among nature’s glory.

The goal was to get to the waterfall and take the photos there. A few people stopped to ask what we were carrying, so the trek took more time as we stopped to explain the quilts. I never know if other hikers think it’s cool or wacky that this is what we are doing, but I’m guessing it leads to a story of “you’re not going to believe what I saw on the trail today!” Just as we got to the clearing and the waterfall was within sight, a young couple moved passed us and perched on a rocky ledge and made themselves comfortable. We debated waiting them out, but also made note of the time and impending sunset. Hiking back down a trail we didn’t know, in the dark, wasn’t top priority. The waterfall shot was over. So here we are…imagine a waterfall just behind the quilt. It’s there, I promise.

Quilted

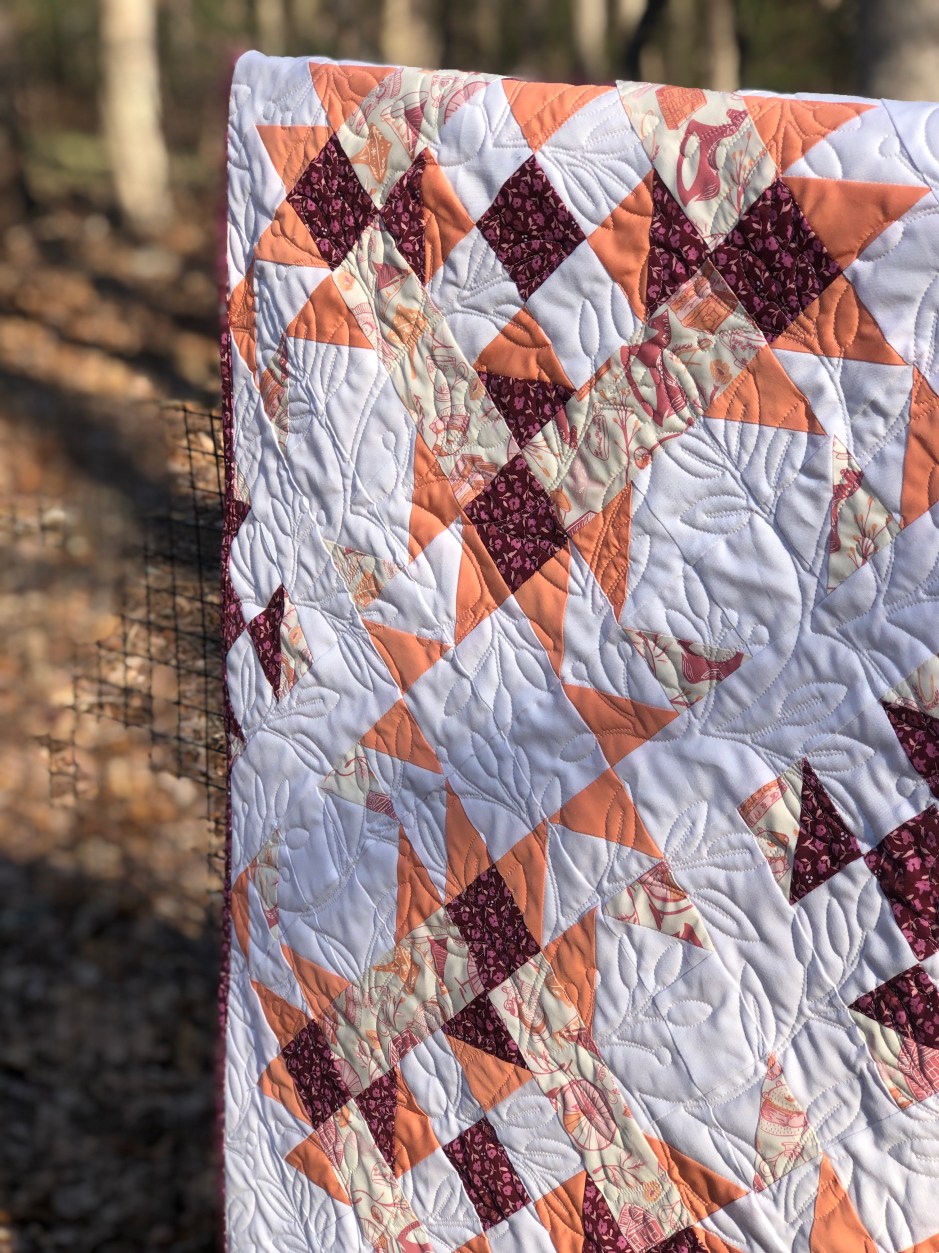
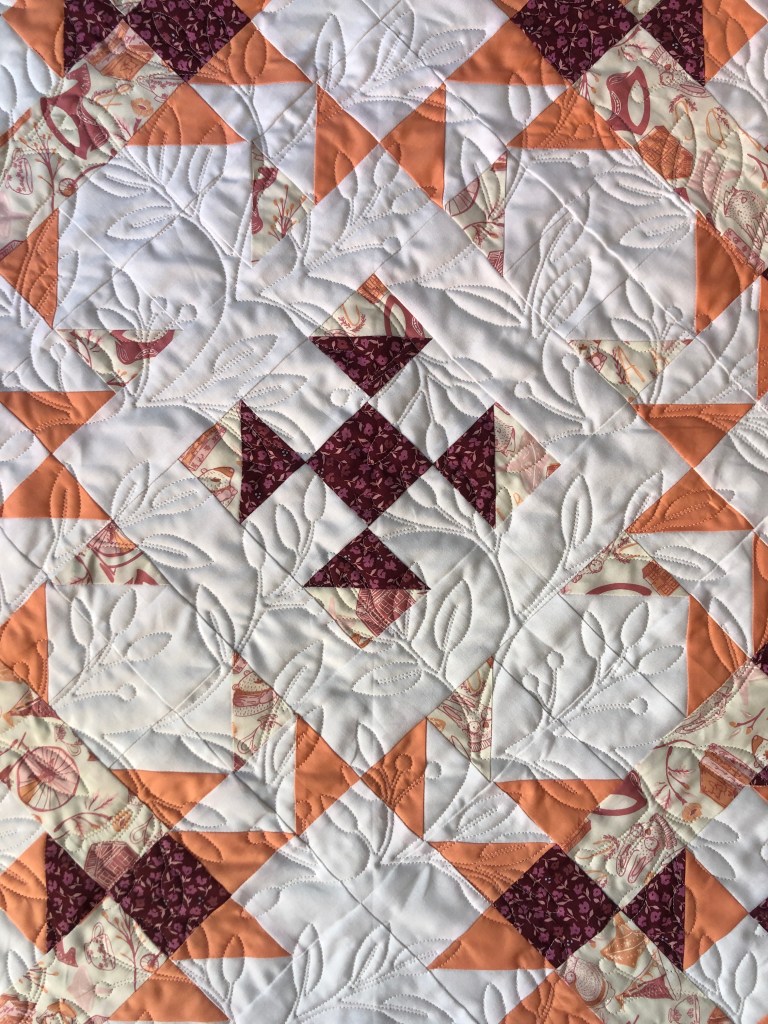
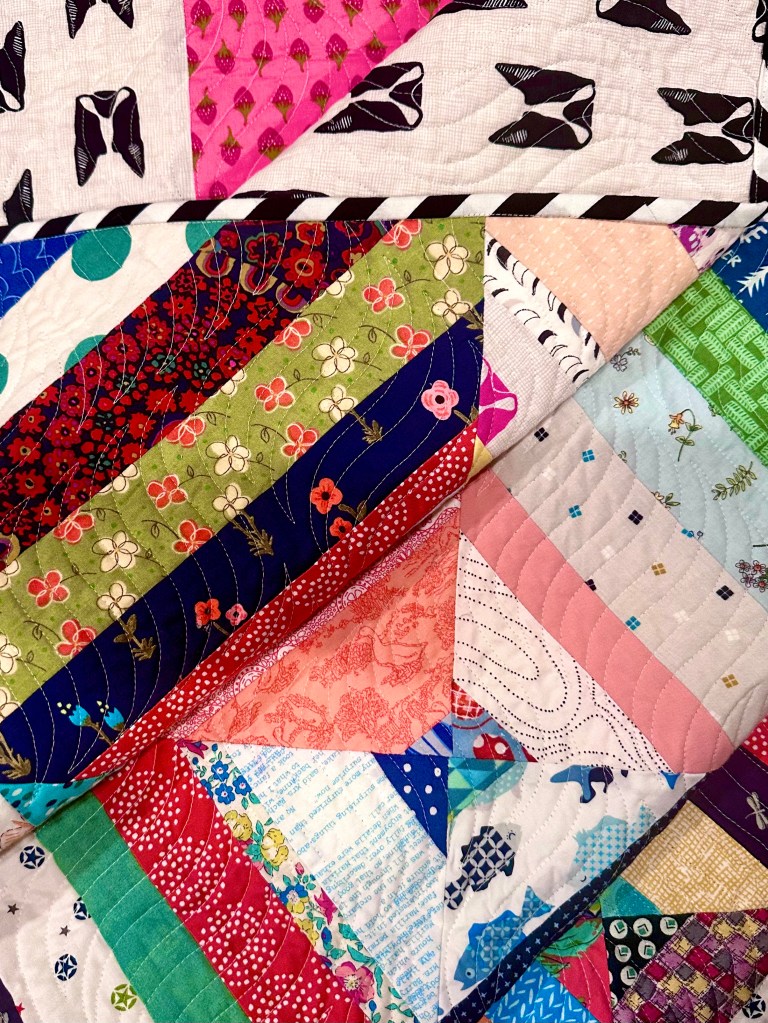
I had this longarm quilted by Jenn, http://www.knottedthread.com using the Time Warp pantograph. The movement of the panto across these angular cuts is exactly what I wanted.

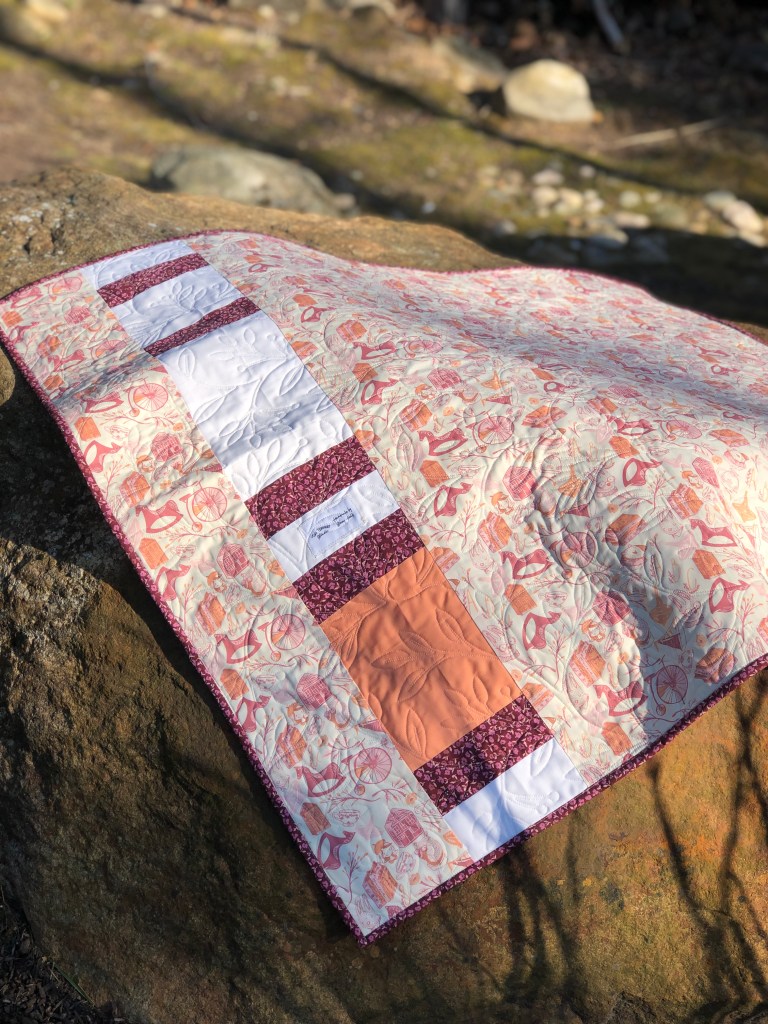
With so much going on in the front of the quilt, I opted for a simple black & white striped binding. The back of the quilt is mainly black and white with a pieced section, too. I like how the striped binding frames everything.

I had two bolts of the terrier fabric & it has come in handy for quilt backs. I really like this print and have used it on quilts I know I intend to keep in our family.

The Beast finished at 75″ x 87″; a decade of fabric, many months of sewing, a bit more than two thousand miles of travel and a day’s hike in Utah. Worth every minute of effort.

-Happy Quilting!

This is not a sponsored post. All content and photos property of Two Terriers Studio and not to be duplicated or shared without written consent of the owner.

The Wizard, a Commission

Awhile back, as in 2019, I purchased fabric called “Dorothy’s Journey” featuring the story of the Wizard of Oz. I have so many personal connections to Dorothy, Kansas, friends along one’s journey and last but not least, it’s a favorite movie of my children when they were very little.

Like I do, I saved the fabric. I saved it for two years. I didn’t cut into it because I didn’t have a plan, so Dorothy & her friends sat patiently in my studio until the end of 2021. I’ve committed to sewing my stash & taking those “must have” bundles from the shelves and turning them into something handmade. What I didn’t realize is that posting my fabric was going to lead to a friend also proclaiming, “I have to have that…what can you make?”

Happy Mail

I had already been cutting blocks for a quilt I wanted to make & keep, so I sorted through what I had left & I didn’t have enough to make something for her too. I scoured online shops & the options were slim or the prices were high. I gave my friend, Rachael, some guidance on where to find the fabric, with the caveat, “the price has gone up quite a bit; are you sure you want to do this?” Her answer was a confident, “Yes, I’d love a mini-quilt for the retreat center”. I’ve sewn for Rachael on several occasions and she gave me an open path on what the end product would be. Some time later, a package arrived with a note and yardage. The plan was set in motion.

Signs of Yellow

My sewing machine was in for service, and this appointment kept me from getting started right away. When it came back with yellow thread in the bobbin, I took that as a pretty entertaining coincidence. I piece all my projects with neutral Aurifil thread, so this golden string was a surprise, but the perfect start to this mini-quilt.

The Blocks

The feature fabric highlights the cast of characters from The Wizard of Oz. I decided to fussy-cut, or meticulously cut, as the case may be, these images into the equal squares. Dorothy would be the center and surrounded by the others. I used a block pattern called Tell Me a Story, from the book, Intentional Piecing, authored by Amy Friend. In addition to the fabric sent to me, I added the yellow print to tie-in the concept of the yellow brick road.

I like how the names of the characters is included; it tells the story a bit, for those who may not be familiar with it.

Metallic Clouds

Joining blocks

With the blocks being foundation paper pieced, they are easy to assemble. I use a mini iron and wool pressing mat to prepare my seams.

I never realized how challenging it is to photograph metallic fabric until I worked on this project! These silver clouds look so different in real life, but wow, the photos don’t do them justice.

Complete

This mini quilt is backed with the pink floral print. It is approximately 18.5″ square. Dorothy is the central figure, her best friends – the Lion, Scarecrow, Tin Man and little dog, Toto, surround her. The peripheral characters, Glinda, the Wicked Witch, the Wizard, and the Winged Monkeys are there too. For those who know the story, so much is captured here.

Now that this has arrived at Rachael’s home, I can share here. I have set aside my own “Dorothy’s Journey” fabric, so stay tuned for what my 2019 purchase becomes. I sure hope it’s not another year before my personal project is complete!

Enjoy & remember, there’s no place like home.

All photos and text property of Two Terriers Studio; not to be duplicated or distributed without written consent.

Garden Paths Quilt

It’s now May 2021 and I’m ready to be outside, enjoying all the spring gardens have to offer. Coincidentally, it’s also pattern release day for this latest quilt, designed by Brittany Tunison for White Plains Quilts. Meet the Garden Paths Quilt!

When the opportunity to test this pattern came up, I had zero hesitation. All of Brittany’s patterns are well written and make creating a unique quilt a breeze. I had recently seen a fabric by Art Gallery Fabrics http://www.artgalleryfabrics.com called “Little Clementine” and it was the catalyst for this color scheme. I was drawn in by the whimsical graphics of animals, florals, lettering, bicycles and more. The peach and plum colors are a bit out of the box for me, but I really love this print. I asked Brittany to “kit” fabric for me using this and a floral by Amy Sinibaldi for Art Gallery Fabrics called “promenade plum”. I could not be happier with the outcome.

Trimming

This pattern is heavy on the half-square triangles, probably best suited for an advanced beginner or someone who is interested in mastering their HST skills. I mean, I’ve made hundreds (thousands?), of half-square triangles, but there’s always room for improving those points, right? I think back to the early days of my quilting journey, about a decade ago now, and remember thinking, “Do I need to trim all these dog ears?” The answer is YES. It may not seem like much, but squaring up blocks is important and that little bit of excess over the entire quilt does add up to a lot of inaccuracy. Just take the time to trim your blocks, if you’re not doing it already. Added bonus, look at all that fabric confetti goodness.

Matching points…game on

I like to press my block seams and see all the pieces lined up along the way. Sometimes progress is slow, but having pretty fabric and little piles of finished pieces is motivation for me.

Block Assembly

Two blocks for one quilt

The Garden Paths Quilt is designed around two block structures. You’ll make a different quantity depending on the size of the quilt. In this case, the baby quilt I made was relatively fast to assemble. This pattern comes with instructions for three sizes: Baby, Throw and Twin. I opted for a bleached white background, but now having seen other tester’s quilts, as well as the designer’s quilt in a dark background, all color combinations are stunning.

Long Arm Quilting

I had this quilt professional long-arm quilted by my friend, Deb, of Owl Quilt It. I’ve said it before, but choosing the motif or pantograph at the end of the piecing process, is often the hardest choice for me. This is a baby quilt, but the colors are not specifically “baby”. There are beautiful graphics in the fabrics and I wanted to highlight the theme and name of Garden Paths. When I saw this design, I knew it was right. Notice how the leaves and berries so closely mimic the florals of the Little Clementine fabric? No doubt this was what I was looking for in the quilting. 99% of the time, I opt for a white thread; I want it to blend into the quilt, and not be distracting. This one will get cozier with each wash & tumble dry!

I like dense quilting. Some quilts lend themselves to more open stitching, but I like it when my quilts have a little tighter sizing on the edge to edge quilting.

The Finish

Even my husband noted how much he likes this quilt. He’s my sidekick when it comes to photographing quilts, but also the one cheering me on along the way. He’s seen plenty of bright, bold, graphic prints and colors, so this one really got his attention. He said, “this isn’t usually what you choose, but I really like this one. I wouldn’t have thought I’d like it so much, but I really do.” Go figure….it’s OK to step outside our comfort zone of color!

Garden Paths Quilt featuring Art Gallery Fabrics

Quilt Backs

The Pieced Backing of my Garden Paths Quilt

If you follow me long enough, you’ll see a pattern of pieced quilt backs. I LOVE them. I do think there’s a beauty in a single fabric background, but I see the quilt back as one more chance to make something unique…it’s good “real estate”, if you will. You never know which side will be right side up when getting wrapped or cuddled with a quilt, so I want the back to be interesting too. It’s a good way to use any leftover bits and pieces that indicate what is found on the other side. You can see the Little Clementine fabric here, in all it’s glory. How sweet is that? It makes me smile. Oh, don’t forget to label your quilts! Artists sign their work; quilters should too.

All done…

The Details

This pattern is available beginning today, May 4, 2021 from http://www.whiteplainsquilts.com. All orders placed there today will be entered for a drawing to win $20.00 in shop credit. Patterns from this site will be discounted 20% until May 7, 2021. Brittany will also have limited quantities in quilt kits available, so shop early if you’re interested. This is not a sponsored post; I’m sharing these details so that you, too, can make this beautiful quilt pattern.

As I mentioned, I’ve used fabrics from Art Gallery Fabrics in prints and pure solids. This is also not sponsored by AGF (but I secretly, not so secretly, wish it were!). The feel of their fabric is delightful. The drape is something you just need to feel.

Thanks, Brittany, for including me once again in your team of pattern testers. I enjoyed it & I’m so happy with this fabric pull and finished quilt. I’m adding it to my collection of favorites!

All photos and content are property of Two Terriers Studio and not to be copied or distributed without written permission. This is not a sponsored post.